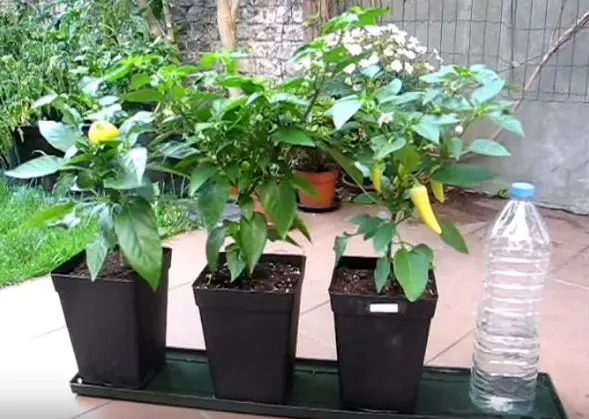
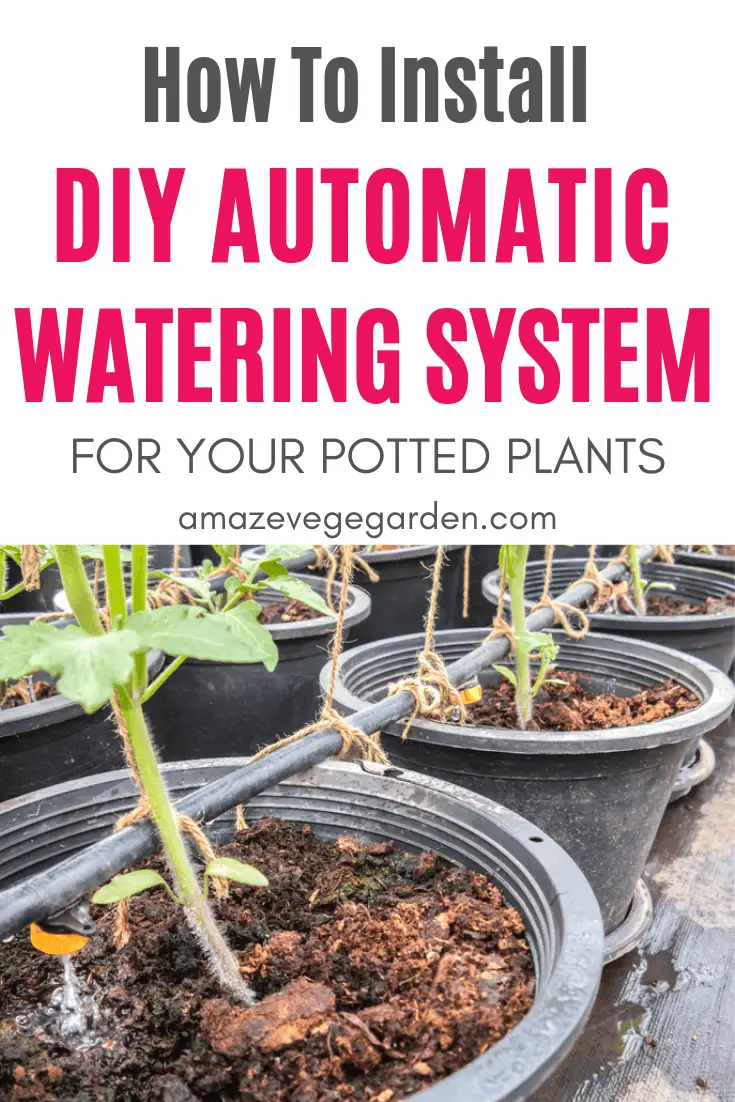
Many people like to grow vegetables on their own but have a problem doing the right auto water irrigation. Today I would like to show you how to make your own DIY plant watering system or drip irrigation system.
A homemade automatic watering system for the greenhouse is a great choice to reduce your chore, and it has its own benefits and features.
For example, for creating your DIY drip hose, all you need is a 50ft hose. You can either buy a new hose or use a refurbished one.
Then, lay the hose on a flat surface, use an upholstery needle, and punch tiny holes 1-2 inches apart on one side of the hose, leaving 6 inches with no holes on both ends. Just attach your hose cap, turn your water on low pressure, and have your very own DIY drip water irrigation system there.
Tools and materials you will need:
- Power drill
- 1/2″ drill bit
- 1/16″ drill bit
- 1-liter soda bottle
- Water pick
You may use a 2-liter soda bottle, but we advise you not to fill the bottle more than half full otherwise, the system may tip over, depending on the consistency of the soil. Also, if you are using this system in a small pot, you could use a smaller (i.e., 20 oz.) bottle to avoid tipping the whole pot over!)
Recommended tools: 1/4″ drill bit, die grinder bit, or round file. The only thing that may cost you money (unless you have to buy the tools) is the water pick. I bought them for 20 cents apiece at Anne’s Country Florals.
Steps:
First, drill a 1/2″ hole in the bottle cap while the cap is on the bottle. You may want to drill a 1/4″ pilot hole first as some bottle caps may break apart if you try to force a 1/2″ hole right away.
Second, see if the water pick fits in the hole snugly but is not too tight. If the water pick is too loose, then the setup will leak. If the water pick does not fit at all, then you need to widen the hole gradually. I recommend the die grinder bit over hand-filing because evenness is key to a leak-free setup.
I use a different die grinder bit, that is, one that is almost exactly the right size for the floral spikes, so when the top of the bit is flush with the top of the cap, the hole is almost exactly the right size. Second – and here is the most important part of all – rather than widen the holes on a whole bunch of bottle caps and then put the spikes in, put the spike in each hole as you make it.
Widening the hole with the die grinder bit melts the plastic just a little. Putting the spike in right away makes for an easier fit. Then, as the cap’s plastic cools, it shrinks slightly, making the seal even tighter.
Third, drill a 1/16″ hole through near (but not at) the tip of the water pick. This will create two holes. For most potted plants, this is all you will need to do. If the soil in question is very hard-packed, you may need to drill another set of holes slightly further away from the tip and at right angles to the first set of holes. It is better to have too few holes and drill more than drill too many right off the bat. Test the flow rate before drilling any new holes.
Fourth, assemble the cap and water pick by inserting the water pick from the inside of the bottle cap. No adhesive or caulk should be necessary.
Fifth, fill the bottle and screw the cap and water pick assembly onto it. Hold it upside down over a sink or outdoors to see if you get water flow and no leakage around the cap and water pick assembly. Do not worry that the flow rate is too fast here. The water will flow faster when there is no soil to slow it down.
Sixth and finally, refill the bottle, screw the cap assembly on tight and test it in a pot with soil and no plant if you are concerned. Do not place the assembly too close to the plant stem to avoid root damage.
(Note: if this is too much aggravation for you, we will build a unit for you for just $5.99, parts and labor, regardless of bottle size. Shipping would be extra.)
Here is an array of 20 ounces and 1-liter size automatic plant-watering systems. I tipped over a smaller pot attempting to use the 1-liter system and said, “I guess this calls for a 20-ounce bottle.” Of course, you can use even smaller bottles as long as the cap is at least the same size as those in larger bottles. The cap doesn’t even have to be standard as long as it is big enough and can form a watertight seal when closed.
You can use virtually anything for your automatic plant-watering system. For some reason, other plastic container lids crack more easily than the soda bottle caps. These two container lids cracked as soon as the manufacturer introduced the 1/2″ drill bit, even though a 1/4″ pilot hole is drilled first.
So what I did was start with the 1/4″ hole as usual and went straight to the die grinder bit to widen the hole gradually and…guess what? But be sure to clean the container thoroughly, because as far as I know, peanut butter and mayonnaise do not make for good plant food.
DIY self-watering system for potted plants
Claber Plants Garden Automatic Drip Watering System
If you are lazy and still have no idea how to DIY an automatic plant watering system, the best way to have one right away would be to get one ready-made available on the market.
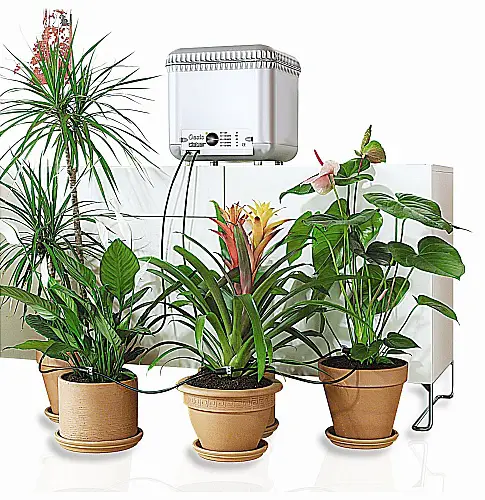
Claber is the one that may meet your needs. The starter kits offered by Claber can be an excellent option for those who would like to get an easy and fast install drip irrigation system. This system is ideal for supplying water to plant pots, hanging baskets, windowsill trays, etc.
Every single kit has the ability to distribute to a maximum of 20 plants simultaneously. One of the advantages of having this kit is that it is flexible, extendable, and managed using a water timer.
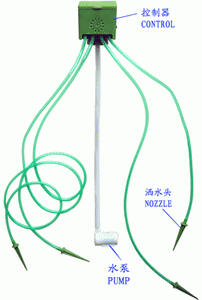
The Claber system is straightforward to set up. What you need to do is start your setup right from the tap. If you buy the kit with a water timer, you can attach it to the tap. The next thing is to run the microtube from the timer to the first plant. Attach a dripper at the first plant, then run to the next, attach another dripper and keep on the task to the last plant.
Such a setup is called a daisy chain setup. You can adjust the drippers to control the water release rate. You will find stakes with this kit where you need them to secure the water pipe in position for every plant. There are also micro tee connectors available for you to branch the water pipe into different directions. You can then use the micro-blanking plugs to cap the end of the run.
When you want to clean it, you will find the task really easy, which may take you a few minutes. You need to wipe all of the parts with a damp rag and then let them dry. It is also possible for you to clean the internal water filter using water and distilled vinegar to eliminate any limescale.
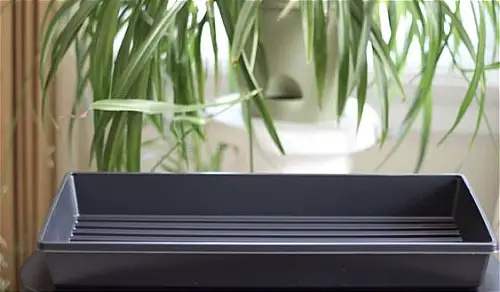
Even though this product did the job very well, there is one drawback that you might need to take care of where you need to make sure that you use pans beneath each pot to catch any overflow.
What’s More?
Automatic plant watering systems are designed to assist people in easing their plants’ watering tasks. Having such a system in place will significantly reduce their garden works, and they could never need to worry about the subject of missing any day or forgot to water their plants and flowers.
The automatic plant watering system is designed by dripping a preset volume of water in a given time period which means you will not water your plants and flowers excessively or insufficiently.
A specific solution recently happens to be acknowledged as the most effective garden watering system. The solution for such a system is given the name of Oasis Plant Garden Automatic Drip System.
It works with the combined use of tanks, drippers, sprinkler systems, valves, and other devices to expedite the irrigating works effectively every day. While there is actually another solution known as Smarthome Automatic Plant Watering System that can also do the jobs. The difference between the two of them are:
Oasis Automatic Plant Watering System
The cost for consumers to own this system is just about $80. This Oasis system is effective at applying water for over 20 plants in around 40 days. This Oasis system can be an excellent product that can hugely help you when you are going on holiday.
It is also beneficial for consumers who have many plants and flowers but do not have many times to supply water. The Oasis Automatic Plant Watering system is easy to build, easy to use, and clean. It can be the most effective system that you should have for your garden.
Smarthome Automatic Plant Watering System
It will cost you about $70 to own the Smarthome Automatic Plant Irrigation System. The system is effective in watering 14 plants simultaneously. The system also possesses a 7-liter capacity that allows consumers to control the volume of water that was going to supply for each plant and flower. This is also a wonderful product that costs you less.
How to Make an Automatic Plant Watering System for Next to Nothing
Purchasing an automatic plant watering system or perhaps a drip irrigation sprinkler system will cost you a huge amount of money. Therefore if you do not have the additional cash to invest in one of these fantastic devices, do not stress yourself as it is still possible for you to have one by doing it yourself.
All items that are needed for you to construct an automatic watering system is:
- Airline tubing
- An aquarium air pump
- A 4-gallon bucket
- A sprinkler timer
- A check sprinkler valve
- An airline control kit
By making this system follow the same model design that displays on the gardening outlet, you will be able to build your own automatic plant watering system and save you a big chunk of money.
The automatic plant watering system is eco-friendly and is very effective in producing a great deal of fruit and vegetables in a very compact area. Such systems have become more popular nowadays and are greatly used by many people to plant fruits and vegetables.
The last thing that you need to do is that you will need to check on the watering system from time to time to ensure that there is no malfunction or destruction of the system.
Automatic Plant Watering System Indoor
An automatic plant watering system indoors is one of the most important items you need to have when maintaining a healthy-looking plant. However, there are many water issues that you need to be aware of. Usually, an irrigation system may find problems in water supply, delivery system, and electrical supply.
Here are a few helpful guidelines that you may refer to before you choose irrigation maintenance and service.
Keep a check on the water supply of your watering system.
Irrigation systems that are connected to a water reservoir should not face any water deficiency. If you face issues with water pressure or if the water supply is not enough to satisfy a complete irrigation cycle, you must consider increasing the water supply to maintain proper irrigation. Increasing the water supply with the use of a larger tank can solve such issues.
Helpful Automatic Choice
The purpose you need an automatic plant watering system indoor is that if you are traveling or need to go out for a couple of days, then nobody will taking care of your plants. This may cause your plants to dry out when you come back. Thus, this is the perfect system to solve your problem.
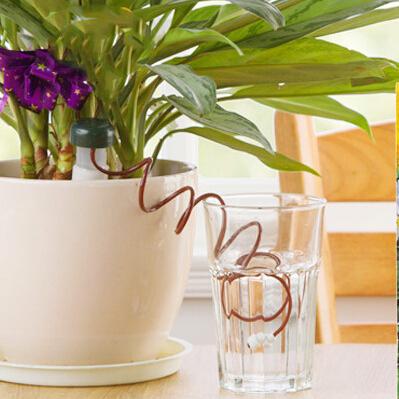
What you need to get are something like porcelain or ceramic material spikes. You can get them wet by soaked or filled them with water. You can then stick them into the soil. At the other end, you have a tube that you can put into your water reservoir. Ideally, it is good to prepare one gallon of water per plant.
You can insert the hydro spikes into the soil. By doing so, you will keep the soil hydrated for about 3 days when you are not around. Leave it without water for 2 or 3 days should be fine. If you leave your plants without water for a week, your plant will not survive and die when you come back.
If you have a different medium than the rest of the plants where the soil can dry out quickly, you may prepare for more than one gallon of water.
The hydro spikes you can get for are very cheap in price at $9 for 3. You can buy the number of spikes you want according to the number of posts you have. But it would help if you bought more than what you need to make them as a spare.
You can have them overnight by pop them into the soil of your pot. Basically, they will do their job well when you are going on vacation without having to worry about your plants.
They are the temporary indoor automatic watering system which is very helpful when you are in an emergency when nobody can help you to take care of your plants.
The drawback of Having Automatic Plant Watering System Indoor
The only complaint you may have is that the tube is built with light material, and when you stick them into your water reservoir, they tend not to sink to the bottom. You may need to add some weight to the tube-like having a fishing weight attach to the tube to make it sink all the way to the bottom.
Another thing that you need to be aware of is every single spike that you take out. It would be best if you blew through them to make sure the tube is clear as some of the spikes may get obstructed, which may cause them not to get any water flow through.
Therefore, you should buy more than you need since they are not expensive.
Hello!
This post is an excellent tutorial on the automatic plant watering system. Thanks for sharing those invaluable tips on making one yourself instead of opting for expensive watering systems that practically milks gardeners and homeowners dry.
Your tips are achievable without having to break the bank. Love them.
:-0
Cheers