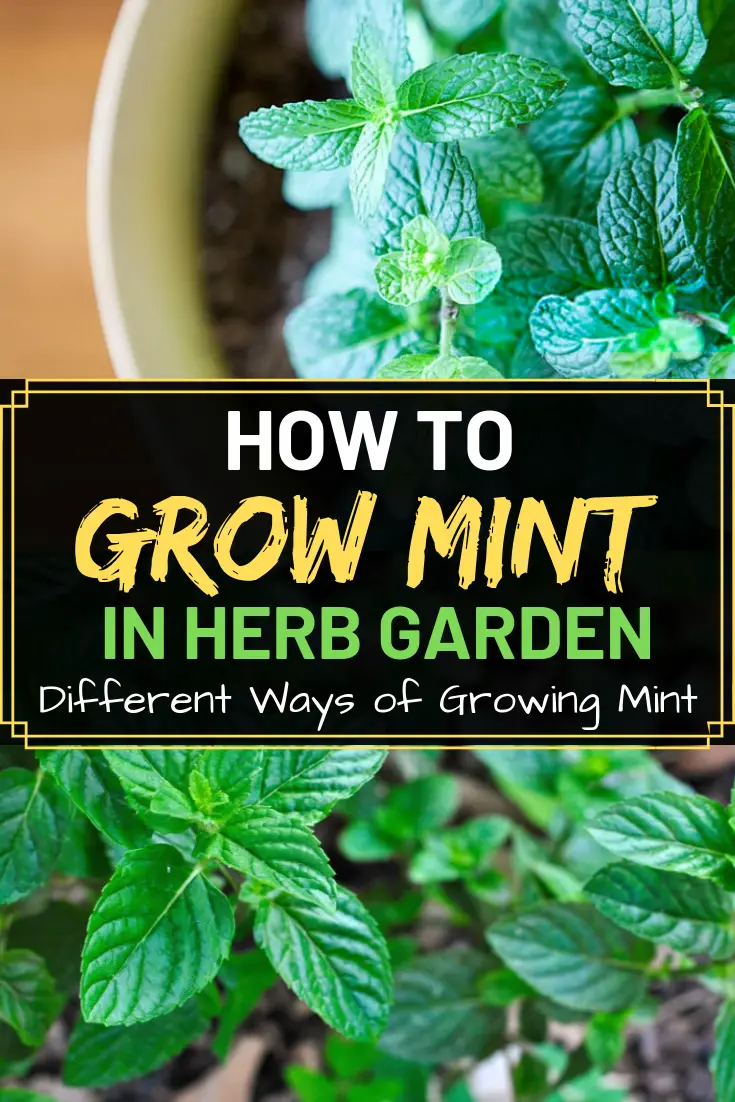
Are you looking to add a refreshing and versatile herb to your garden? Mint is one of the most popular herbs, and it’s easy to grow! In this article, we’ll discuss how to grow mint in your herb garden. From selecting the right kind of mint to planting and harvesting tips, this guide will give you all the information you need to get started.
Mint is a perennial herb that can adapt well to many types of soil. It’s hardy enough to withstand colder temperatures, so it can be grown in almost any region. What’s more, there are dozens of varieties available for growing in a home garden, including common spearmint and peppermint. Its fragrant leaves add flavor and aroma to salads, sauces, drinks, desserts, and more.
By following our step-by-step instructions for growing mint in your garden, you’ll be able to enjoy the freshness of homegrown mint all season long! So let’s get started – read on for all the advice you need on growing mint in your herb garden.
Growing mint isn’t difficult. It can be grown from cuttings and seeds, but your local garden center or store is bound to have several varieties of mint for sale – this is the easiest way to make a start growing mint.
Types of Mint
A 16th Century monk Growing mint – Peppermint Herb carried out a lot of research on mint plants. He managed to identify over 600 different varieties of mint, many of which you have difficulty tracking down today.
Here’s a list of mint varieties that are fairly easy to get hold of today. If you can’t find them in your local garden center, you’ll be able to buy them over the Internet.
The following mints can be easily purchased as plants or seeds:
- Corsican mint, spearmint, pineapple, chocolate, and ginger mint.
These mints can be purchased as seeds
- Catmint, pennyroyal, lemon mint, and wild mint.
Planting Requirements
Mint is a great addition to an herb garden, as it’s easy to grow and can be used in many recipes. When planting mint, it’s important to understand the necessary requirements.
Mint prefers full sun or partial shade and moist soil. It should be planted in an area that will get plenty of sunlight, but can also provide some relief from the hot afternoon sun, especially during the summer months. The soil should be kept moist and well-drained; if not, the roots may rot. Adding some compost or other organic matter when planting helps keep moisture in the soil while providing essential nutrients needed for growth.
Another important factor is providing enough space for your mint plants to spread out and grow. Mint has a tendency to take over any area you plant it in, so make sure there’s enough room for it to spread its roots. You should also consider planting mint in containers or raised beds if you don’t want it to take over your garden space. Containers also make it easier to move your plants around if needed, such as when temperatures become too extreme or when pests become an issue.
Soil Preparation
Soil preparation is key to successfully growing mint in your herb garden. When planting mint, it’s important to choose a soil that is highly fertile and has good drainage. The best type of soil for growing mint has a slightly acidic pH level between 6.0 and 7.0. If the soil is too alkaline, you can add sulfur or peat moss to lower the pH level.
In addition to preparing the soil, it’s important to make sure that the ground isn’t compacted. Compacted soil will not allow the roots of your plants to spread out properly, so be sure to loosen it up by digging down at least 12 inches before planting your mint. You should also make sure that the area you are planting in does not flood easily, as mint does best in soils with well-draining properties.
Once you have prepared the soil properly, be sure to give your mint plenty of room to grow and spread out by spacing each plant about 12 inches apart from one another. Once planted, water your seeds regularly with a light misting until they sprout and become established.
Sunlight Considerations
Once the soil has been properly prepared, it’s time to consider the amount of sunlight needed to grow mint in your herb garden. Mint is a very versatile plant and can tolerate both full sun and partial shade. However, for the best results, it’s best to have at least six hours of direct or indirect sunlight per day. If there isn’t enough sunlight available, you may want to move your herb garden closer to a window or replace some of the plants with mint that can thrive in partial shade.
It’s important to remember that too much sun can be just as detrimental as too little, so make sure that your mint plants aren’t getting scorched by direct afternoon sunlight. If they are, then consider providing some shade or moving them into an area with more breeze and indirect sunlight during the hottest parts of the day. Additionally, if you live in an area with hot summers, it’s best to choose a mint variety that can tolerate high temperatures and humidity such as peppermint or spearmint.
Mint does not require much water but regular watering is essential for optimal growth. It prefers moist soil but does not overwater as this can lead to root rot and other problems. When watering your plants, focus on the roots and avoid wetting the leaves as this can cause fungal diseases. It is also important to provide adequate drainage so excess water does not remain in contact with the roots of your mint plants for too long.
Watering Guidelines
Now that you know how to grow mint in your herb garden, it’s important to understand the watering guidelines. The most successful way to keep mint healthy is by providing consistent moisture. When the soil begins to dry out, water deeply until the water runs from the bottom of the pot. Be sure not to overwater, as this can lead to root rot and fungal problems.
To determine whether or not your mint needs water, stick your finger about an inch into the soil. If it feels dry, it’s time for a drink. During the growing season, water your mint every two days and each time apply enough water so that the soil is damp but not soggy. In winter months, you should reduce watering as growth will slow and less moisture will be needed.
Mint plants are typically very hardy and can withstand periods of drought just fine; however, if you want a lush and healthy plant, make sure you provide adequate moisture during its growing season. Take care not to overdo it though – too much water can cause root rot。
Fertilizing Tips
Fertilizing your mint plants is an important part of ensuring a healthy, thriving garden. Before you begin to fertilize, you’ll want to make sure the soil you’re using is nutrient-rich and well-draining. You can add compost or organic matter to improve the quality of the soil if it’s not quite up to par.
Once you’ve confirmed that your soil is suitable for fertilization, it’s time to start adding nutrients. A balanced fertilizer like 10-10-10 or 20-20-20 will provide your mint plants with all the necessary nutrients they need throughout their growth cycle. Fertilize every other month in spring and summer, then once a month in late summer and fall.
It’s also important to remember that over-fertilizing can be detrimental to your mint plants as well as the environment; too much nitrogen can cause excessive leaf growth at the expense of flowers and oils, which are essential for culinary use. Always follow manufacturer instructions when applying fertilizer and keep an eye out for signs of overfertilization such as yellowing leaves or wilting stems.
Growing Mint from Cuttings
You will need a mint plant to propagate from if you are thinking of growing mint from cuttings. If you haven’t already got one, you will need to find a neighbor who will give you some cuttings from their garden.
Take your cuttings from the root or stem of the mint plant or divide the whole plant into two or smaller plants. A good time to do this is in the spring or autumn. Most mints grow very vigorously and are easy to propagate from cuttings.
Growing Mint from Seed
Mint Seeds from AmazonFirst, you’ll need to buy the mint seed. You should do this locally or use the Internet to find mint seed suppliers (Amazon is always a good choice). Sow your seeds in seed trays using a suitable soil-less potting compost.
I get on best with seed trays with multiple separate compartments for sowing seeds (go to my article on Growing Herbs from Seed for more information). Try and sow one or two seeds in each compartment. Use lids to keep the compost moist.
Whatever container you choose to use, make sure you have a layer of compost about one inch deep. Make it really moist, and then sprinkle the seeds on top. Cover them with a thin layer of the compost, and then put a piece of clear plastic or glass on top (the seed trays I mentioned include a plastic cover).
Cover your container with a newspaper until the seeds germinate (just a few days if it’s warm), and keep the soil moist. When germination has occurred, remove the cover and keep the young seedlings in a fairly warm area – but not in direct sunlight.
Growing From Seeds Vs Cuttings
Growing mint from seeds or cuttings is a fairly simple process. If you’re growing from seeds, it’s best to start them indoors in early spring. Plant the seeds in small pots and keep the soil moist but not soggy. Once the seedlings are large enough, you can transplant them into your herb garden.
If you’re starting with cuttings, it’s important to find healthy stems that have been recently trimmed off a mature plant. Use scissors to snip off any leaves near the bottom of the cutting and place them into a glass of water until roots form. Then you can pot up your cutting and watch it grow! It’s important to note that if you plan on harvesting leaves from your mint plant, you should wait until it has established itself before doing so.
The key takeaway here is that either method is suitable for growing mint in your herb garden – just be sure to give it plenty of sunlight and water and you’ll be enjoying fresh mint in no time!
How To Harvest And Store Mint Leaves
Once your mint plants are established, it’s time to harvest and store the leaves. To do this, use scissors or garden shears to cut the stems of mature leaves near their base. Make sure not to take more than one-third of the plant’s total foliage. Immediately after harvesting, rinse the fresh leaves with cool water and pat them dry with a paper towel.
Mint leaves can be stored in several ways depending on what you’re using them for. If you want to use them for cooking or tea, it’s best to store them in an airtight container in the refrigerator. If you plan on drying them for later use, spread them out on a paper towel and let them sit in a warm, dry place for about three days until completely dried out. Once dried, store the mint leaves in an airtight container or bag at room temperature away from direct sunlight.
Harvesting and storing mint is simple but requires some attention to detail. By following these steps you can make sure that your herbs remain fresh and flavorful while preserving their natural aroma and flavor.
Common Pests And Diseases
Mint can be prone to some common pests and diseases. Aphids, mites, and whiteflies can all affect mint plants. To reduce the risk of these pests, practice good garden hygiene such as removing dead foliage, controlling weeds, and avoiding overcrowding of your plants. You should also inspect new plants for signs of infestations before bringing them into your garden.
Fungal diseases such as powdery mildew and verticillium wilt can also cause problems for mint plants. To reduce the risk of fungus infecting your mint, make sure your soil is well-drained and keep humidity levels low around the plants. Proper watering habits are also important; don’t water from overhead or let the leaves stay wet for extended periods of time.
It is also important to rotate where you plant your crop each year in order to avoid soil-borne diseases from taking hold in one area year after year. Taking these steps will help ensure that your mint garden stays healthy and productive for years to come.
Companion Planting Ideas
Now that you have an understanding of the common pests and diseases that can affect your herb garden, let’s explore companion planting ideas for growing mint. Companion planting is a great way to get the most out of your garden by utilizing the natural benefits of different plants when planted together. This helps to improve soil health, increase pest control, and maximize growth potential in all your plants.
One of the best companion plants for mint is basil. Mint and basil both create a strong aroma that repels aphids, which can otherwise be quite damaging to many other herbs in your garden. Basil also helps to shade delicate herbs while they are still young so they don’t dry out too quickly.
Another great companion plant for mint is rosemary. Both mint and rosemary thrive in similar conditions and help each other to grow better by providing more nitrogen to the soil. Rosemary also has antifungal properties, which can help protect against some common fungal diseases that attack herbs like mint. Additionally, it helps attract bees that will pollinate both plants more efficiently than if they were grown alone.
Companion planting with mint doesn’t stop there; other herbs such as chamomile, oregano, parsley, thyme, and sage can also benefit from being grown alongside this fragrant herb. By including these in your garden layout you will ensure that all of your herbs receive the best possible care – maximizing their potential for growth and flavor!
Creative Uses For Fresh Mint
Fresh mint has so many uses in the kitchen, making it an invaluable addition to any herb garden. The leaves have a strong, refreshing flavor that can be used to create a variety of dishes. Here are just a few creative ways to use fresh mint:
First, try adding it to drinks like mojitos, flavored waters, and mocktails. A sprig of fresh mint adds a unique flavor and aroma that takes any beverage from ordinary to extraordinary. For an even more intense flavor, muddle the leaves before adding them to your drink.
Second, use fresh mint as an ingredient for salads and other light meals. It pairs especially well with fruits like strawberries and mangoes, as well as vegetables such as cucumbers and tomatoes. Mint can also be added to cooked dishes for extra zing — try adding it to soups or sauces for added complexity.
You can use mint in sweet recipes too. Try using it in desserts like ice cream or sorbet for a unique twist on classic recipes. Or sprinkle crushed dried leaves over cakes and cupcakes before baking — the subtle flavor will add depth to your favorite treats!
In Cooking:
- Make mint (spearmint) sauce (it goes well with roast lamb).
- Add mint (spearmint and apple mint) leaves to new potatoes and peas.
- Make mint and chocolate ice cream and mint sorbet.
Drinks:
- Make mint (peppermint) tea.
- Make mint julep and raspberry and mint yogurt drinks.
Medicinal:
- Use mint (spearmint) oil on a handkerchief to help with colds.
- Make herbal poise and invalid bouquets.
- Macerate mint (peppermint or spearmint) leaves and use them as a rub for migraines and other aches and pains. Maceration is a process of softening or breaking into pieces using a liquid such as olive oil.
Garden:
- Grow mint (spearmint) near roses to deter aphids.
- Grow mint plants near dog kennels to repel flies.
Frequently Asked Questions
How Often Should I Water My Mint Plants?
Watering your mint plants is an important step in ensuring they grow healthy and strong. This herb requires a lot of moisture to thrive and requires more frequent watering than many other herbs. To keep your mint plants flourishing, you should water them at least once a week.
It’s essential to make sure the soil is moist for the duration of the growing season. You don’t want it to dry out completely, so check it on a regular basis. If you live in a hot climate or experience periods of extreme heat, then you’ll need to water your mint plants more often. When deciding how often to water them, monitor the soil’s moisture levels and adjust as needed.
When you do water your mint plants, make sure that the soil is thoroughly saturated each time. You don’t want them to be under-watered or over-watered; aim for even moisture throughout the entire growing season. To ensure your mint receives adequate hydration, use a garden hose or watering can with a gentle stream setting and take care not to disturb the roots while doing so.
Mint plants are hardy and can tolerate some drought, however, they require consistent watering if they’re going to thrive in your herb garden. With proper maintenance and careful attention to their hydration needs, you can enjoy fresh mint all season long!
How Long Can I Store Fresh Mint Leaves?
Storing fresh mint leaves can be a great way to extend the life of your herb garden. Mint is an incredibly versatile herb, and having some on hand in the fridge can help you make delicious dishes or drinks. But before you start snipping away at your mint plants, it’s important to understand how long you can safely store mint leaves.
The shelf life of fresh mint depends on how it is stored. If kept in an airtight container, refrigerated, and away from direct sunlight, mint leaves can last anywhere from two to three weeks. To further extend their shelf life, you may also want to wrap them in a damp paper towel before storing them in the refrigerator. This will prevent the leaves from drying out and losing flavor.
If you plan to store your mint for longer than two weeks, consider freezing it instead. Simply wash and dry the leaves before chopping them into small pieces and storing them in an airtight container or plastic bag. Frozen mint will keep for up to six months if properly stored and will retain its flavor when added to recipes later on.
No matter how you choose to store your fresh mint, it’s always best to use it as soon as possible so that you can enjoy its unique flavor and aroma while they are still at its peak.
Did you find this post useful? Would you like to get back to it later? Save THIS PIN below to your gardening, herb garden, or house plant board on Pinterest! Thanks 🙂