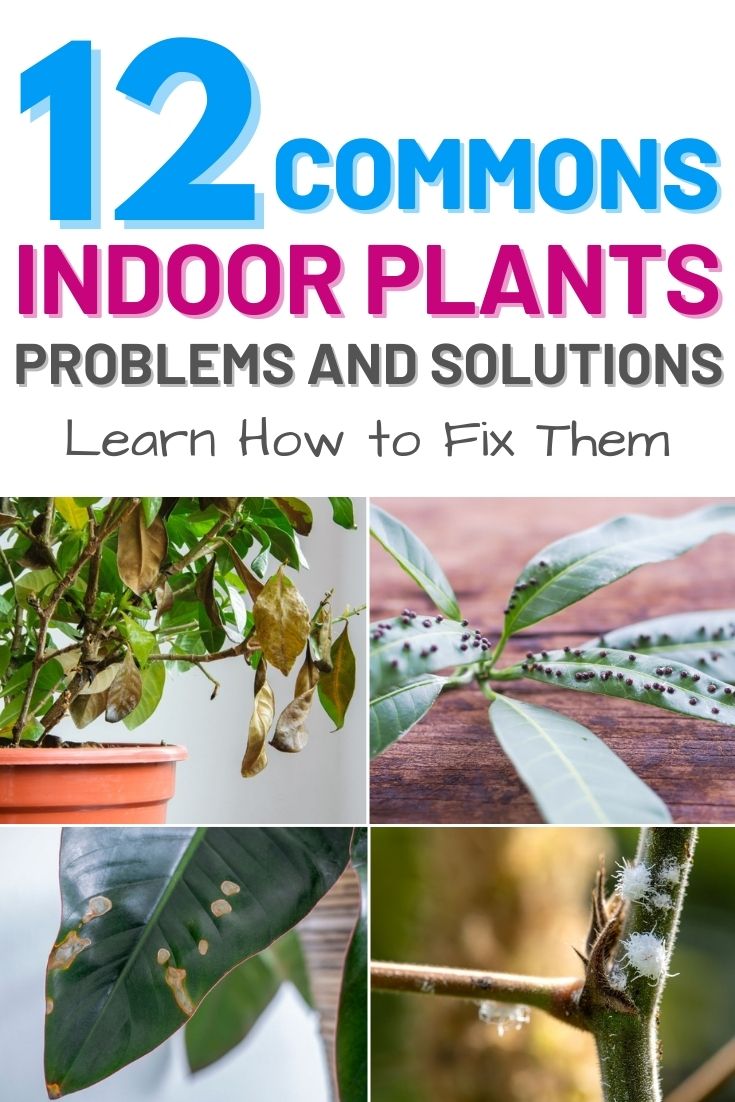
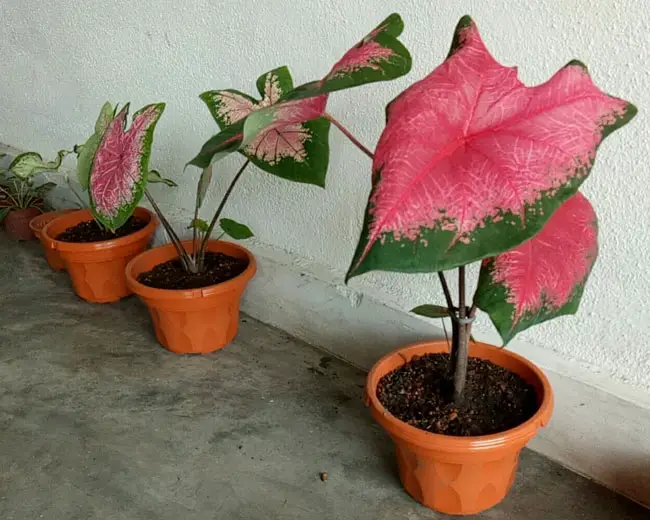
Owning an indoor plant is a fantastic way to add charm and life to any space, but, as living beings, they are subject to a series of common problems regarding their care and health. Fortunately, most of these problems have quick and easy fixes that will leave you with a thriving indoor plant.
If you have a widespread problem with your plant or merely want to know how to prevent and care for them, here are twelve of the most common indoor plant problems and how to fix them. Most of these issues are caused by misguided plant care, bugs, and diseases with immediate or short-term solutions for long-term success.
Your Plant is Unnaturally Stretching to One Side
There’s a clear difference between proper plant growth and unnatural stretching. If you see your plant’s stems or branches and leaves growing in various directions, then it’s receiving sufficient light to support that growth.
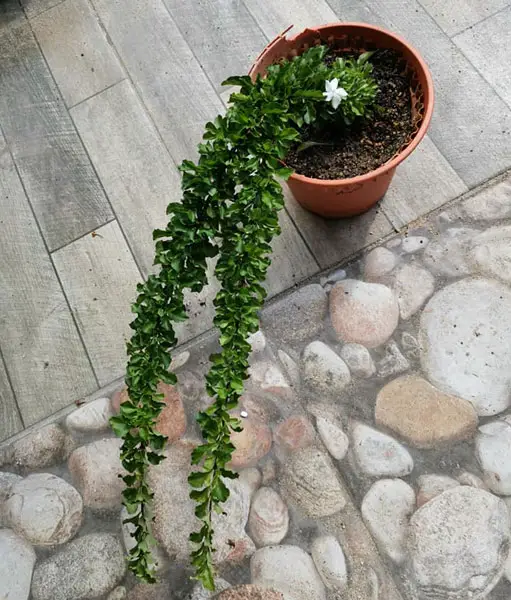
Therefore, the alternative is that your plant’s growth unnaturally stretches in one direction, most likely towards the only light source it can find. This signifies that your plant isn’t receiving sufficient light, so it strives to get as much as possible by growing towards the light source.
If the stem of your plant stretches too far, it could cause the plant to be unbalanced and fall. Additionally, this extended growth means it takes longer for water to travel from your plant’s roots to those far-reaching stems and leaves, which could affect the plant’s overall health.
How to Fix
For the most part, plant stretching is a simple issue with a simple solution. The culprit is almost always a lack of sufficient light, so if your plant is stretching, this is your sign of moving it.
You could place it under a skylight or more directly in front of a window, or you might have to move it to a different room entirely that gets more natural light throughout the day. South-facing windows are typically the brightest, so this is a good place to start if you truly aren’t sure where to place your plant.
It also helps to research the plant you have that’s stretching and determine their exact light needs. Some plants thrive for a certain number of hours in direct sunlight, while others prefer indirect sunlight.
Therefore, if your plant was previously in a windowless room or area of your house, know their needs before placing them in the blazing light of your brightest window.
You’re Overwatering Your Houseplant
Many new plant owners will try to eye how much water their indoor plants need, and before they know it, their plant’s roots are swimming in a sloshy sea of excessively watery soil.
For most plants, overwatering can be overcome and won’t have too many serious side effects. However, for more particular or less resilient plants, this could lead to a series of issues, including:
- Wilting
- Stunted growth
- Leaf discoloration
- Opportunity for infection
- Root drowning
- Plant death
You certainly don’t want your beautiful indoor plant to die from something as simple as too much water. Luckily, this issue can be fixed even after you’ve poured the water into the pot.
How to Fix
The easiest way to avoid overwatering your plant is to know exactly how much water that particular plant needs and how often to water it. Having general care knowledge for your plant can save its life in situations like these.
Of course, if you’ve already poured three cups of water into your plant’s pot, this knowledge isn’t really going to help you solve the issue at hand. How you handle the situation partially depends on how much damage has been inflicted.
If you’ve watered your plant so much that you can visibly see water on top of the soil, tip the pot and drain out as much of the water as possible. Excess water can also pool in the cache tray, so you should drain that as well.
After you’ve removed as much excess water as possible, place the plant in front of direct sunlight, so it is stimulated to use more water as it takes in sunlight and promotes evaporation.
Take the room into consideration as well. If the plant is held in a humid room, lower the humidity and increase the room’s air circulation to help the water further dry faster.
You’re Not Watering Your Houseplant Enough
This might not be a problem with your plant itself, but it certainly affects your plant’s ability to live and thrive.
There’s probably a point in every plant owner’s life that they realize they haven’t watered their indoor plant in a while. Most likely, far too long.
We all know the dreaded feeling when you walk over to your plant that sadly slipped your mind, and you notice its soil is akin to desert sand or, for the truly unlucky ones, the plant is completely dead.
Whether you want to admit it or not, insufficient watering of plants is definitely a common problem. For the forgetful plant owner, you might be thinking there’s no solution here apart from more diligence on your part, but you’d be mistaken.
How to Fix
If you love having beautiful indoor plants but know your lifestyle isn’t exactly suited to regular plant care, there are some tools you can use to solve this issue.
Watering tools are the best friends of any plant owner, as long as they are used appropriately and matched with the right plant.
We recommend a few options that will help your plants self-water without your regular care or supervision.
The first option is the cheapest and easiest. Watering globes are fantastic for keeping your plants properly hydrated for up to two weeks! All you need to do is fill them, place them properly, and the globe does the rest.
They’ll also help keep the moisture levels in your plant’s soil consistent, which can help prevent a series of other issues on this list.
If you have a little extra cash to spend on your plant’s regular water intake, you can purchase an automatic irrigation system and hook several plants up to one drip.
Of course, the luxury option is to invest in a hydroponic system or tower. These pricy tools are exceptional for indoor plants and can help guarantee their health in many ways, including proper hydration.
Your Plant Has Curling and Drooping Leaves
Unless you have a Frizzle Sizzle plant, also known as the Albuca spiralis or Corkscrew Albuca, then it isn’t natural for the leaves on your indoor plant to start cupping or curling.
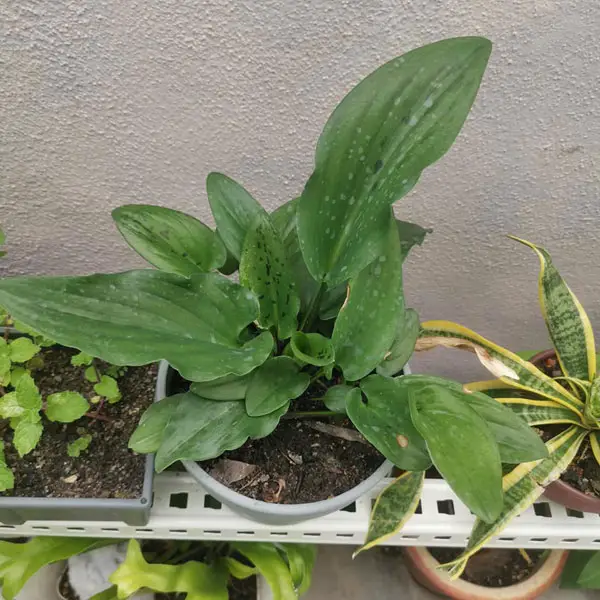
This issue can be caused by a few factors, and the easiest way to determine which is to see how the leaves are curling.
Leaf Curling Direction and Signs | Likely Cause |
Margins curling downwards and drooping/wilting | Underwatering and exposure to excessive heat |
Tips and margins upwards | Environmental problems like heat or wind stress |
Margins and tip curling down and inwards while drooping | Overwatering |
Random margin curls (only part of the leaf is curling) with visibly wrinkling and discoloration | Pests and bugs like aphids or mealybugs or caused by fungal infections |
How to Fix
As you can see, there are many potential causes for this issue, so various solutions are depending on the reason behind your plant’s leaf curling.
If you’ve determined your plant is overheating, try moving it further from the window or to an area where it receives less direct sunlight. As an indoor plant, it’s unlike the cause is wind stress, but if your plant is by a doorway or in a room where drafts or frequent rushes of wind occur, it’s best to move it.
The watering issues can be solved using the suggestions mentioned previously, which leaves pest and fungal problems.
You’ll need to look closer at your plant and determine if the curling is caused by a common house bug, like aphids, or if it’s a fungal issue. Once you know the cause, you can remedy the situation.
We’ll even discuss many of these issues, later on, so continue reading for their solutions.
Aphids Have Made a Home of Your Houseplant
Aphids are small insects that usually have a translucent green, brown, or black appearance and will typically appear on your indoor plant in groups on the underside of its leaves.
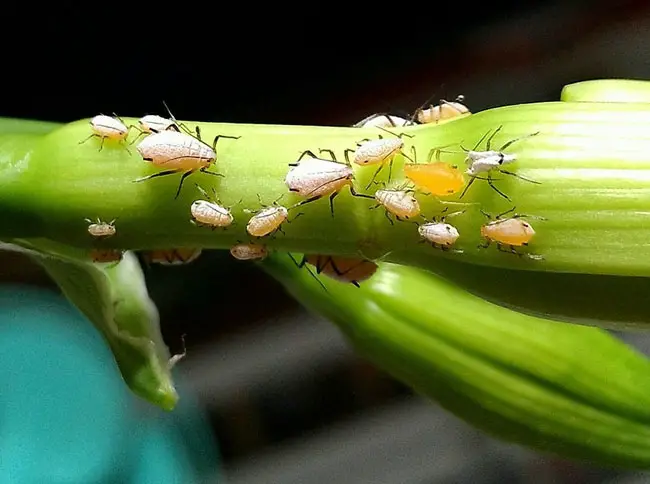
These nasty little suckers can do some serious damage to your plant and cause stunted growth and curled or distorted leaves. Plus, the liquid they excrete can attract other pests, like ants, and even cause mold. The culmination of these issues could easily kill any plant.
Although aphids are certainly annoying and unfavorable for your plant’s health, they are likely the most common indoor plant pest. So, there is a lot of information on how to rid your home of these plant-sucking critters easily.
How to Fix
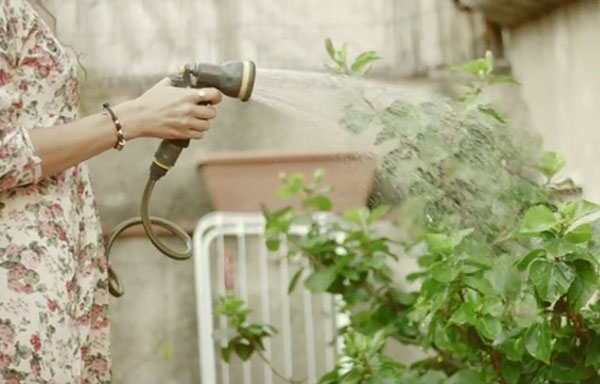
If you only see a couple of aphids on your plant, you can easily get down and dirty and squish them with your fingers. As a soft-bodied insect, this is certainly the easiest and most effective way to rid your plant of its presence, but we understand it isn’t the preferable approach for you.
Alternatively, you can wash the aphids away using a strong stream of water from a hose or maybe your sink faucet. There is the risk of drowning your plant, so be careful how much water you’re getting to the soil and roots. Another option is to brush or wipe them away using a wet cotton ball.
You’ll want to repeat this process multiple times over the next few days until you can visibly tell that the aphid population has either significantly diminished or disappeared.
It’s likely the aphids will try to lay eggs on your indoor plant if enough of them are present, so you’ll want to be really diligent with your removal technique to ensure they are also wiped or washed away before they hatch.
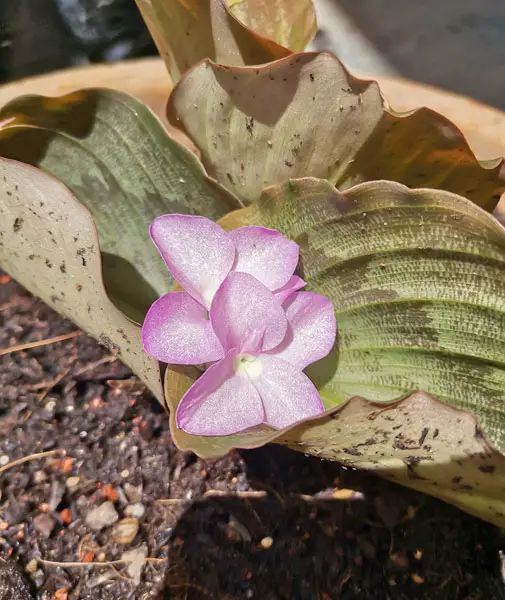
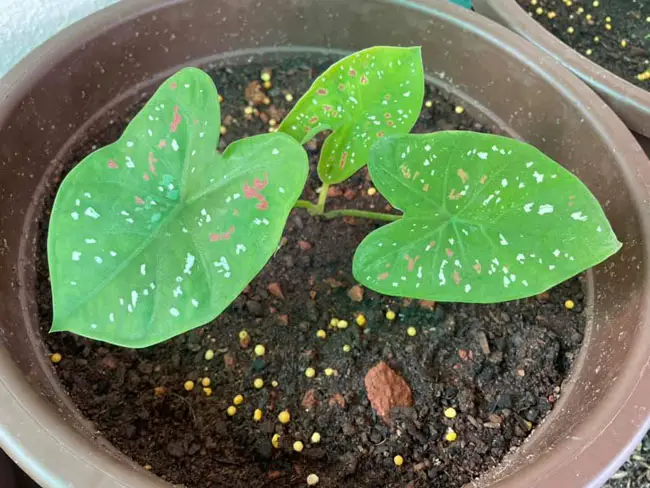
Your Plant is Developing Brown Leaf Tips or Patches
Leaf discoloration is one of the most easily visible signs that your indoor plant is in distress, and brown leaf tips are one example of this.
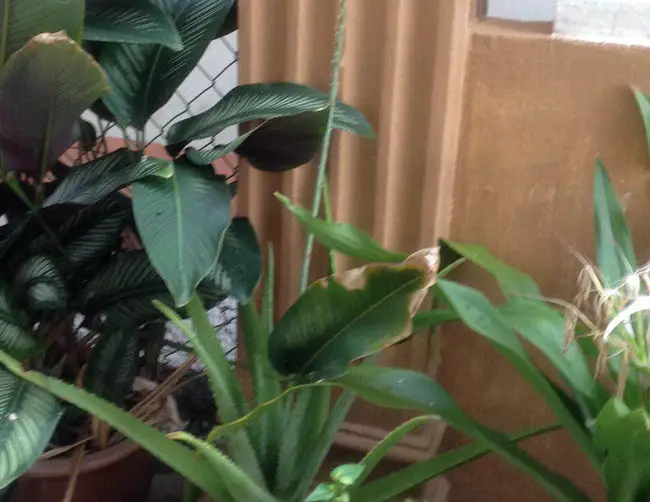
There are a few potential causes for brown leaf tips or patches, so you might have to do some detective work before determining which applies to your plant. We suggest you start at the top of the list mentioned below and work your way down.
Causes:
- Insufficient watering: browned leaf tips, or “leaf scorching,” are often caused by a lack of sufficient water supply to support plant life fully. If your plant doesn’t have enough water, it will prioritize its supply and let parts of the plant slowly die off. This process starts with the lease essential elements, the leaves.
- Erratic watering: remembering your plant is in desperate need of water doesn’t mean you should automatically dowse it in a downpour. If your plant receives water erratically like this, it’ll have difficulty adjusting to the sudden overflow of water, and you might unintentionally overwater or drown it.
- Temperature damage: brown leaf tips are often referred to as “leaf scorching” because a common cause is over-exposure to extreme temperatures. This most commonly occurs in the summer when a plant is placed by a window with the blazing sun outside, but it can also occur in extreme cold.
- Low humidity levels: many indoor plants thrive in more tropical regions where the humidity levels are between 60-100%. These aren’t common levels in the everyday home, especially when cold winters roll around.
- Fertilizer salts: fertilizers are great for providing extra nutrients for your plant, but many contain salts that might lead to leaf scorching or brown tips if present in large quantities.
Sadly, when the tip of your plant’s leaf turns brown, it essentially means that part of the leaf has now died, so the condition is not reversible. All you can do is solve the underlying problem, remove the damaged area, and hope your plant will return to its healthy growth in no time.
How to Fix
Start by ensuring your plant is on a regular watering schedule and provided sufficient water every time. If you’re certain that you are watering your plant properly, try changing its location to remedy and temperature or humidity issues.
If you just added a hefty dose of fertilizer and believe the salt within is the issue, flush the soil with clean water several times. This will help remove the salts that accumulated within. You can also find salt in tap water to be a quick remedy opting for distilled water instead of it.
Or Your Plant is Developing Yellow Leaves
Another common discoloration for indoor plants is yellow leaves. Fortunately, the cause and solution for this issue are much easier to determine and remedy than brown leaves.
The leading cause of yellow leaves is insufficient drainage for your plant paired with overwatering. If you have overwatered your plant, the yellow leaves are a sign that it’s either experiencing root rot from the excess water or dying altogether because it’s essentially drowning.
The leaves aren’t receiving enough oxygen because the roots are more or less suffocating from being overwatered.
Underwatering is also a potential cause but not as common as overwatering. Alternatively, some plant leaves will turn yellow if they are in a low-light environment.
The absolute worst-case scenario is that your plant is experiencing Anthracnose, which is a fungal infection that will grow on your plant in a cold, wet environment. This, too, could be caused by overwatering your plant and creating the perfect environment for the fungi.
How to Fix
On the chance that only one or two leaves are yellow, you could potentially remove the discolored leaves, and your plant would be fine.
If you are certain Anthracnose causes the issue, then you’ll want to remove the infected leaves and refrain from misting or really watering your plant for a few days.
When it comes to yellow leaves from overwatering, you can refer to the solution for overwatered plants to remove any excess moisture within the pot. Otherwise, the solution is only to provide your plant with the proper amount of water regularly.
Determining if the root cause is low light can be difficult, but if you have tried all of the previous solutions and there are still yellow leaves occurring on your plant, try moving it to a brighter location and see if that helps.
More Pests to Worry About a Whitefly Infestation
These pesky insects can be found on the underside of your plant’s leaves, and although they’re more commonly found on outdoor vegetables, there’s certainly a risk of them feeding on your lovely indoor plants.
Whiteflies look exactly as the name describes. They are small, winged insects you’ll typically find in groups on your plant. If left unaddressed, Whiteflies can seriously injure your plants by sucking out life-giving juices and causing their leaves to turn yellow.
Over time, these leaves will likely shrivel and drop prematurely, which could ultimately lead to your plant’s demise in time. Another risk is the transmission of viruses from the Whiteflies to your plants that could cause several health issues.
How to Fix
The solution for Whiteflies is fairly similar to that of Aphids. Take your plant outside and wash away the flies and their eggs or larvae using a hose or another powerful stream of water.
Since the flies will likely scatter once the plant is disturbed, you’ll have to do this on numerous occasions until you’re certain the issue is resolved.
Some alternative solutions include placing yellow sticky tape traps in your pot to attract and collect the flies. You could also (very carefully) vacuum the flies, larvae, and eggs off of your plant, but make sure you empty your vacuum outside, so you don’t release the flies back into your home.
If you’re keen on preventing Whitefly infestations in the future, try to limit how often you prune your plants as this attracts them. It’s also advisable to refrain from using a fertilizer high in nitrogen, as the frequent new growth is enticing to the pests.
Also read: When and How to Prune Viburnum.
Most importantly, make sure you check any previously outdoor plants for pests before you bring them inside.
Your Houseplant Has Root Rot
One of the most detrimental common plant issues is root rot, as, in most cases, your plant won’t be able to survive once the disease has really progressed throughout the root system.
Root rot occurs when your plant’s root system cannot effectively absorb the moisture or nutrients within the soil around them. If you notice that your plant is depicting signs of dehydration despite your regular watering and its roots are soft and black or brown, then it’s most likely suffering from root rot.
There are two causes of root rot: overwatering and fungus in the soil. Although there are some measures you can take to help the plant if you catch root rot in its early stages, it’s common for the plant to wilt and eventually die from this issue.
How to Fix
It’s tough to save a plant from root rot. Even if you can stave off its effects for a while, your plant will never truly return to its optimal healthy state again.
We strongly recommend you focus on preventing this one over waiting for the issue to arise and resolving it.
The easiest way to prevent root rot is to ensure you don’t overwater your plant. If the excess moisture doesn’t cause the roots to rot on their own in time, it could promote fungus that will expedite the process.
On the occasion that you have found the early stages of root rot in your plant, there are a few measures you can take that might save it.
If there are only signs of rot within a few roots, cut those roots from the plant. You’ll then want to rinse the roots in a fungicide solution, especially if a fungus is a cause, and then completely repot it in a pot with soil barely damp soil.
If you don’t have a separate pot for the plant, remove everything from its old pot and then wash it thoroughly with disinfectant before giving it a final rinse and using it for your suffering plant.
Mealybugs Infestation, Yet Another Pest Possibility
The cottony substance on your plant isn’t from dandelion fluff; it’s from mealybugs. These insects look like a small white version of the pill bug and will appear on your plant as a white, fluffy mass that will cover the leaves and nodes.
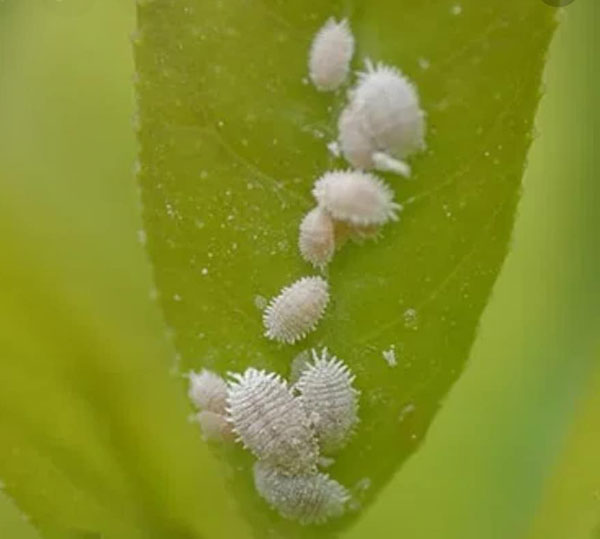
These bugs will feast on your plant’s leaves and stunt its overall growth. They could also damage the plant so severely that its leaves will turn yellow, fall off, and the plant could ultimately die. A similar progression to the two previous pests we’ve mentioned, the aphid and the whitefly.
Fortunately, as long as the infestation isn’t too out of hand, you can easily resolve this issue as well, and your plant can return to a normal, healthy life.
How to Fix
The solution to removing mealybugs is actually quite different from the water blasting method for aphids and whiteflies.
In this case, the ideal way to remove them from your plant is to dip some cotton balls and swabs into 70% rubbing alcohol and wipe away all visible mealybugs from the leaf.
The most effective method is to use cotton balls for the leaves and cotton swabs for smaller gaps or crevices.
Afterward, create a solution made from 1 cup of 70% rubbing alcohol mixed with a few drops of dish soap and 32 oz of water. Place the solution in a spray bottle and spray down your plant once or twice a week until the pests are gone.
Your Flowering Houseplant Isn’t Flowering.
One of the greatest joys of having an indoor plant is watching it bloom under your care, which is why it’s such a perturbing shame when you discover your plant has very few flowers when it should have several.
Few to no flower production is one of the many signs your plant is distressed and needs help. Several factors, such as: could cause this.
- Excess nitrogen in fertilizer
- Poor lighting conditions
- Improper pruning
- Low temperatures
Although we’re sure you’d rather so one definite cause behind this issue, we’re afraid it’s not that simple. You’ll have to do some detective work again to determine the true cause for the best solution.
How to Fix
Luckily, you can easily solve the most common causes behind minimal flowering or budding in your plant.
If the issue is poor lighting or subjection to low temperatures, the solution is to move your plant to a warmer room where it will receive the necessary sunlight to support flower production.
Improper pruning is typically more of an issue with outdoor plants, but if you do find yourself pruning your indoor plant, make sure you’re doing so at the proper time. Late season pruning can accidentally cause you to remove the buds necessary for the next season.
Nitrogen-rich fertilizer in itself isn’t the issue that inhibits flower production; it’s adding it in excessive amounts too frequently. You don’t have to toss your favorite fertilizer altogether, but make sure you only use it about once a month on a regular schedule and then leave it be.
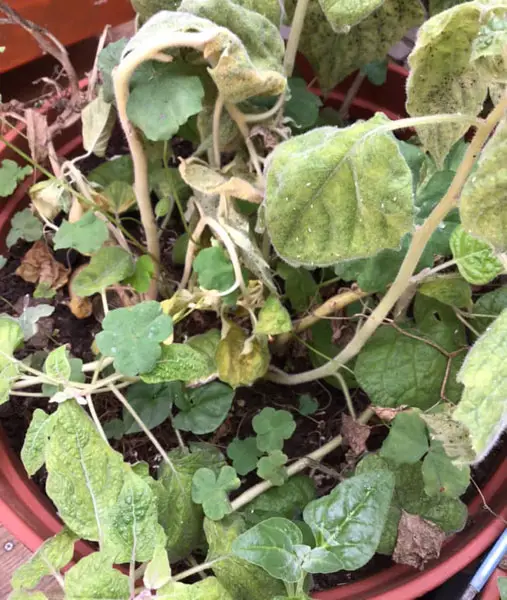
You’re Seeing Powdery Mildew on Your Plant
This might be the most common fungal infection found on plants, indoors or outdoors. Powdery mildew looks like patches of white or gray powder, mold, or maybe even snow.
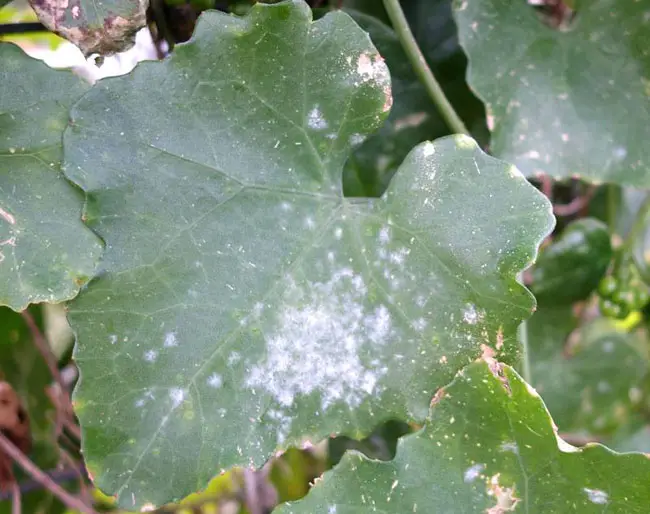
This disease thrives in conditions that are warm, dry, and have high humidity levels. It can spread to all of the leaves on your plant if left unattended.
As a result, it severely inhibits the plant’s health and can rob it of necessary nutrients and water, causing the plant to turn yellow and become weak.
Powdery mildew isn’t typically fatal to plants unless it’s left to spread and remain for an extended period of time. However, it certainly shouldn’t stick around on your lovely plant any longer than necessary.
How to Fix
Because powdery mildew rarely kills plants, you have some time to choose the solution that best suits your and your plant’s needs. Many fungicides will work wonders on this fungal disease, but there are several DIY methods you can create at home that might be cheaper but just as effective.
Some solutions you can create and spray onto powdery mildew include:
- Baking soda solution:
- 1 tablespoon baking soda
- 1/2 teaspoon liquid soap
- 1 gallon of water
- Potassium bicarbonate solution:
- 1 tablespoon potassium bicarbonate
- 1/2 teaspoon liquid soap
- 1-gallon water
- Milk solution:
- 1 part milk to 2-3 parts water
In addition to treating your plant with these solutions, you should make sure the humidity in the room isn’t high enough to support powdery mildew. Either move the plant to an entirely separate room or increase the airflow within the room it’s already placed.
Removing the severely affected leaves can also help aid in a speedy recovery for your plant as a whole and limit powdery mildew growth from airborne spores.
Did you find this post useful? Would you like to get back to it later? Save THIS PIN below to your gardening and vegetable garden boards on Pinterest! Thanks 🙂