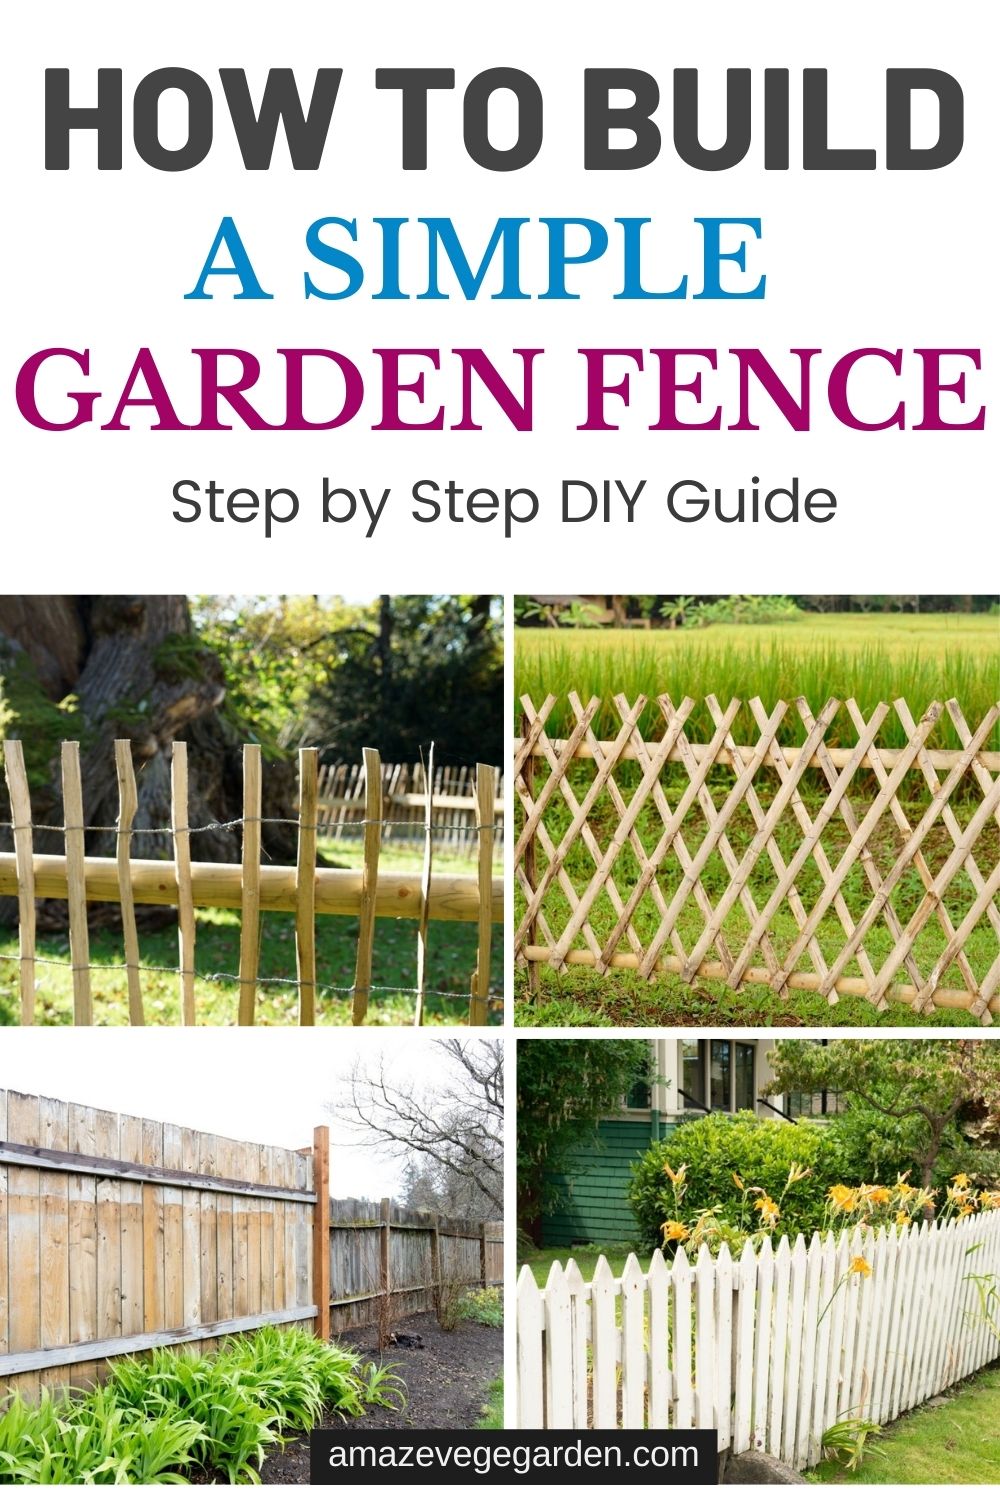
Fences are an attractive and functional asset for any kind of garden, yard, or field. However, fences can be costly when you have someone else set them up for you. Moreover, it can be hard to find a fence that meets all your criteria. This is why DIY garden fences are great.
Keep critters away from your beautiful flowers, give the best space for your vegetables to grow, or just give yourself some wonderful privacy with garden fences. Keep reading to learn how to make your garden fence, stone wall fence, vegetable fence, or cheap pallet fence.
How to Build a Simple Garden Fence Gate
Sometimes simpler is better. A simple garden fence is always a safe choice if you are unsure what fence design to opt for. Moreover, a simple garden fence is also rather easy to make.
Steps to Making Your Own Simple Garden Fence Gate
The following guidelines are easy enough that almost anyone can make their garden fence. Before you get started, make sure you have all the necessary supplies on hand.
Things you will need:
- Pressure-treated wood posts that are 4 inches by 4 inches (four of these)
- Wood fence panels
- Pressure-treated wood by 2 inches by 4 inches by 8 inches
- Stainless steel screws
- White latex exterior paint
- Roofing tar
- Quick set cement
- Pebbles or crushed stones
- Measuring tape
- Auger
- Drill
- Dig two holes, each two feet deep, where you want the fence to be. You can use an auger for this step. Make sure you did the measurements first; the distance between the two holes should match the fence measurements.
- Put about 2 inches of pebbles or crushed stones into each hole.
- Measure how high you want your gate to be. Figure out your desired height for the fence. Cut each post slightly longer than your desired height (part of it will be in the dug holes).
- Prep the cut-out posts with paint and roofing tar. Paint the posts with two coats of latex exterior paint. Place roofing tar on the bottom part of each post.
- Let everything dry completely. Remember, this is an outdoor fence. You want your final fence to be strong enough to withstand wind, water, and so on.
- Carefully put each post in its holes. You can use a leveler to make sure they are leveled up (optional). Gently pour wet cement into each of the holes. You might want two or more people for this step to ensure the posts are straight and leveled.
- Let the wet cement dry for a minimum of 24 hours. Cut out flat wood pieces that are around 2 inches in width. You want one diagonal piece and two horizontal pieces between every two posts.
- Measure out the sizes you will need between every two posts. Cut out the wood and paint them. Let the paint dry.
- Attach the wood pieces to the posts. Attach the horizontal pieces, one near the top of the fence and one near the bottom of the fence. Attach the diagonal piece. You can use a drill and screws for this step. Make sure these wood pieces are attached to the “back” of the fence.
Pros and Cons of Simple Garden Fence Gates
Still on the fence about building your fence? Here are the pros and cons to help you make a decision.
Pros | Cons |
You can bring to life the fence image in your mind, especially with personalized colors and sizes. | It can be a bit expensive with all the materials and tools needed. |
You can save money doing it yourself. | For beginners, it still might be somewhat hard to do. |
It is a fun and rewarding experience all in all. | Certain procedures require two or more people. |
How to Build a Vegetable Garden Fence
A fence around your vegetable patch is a great way of giving your growing vegetables a safe and sound home. You want to get healthy and delicious produce for all your gardening effort and time when growing vegetables.
Steps to Making Your Own Vegetable Garden Fence
Here is a how-to guide on making a very effective yet super simple vegetable garden fence. Once you have this vegetable garden fence built, any animal or critter pests will be a problem of the past.
Things you will need:
- Fence posts (wooden, each 10 feet long)
- T – posts (metal, each 8 feet long)
- Hardware cloth (around 3 feet tall)
- Mesh wire fencing (6 feet tall)
- Posthole digger or auger
- Fencing staples
- Zip ties
- Hinges
- Wooden beam
- A gate
- Do all your measurements. Measure out how many fence posts you need or how much mesh wire fencing you need. It all depends on how stretched out your final patch will be. The number and amount of items you will need depends on the size of your target fence.
- Dig holes into the ground for the fence posts. Dig the holes, each at least two feet deep, into the ground where you want each fence post to be. You can use an auger or a post-hole digger for this step.
- Generally, you want one fence post in each corner if you are making a square fence. Remember, fences that are larger or non-square may require more fence posts.
- Set the fence posts into their holes. You want to place each fence post into its designated hole carefully. Eight feet of each fence post should be visible from above ground.
- Secure the fence posts in position with wet cement. These posts must be set properly, so you can use wet cement to make them stand steady and strong. Let the cement dry fully.
- Place the metal T-posts. After the posts are set, fill in the gaps between them with metal T-posts. The metal T-posts should be evenly spaced out. Each T-post should be into the ground about one foot, with seven feet above the ground. Generally, one T-post should be placed for every nine or eight feet.
- Attach the mesh wire to the posts. Now the “backbone” of your fence is ready so that you can attach the mesh wire to the outside part of the fence; the vegetables should not be disturbed by the mesh wire. Roll out the mesh wire to match the size of the fence.
- Attach the mesh wire to the top of the fence posts. This means there should be around two feet of space from the ground to the mesh wire. The mesh wire can be attached to the wooden posts using staples. The mesh wire can be attached to the metal T-posts using zip ties.
- Make space for the hardware cloth around the fence. The purpose of the hardware cloth is to protect your vegetables from small critters such as squirrels or rabbits. Dig a trench, which is shallow but wide, around the outside of your garden fence.
- Slowly, place the hardware cloth into the trench and around the fence. Bury about one foot of the hardware cloth into the trench. As you bury the hardware cloth, fold it away from the inside of the fence. The two feet of hardware cloth remaining can be stuck onto the fence using zip ties and staples.
- Finally, install the gate with the vegetable garden fence. This gate’s purpose is to keep animals and critters out. Set it between your preferred two wooden posts. Attach the gate with hinges. Place a wooden beam under this gate too, so small critters cannot enter.
Pros and Cons of Vegetable Garden Fences
There are many types of vegetable garden fences. Here are the advantages and disadvantages of making the following type of vegetable garden fence.
Pros | Cons |
It is a fun family-building activity. | Though this is beginner-friendly, it might be a little hard for those who are new to woodworks. |
The final fence will provide some security to your vegetable patches. | Any wrong measurement can have a drastic effect on the final results. |
These look great around flower patches too. | With all the materials needed, it can get a bit expensive. |
How to Build a PVC Garden Fence
Polyvinyl chloride (PVC) is a strong, sturdy material that does not rot. This is why it makes fantastic fences. PVC pipes built into fences last much longer than wooden fences, yet the price is more or less the same as wooden fences.
Steps to Making Your Own PVC Garden Fence
If you can get your hands on PVC pipes, you can make your PVC garden fence instead of spending a lot of money on the construction costs.
Things you will need:
- Measuring tape
- PVC pipes (sizes depend upon you)
- PVC pickets
- Woodcutting blades or PVC cutting blades
- Drill (manual or electric)
- Marker
- Screws/head metal screws
- End caps
- Spray paint (color of your choice)
- Measure the rails and then cut them. You will need two rails for one panel. For example, for 77.5 inches of fence panel, you will cut the PVC 77.5 inches lengthwise. The exact measurements depend on your personal needs. Woodcutting blades are sufficient to cut PVC.
- Drill holes into the two PVC rails. This step will allow the pickets to be placed inside for the next step. You can use a manual drill or an electric drill for this step. Mark on the PVC pipes where you want the drilled holes to be before you drill any holes. The drilled holes must be complementary for each of the two PVC pipes per panel.
- Keep in mind. Exact measurements depend on your personal needs and choices. Generally, there should be one hole three to four inches from the PVC pipe end. Then, drill the next hole five inches from the first hole. Every consecutive hole from here will be five inches from the previous hole.
- Now you will cut the pickets. Take 15 PVC pickets that are 32 inches lengthwise. The diameter of each of the PVC pickets should be ¾” inches. Once again, the exact measurements may differ from person to person.
- Place screws on the PVC pickets to create a bottom rail stopper. The purpose of this step is to ensure the lower rail stays put and does not slide down and off the final fence. For each PVC picket, put a mark from four inches from one end. On the mark, screw in a Head Metal Screw 7 x ½.
- Insert the bottom rail. Once all 15 PVC pickets have been screwed, slide the pickets into the lower PVC pipe rail. The pickets should go in through the holes made at the lower three-inch pipe rail. The screws should be big and tight enough to prevent any slippage.
- Mark where you will place the screws on the PVC pickets to create a top rail stopper. This is similar to steps two and three, except you put a mark and screw for the other PVC pipe rail. You should place the marks and screws six inches from the top of each picket.
- Screw on the screws to the marked areas. Make sure the upper screws and the lower screws are both facing the same direction. Do this for all 15 of the pickets.
- Finally, put on the top rail and end caps. Slowly and carefully slide the pickets into the upper PVC rail. The screws from step six should keep the upper PVC rail in place. Place the PVC end caps on the top of each picket.
- Spray paint your PVC pipe fence (optional). For visual and quality reasons, it is highly recommended you spray paint the whole PVC fence panel. The color white is suggested the most. You are done!
Pros and Cons of PVC Garden Fences
There are many superior qualities of PVC fences. However, some limitations come with PVC fences as well.
Pros | Cons |
Strong and durable PVC material | Cannot handle extreme weather conditions |
Will not splinter or split like wood | Can get expensive |
You can paint it to your desired color | PVC is not a natural material |
Similar price to regular fences | It may be stained if affected by algae, mildew, or mold |
Very low maintenance | |
PVC pipes come in many shapes, sizes, and styles | |
You can even get PVC pipes that mimic wood in appearance | |
Very easy to clean |
How to Build a Stone Garden Wall (Gabion Wall)
Stone walls are always visually appealing. Add a stone wall around your flower beds for an amazingly aesthetic touch to your overall landscape.
Steps to Making Your Own Stone Garden Wall
Gabion fences are a delight to look at and even more of a delight to make. The following steps tell you what to do to make your stone garden wall.
Things you Will Need.
- Measuring tape
- String
- Sticks to use for measurements
- Plenty of big heavy stones
- Wooden posts (48 inches high)
- Auger or spade
- Hammer
- Crushed stones or pebbles
- Quick setting cement
- Poultry wire or wire mesh
- Wire or net cutting scissors
- Net staples
- Find the place you want to build your stone wall. Take two sticks; place each on either end of where you want your stone wall to be. Run along and durable string between the two sticks. The string should guide you to how tall you want the stone wall to be too.
- Remove any obstacles. Now remove any debris, rocks, or plants from this area. You need it to be clear so you can start building your stone wall on it.
- Gather wooden posts. You want to refine step one here. Take wooden posts that are at least around 48 inches high. For lengthier stone walls, use multiple posts and keep them four feet apart. Place the posts along the area you want your stone garden wall.
- Mount the wooden posts. Dig holes that are 12 inches deep in the places you need to mount the wooden posts. Put each post in its hole, and fill it up three quarters with crushed stones or pebbles. Keep each post straight and upright.
- Tie a string so it is placed between two posts; do this between every two posts. Level out all the posts using a hammer.
- Pour in quick-setting concrete into each hole. This type of concrete sets fast. Fill up the remaining of each hole with this concrete, and they spray water on top. It is essential to let the concrete dry fully.
- Place poultry wire along the length of the wall. Roll out the poultry wire along the full length you want the stone wall, then cut it. If the poultry wire is taller than the desired fence height, cut it to size.
- Securely attach the poultry wire to the posts. Use net staples to attach the poultry wire to the posts. Make sure the cut edge is at the bottom, aligned with the ground.
- Repeat steps seven and eight on the other side of the fence. The two poultry wire meshes on either side will create a “container” for the stones. The two mesh wires on either side create the gabion, aka “cage.”
- Collect sufficient river stones and place them inside the two poultry wire meshes. Place the river stones inside the fence, layer by layer. Angular rocks are preferred, as they lock together and create a sturdy finishing. The heavy stones should be evenly distributed, so the fence is leveled at the top. You now have your garden stone wall!
Pros and Cons of Stone Garden Walls
Stone garden walls are always great, but it is a good idea to go through the pros and cons before making your stone garden wall.
Pros | Cons |
Very affordable | It might require two or more people for certain steps |
The DIY procedure is very easy and fast | It can be difficult to find all the stones required |
The very natural aesthetic for any landscape | High-quality mesh wires can be expensive |
Highly economic | Might look too bulky in smaller areas |
Low to no maintenance | Might become home to unwanted fauna and flora |
Wind-blown soil, debris, and dirt may gather between the stones over time |
How to Build a Cheap Pallet Fence
There are so many options when it comes to the types of fences you can build. However, most of them get expensive. Pallet fences, on the other hand, are a great choice that will not break your bank.
Steps to Making Your Cheap Pallet Fence
Despite the drawbacks, pallet fences still make great fences without hurting your wallet. Try this pallet fence out if you are opting for a cheap, homemade, and efficient fence.
Things you need
- Measuring tape
- Pallets
- Roofing nails or bolts
- Hammer
- Hinge and latch
- Steel pole
- Chicken wire
- Staples
- Color paint
- Do all the measurements. To make this DIY process smooth and easy, take all the measurements first. Measure out the area you want your fence to be in. Based on the measurements, calculate roughly how many pallets you will need.
- Gather all your pallets. You want to use pallets that are similar in shape and size. Collect your pallets from small businesses (that recycle pallets) or stores. 40 inches by 48 inches is the standard pallet size.
- Assemble the pallets. Arrange your pallets into a neat and straight line. You can leave gaps between each pallet if you want, but make sure the gaps are even. Place another long pallet, or multiple small pallets, across the middle of the lined up pallets.
- Attach the pallets after assembling. Use bolts or roofing nails with a hammer to attach them. Depending on your fence size, you may need to repeat this step until you have enough sections to cover your entire fence area.
- Make a door for your pallet fence. Take one set you made from step three. Put hinges and a latch on this pallet set to create a swinging door. You can secure a steel pole vertically on the ground and latch the fence door onto that pole.
- Make your fence predator-proof. Do this step if you want to keep animals out. Attach chicken wire with staples on the inside of your fence.
- Paint your pallet fence. This step is optional. You can paint the fence any color you please. This will add visual improvement to your fence.
Pros and Cons of Pallet Fences
You get what you pay for. Read on the pros and cons of cheap pallet fences before deciding if it is a good fit for you.
Pros | Cons |
Very cheap | Not as aesthetically pleasing |
Sturdy and durable | Not very high in height |
Fast and easy to make | Does not keep out small critters like mice and rabbits |
Easy to move around and reconfigure | Quality can be compromised if pests and termites show up |
How to Build a Raised Bed Fence
This is a wonderful simple garden fence that is quick and easy to make. This type of fence will prove useful if you have raised garden beds.
Steps to Making Your Own Raised Bed Fence
Even if you don’t need vegetable garden fences, you will want to try out this DIY project that is quick, easy, and fun.
Things you need
- Measuring tape
- 1 x 4 wooden boards (treated)
- L brackets
- Staple gun
- Staples
- Screws
- Metal garden fencing/mesh wire (28 inches high)
- Measure out the garden space. Measure out how big you want your raised bed area to be. If you make multiple raised bed fences, measure the gap between each, too; leave at least two feet between raised beds.
- Measure out the mesh wire or metal fence height. Your panel boards and designs need to fit this height too. There should be two horizontal boards and three vertical boards for each panel.
- These are the general measurements and designs used. The horizontal boards tend to be 120 inches in length. The vertical boards tend to be 30 inches in length. The horizontal boards will be parallel to each other. Two vertical boards will be on either end of the parallel horizontal boards, and one vertical board will be in the middle.
- Attach the panel with screws. You can have four panels (one for each side) or more, depending on how big you want your raised bed fence to be.
- Unroll the mesh or metal fencing and attach it. Cut your mesh or metal wire fencing so it is the right size to cover the fence panels. Attach with staple gun and staples.
- Put the panels together. Attach the panels and then onto your raised beds. Use L-brackets and screws to secure everything together. You now have your homemade raised bed fence!
Pros and Cons of Raised Bed Fences
The advantages outweigh the disadvantages of raised bed fences.
Pros | Cons |
Very cheap | This does not meet the needs of large areas that need to be fenced |
Very easy and fast to make | Not very high in height |
Supplies are easy to find in most hardware stores | |
You can modify it to a regular garden fence |
Tips and Tricks on DIY Garden Fences
This article has how-to guides on different kinds of garden fences. However, you can apply these tips and tricks to the guides given below.
- Know your goal first, then select your type of garden fence to build.
- You do not need strong fences to keep out critters and animals.
- The sturdy thick wood is usually the best material for homemade gates.
- Painting your fence before you build your fence can save you from getting paint onto unwanted places.
- For taller fences, attaching a diagonal board will add to its sturdiness.
- Paint or Stain the fence often (e.g., yearly) to increase its life length.
- Do not do any additional mounting until any wet cement has completely dried.
- Keep hinges far from the ground, as it may make the gate drag.
- Choose your gate width measurements after deciding what will move through it, like people, wheelbarrows, bikes, etc.
Final Thoughts
There you have it. Now you know methods to make different kinds of simple DIY garden fences. Once you know what your particular garden fence needs are, you can make your garden fence. The DIY fence building methods mentioned above make fun, money-saving, and group-building activities.
Did you find this post useful? Would you like to get back to it later? Save THIS PIN below to your DIY garden boards on Pinterest! Thanks 🙂