Here’s something almost nobody talks about with tall succulents: the moment they start tilting, you’re already late. Not dangerously late — but the root system has been quietly sending distress signals for weeks, pressing against ceramic, circling at the bottom, or drowning in soil that stopped draining properly six months ago. By the time a Euphorbia or a mature Aloe vera starts leaning like a slightly drunk party guest, repotting isn’t optional. It’s urgent.
The good news? Repotting tall succulents is one of those skills that sounds intimidating and is genuinely easy once you understand what the plant actually needs — which is not what most beginner guides describe. We’ll cover every step in order, explain the why behind each one, and flag the specific places where people go wrong (and quietly wonder for months why their plant looks sadder after the move).
How to Know It’s Actually Time
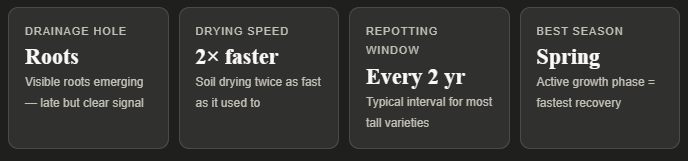
Roots coming out of the drainage hole is the obvious signal, but it’s not the only one — and waiting for it means you’ve already delayed too long. Tall succulents give earlier clues: soil that dries out far faster than it used to (because roots have displaced most of the growing medium), a plant that wobbles at the base despite firm-looking soil, or a noticeable slowing of growth during a season when it should be active.
There’s also a less-discussed scenario specific to tall varieties: top-heaviness without visible root crowding. A Sansevieria cylindrica that’s added significant height can tip its own pot in a windstorm or after a slight nudge, not because it’s rootbound but because the pot-to-height ratio has become structurally unsound. That’s a repotting case too — specifically into a heavier, wider-based container that restores physical stability.
What You’ll Actually Need
The tool list for repotting tall succulents is short — but a few items are non-negotiable in ways that cheaper alternatives can’t replicate. Specifically: gloves if you’re working with spiny or latex-producing varieties (Euphorbias will sap you the moment you’re not expecting it), a clean cutting tool for any root pruning, and newspaper or old towels to wrap spiny plants during handling.
For the pot itself: choose terracotta over plastic for anything going outdoors or into a bright window. Terracotta breathes, wicks excess moisture, and adds meaningful base weight that stabilizes tall plants. The tradeoff is faster drying — which for succulents is almost always an advantage, not a problem.
- ✓New pot: 1–2 inches wider in diameter than the current one, with drainage holes
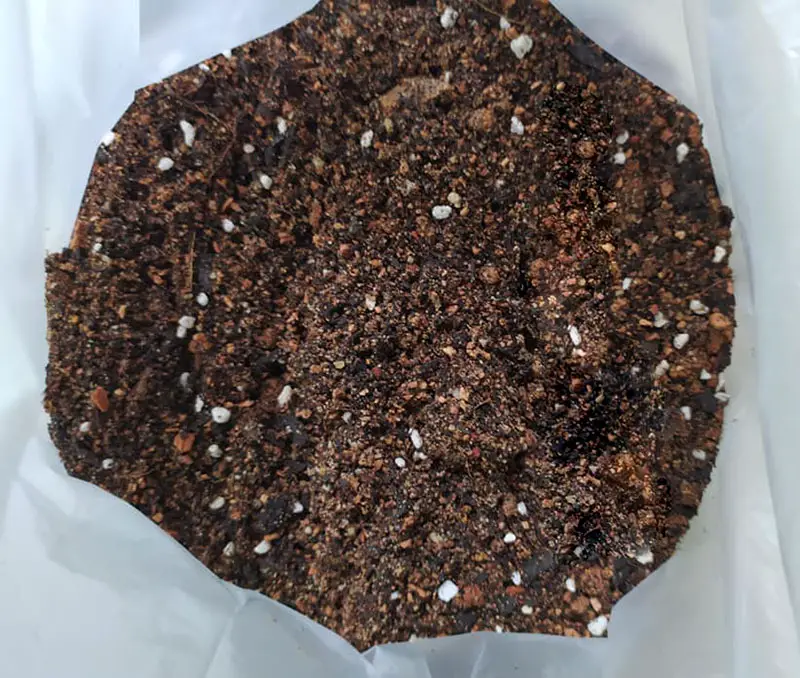
- ✓Gritty succulent mix or DIY blend (50% potting soil, 50% perlite minimum)
- ✓Clean pruning shears or a sharp knife for root pruning
- ✓Thick gloves (leather if working with spiny cacti or Euphorbias)
- ✓Newspaper, bubble wrap, or an old towel for handling tall spiny specimens
- ✓A layer of coarse gravel or pot shards for drainage layer (optional but helpful in deep pots)
- ✓Dry brush or chopstick for working soil around roots
What most people miss on soil
The Repotting Process, Step by Step
Sequence here is everything. Each step sets up the next one, and skipping or rearranging them creates the predictable failure modes: shocked roots, unstable planting depth, or a plant that looks transplanted rather than thriving within a few weeks of the move.
-
Stop watering 7–10 days before repottingDry soil contracts and releases from the pot walls, making extraction far cleaner. Wet roots tear more easily and invite the rot that ruins fresh soil immediately after repotting.
-
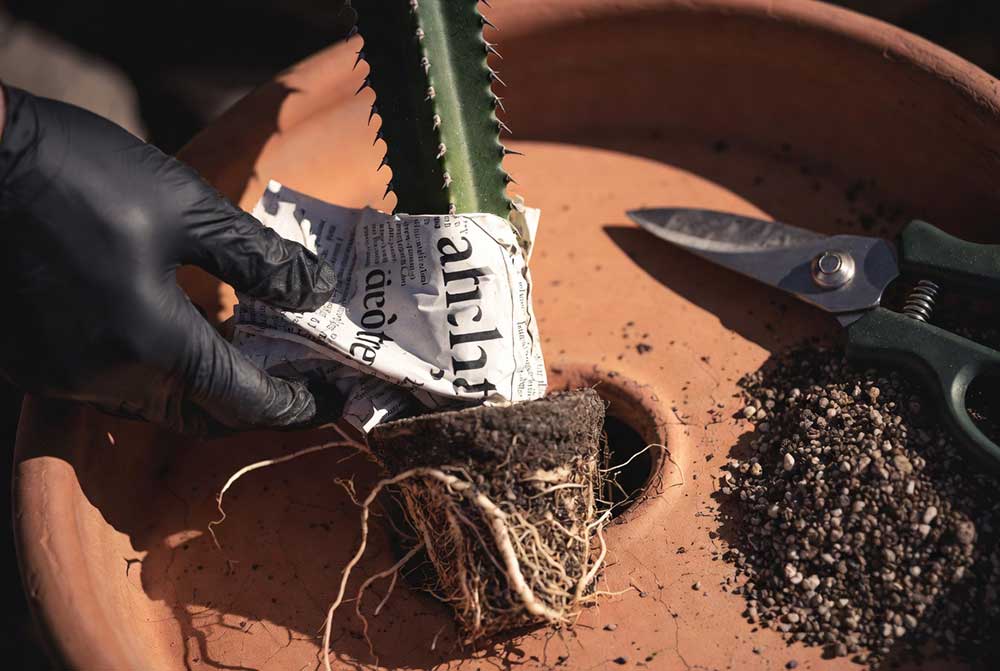
Tip the plant sideways and ease it outRun a butter knife or thin trowel around the inner edge of the pot first. For a stubborn rootbound plant, give the outside of the pot a few firm squeezes (for plastic) or gentle taps. Never pull from the stem — use your palm flat against the soil surface to push from below.
-
Inspect and loosen the root ballGently shake off loose old soil and untangle any circling roots by hand. Roots that have been growing in a tight spiral will continue spiraling after repotting if not interrupted — they won’t self-correct. Prune any black, mushy, or completely desiccated roots with a clean cut.
-
Let cut roots callous for 1–2 daysThis step gets skipped constantly and it costs plants their recovery momentum. Any cut root surface is an entry point for bacteria. An hour of air-drying in a shaded spot is the minimum; overnight is better.
-
Add a base layer of gritty mix to the new potEnough so that when you set the plant in, it sits at the right depth — the base of the stem at or slightly below the pot rim. For leggy or etiolated stems, bury deeper than the original soil line to provide structural support and encourage new root development from the buried section.
-
Center the plant and fill in around itWork fresh soil in from the sides using a chopstick or dry brush — never compact it by pressing down hard from above. You want contact between roots and soil without eliminating the air pockets that new roots grow into.
-
Stake if needed for the first 4–6 weeksA tall succulent without a fully established root system in new soil can tip from its own weight. A simple bamboo stake and soft garden tie prevents the lean from becoming permanent while roots anchor in.
-
Wait 10–14 days before the first wateringThe delay allows any minor root damage to callous, helps roots seek moisture actively (which drives outward growth into new soil), and prevents the wet-soil-over-damaged-roots combination that causes rot. This is the hardest step for new growers to honor. Honor it anyway.
The Pot Size Question Everyone Gets Wrong
The instinct when repotting a large succulent is to give it as much space as possible — after all, the old pot was too small, so bigger must mean better. This is one of the most consistent mistakes in succulent care, and it produces slow rot rather than fast growth.
Succulents develop their root systems proportionally to the available soil volume. In an oversized pot, the outer soil stays wet long after the roots have used the moisture near them. That persistently damp zone — especially in the bottom half of a deep pot — becomes a rot incubator. A 6-inch plant in a 12-inch pot will struggle for a year before it might thrive. The same plant in an 8-inch pot will establish in four to six weeks.
“The right pot size for a tall succulent is the one that fits the root ball with about an inch of clearance on all sides — nothing more generous than that.”
The exception: stability repotting. If you’re moving a top-heavy plant into a wider, heavier pot specifically to prevent tipping rather than to accommodate root growth, you can go wider while keeping depth similar. A terracotta bowl or squat wide pot can add meaningful weight and base stability without creating an excess of wet soil volume at depth.
Handling Spiny or Toxic Varieties
Tall cacti, columnar Euphorbias, and large Agaves all require handling techniques beyond gloves. A 4-foot Cereus or Euphorbia trigona at full height is genuinely unwieldy — and a fall during repotting can snap or scar a plant you’ve grown for years.
The wrap method: fold several layers of newspaper into a wide band (12–15 inches for large specimens), then wrap it around the plant’s mid-section to create a handle you can grip firmly. This keeps your hands clear of spines and gives you actual leverage on something that may be heavier than it looks. For anything approaching or exceeding your own height, get a second person. Not because it’s complicated — because it’s physically awkward in a way that solo maneuvering makes risky.
Euphorbias produce a milky latex sap that is a serious skin and eye irritant. Any cut or broken surface releases it freely. Work in a ventilated area, wear gloves and eye protection, and wash immediately if sap contacts skin. Keep pets and children away during repotting.
After the Move: What Normal Recovery Looks Like
A successfully repotted tall succulent looks slightly stressed for one to three weeks. The leaves may appear slightly softer or less plump than before. This is not failure — it’s the plant redirecting energy from foliar water storage into root development. You’ll see it perk back up once new root tips find the edges of the fresh soil, typically three to five weeks post-repotting.
What’s not normal: progressive wrinkling that doesn’t reverse after week four, base-of-stem softness or discoloration, or soil that stays wet more than ten days after your first post-repotting water. Any of those signals means you’re either dealing with root rot from a pre-existing condition or soil that’s retaining too much moisture.
| Symptom after repotting | Likely cause | Response |
|---|---|---|
| Slightly soft leaves, 1–3 weeks | Normal recovery stress | Wait. Don’t water early to compensate. |
| Persistent wrinkling past week 4 | Root system not establishing | Check soil drainage; gently loosen with chopstick to aerate |
| Soft, discolored base of stem | Root rot from excess moisture | Unpot, cut to healthy tissue, dry 2–3 days, replant in fresh dry mix |
| Leaning in new pot | Root system not anchored yet | Add stake; this resolves naturally within 4–6 weeks |
| No visible growth after 8 weeks | Dormancy or wrong season | Check if plant is in its natural rest period; pause fertilizing |
The Bigger Picture: Why Repotting Is Actually Renovation
Every repotting is a chance to reset a plant’s trajectory. Fresh, properly draining soil eliminates the accumulated mineral salts from months of fertilizing. Root pruning — done thoughtfully — stimulates dense new root growth, the same principle that makes bonsai cultivation work. And moving a leggy, etiolated stem deeper into soil can trigger new root nodes along the buried section, effectively giving an older plant the root density of a younger one.
Tall succulents, specifically, reward this kind of intervention more than most other houseplants because they invest so heavily in aboveground structure. A Euphorbia that’s been struggling in compacted soil for two years can look genuinely transformed six months after a proper repot — deeper color, firmer tissue, resumed growth. That transformation is yours to make happen. It just requires a bit of timing, the right mix, and the discipline to not water it for two weeks after.
Complete repotting checklist
- ✓Withhold water 7–10 days before repotting
- ✓Choose pot only 1–2 inches wider than current one
- ✓Select terracotta for outdoor or bright-window plants
- ✓Use gritty mix (minimum 50% perlite)
- ✓Inspect, loosen, and prune damaged roots
- ✓Allow cut roots to callous 1–2 days before planting
- ✓Bury leggy stems deeper than original soil line
- ✓Fill gently — don’t compact from above
- ✓Stake if plant is top-heavy for first 4–6 weeks
- ✓Wait 10–14 days before first watering
Care notes based on observed outcomes across Euphorbia, Aloe, Cereus, Sansevieria, and Agave genera in container cultivation. Timelines reflect temperate growing conditions during spring repotting; dormant-season repotting extends all recovery estimates by 30–50%. Root rot treatment success depends heavily on how early the problem is caught — early intervention has a high recovery rate; advanced rot is rarely reversible.