Classified as a perennial plant, Rhubarb is a cool-season crop, which is winter hardy and drought-resistant. The vegetable is developed from crowns made up of buds and rhizomes. When you grow rhubarb, keep in mind that it likes cooler weather. Although they are full sun plants, they do not like very hot climates.
This old-fashioned fruit is making a comeback in today’s culinary world. Easily grown with an interesting growth habit, it adds a distinctive presence in the garden.
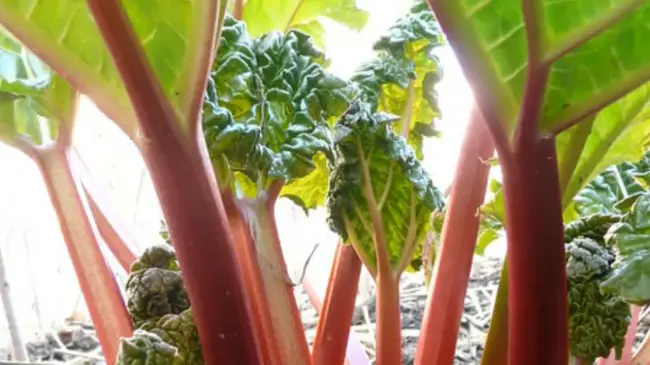
Its preferred habitat is a cooler climate as it does not handle heat very well but manages quite heavy frosts.
What Is Rhubarb?
Rhubarb is a vegetable that has become increasingly popular in recent years. It’s a perennial plant, meaning it comes back every year, and it can be grown in most temperate climates. The stalks are edible and have a tart taste, while the leaves are poisonous and shouldn’t be eaten. Rhubarb is often used to make pies, crumbles, jams, and other desserts.
The earliest references to Rhubarb are from Chinese manuscripts over 2,000 years ago. They use the root for medicinal purposes. The English have been using it since the sixteenth century also for medicinal purposes. There is an old-wives remedy of burying a rhubarb stalk next to cabbages in the garden. It is said to assist in the prevention of clubroot in cabbage plants.
1. Grow Rhubarb From Seeds
The first thing we want to do is to start with a good seed starting mix. The seed starting mix is what we are using for everything as it is a very well-draining soil. In addition, it is also very airy and light. It got good porosity which means it can hold onto just the right amount of water. So it is just like a sponge.
You can pre-moistened it and put it into larger containers.
You want to start planting rhubarb in a larger container because they grow very fast and don’t like to be root-bound very much. Since they are perennial, they have really fast-growing roots to adapt their root growth to grow super fast.
So once they start seeding, they’re going to be well established by the time winter comes. If you have some of the fastest-growing root systems out there in the garden, you will need to give rhubarb a little bit more space, so they are not stressed out.
What you may consider doing is only planting about two seeds per cell for your container. You can spin down to one typically with other vegetables. If you start with more than two seeds, it may break the club apart and separate them. For sure, you don’t want this to happen as you don’t want to do any damage to the roots.
So you should only plant about two seeds per square in each cell of your container. You can get a container with many cells that measure a 2″ x 2″ square pot. The benefit you can get with this container is that it will allow you not to waste too much seed, and you will have better results because you don’t need to rip into any of them.
Basically, you want to plant them to be the healthiest one per square and leave them until they are ready to be transplanted into the garden. These rhubarb are very fast maturing and fast sprouting. If you’re beginning a gardener, you will be able to see if you are a success or a failure within about 5 to 7 days. So it is a very fast maturing seed.
Here is what the seeds look like. They just got kind of a little three-dimensional shape. They are pretty cool, but each will give you one plant, so you don’t have to worry about multiple seeds.

Certain plants produce multiple seeds in each seed pod. This is just one pod, so they’re easy to hold, and all you need to do is when you first start your seeds, you want to put your holes about no deeper than your first knuckle on your finger. You can go a little bit shallower but no deeper with about half an inch or so.
One of the biggest reasons people have problems when planting their rhubarb is that they either put the seeds too deep or keep them too damp. If the soil is too damp, the roots are actually going to rot. When the roots rot, the plant will go into shock, and it will stop taking water. They don’t like to be drowned, so they don’t like too much water.
I typically leave my soil about damp enough that I could create a ball out of it by crumpling it together. It creates a ball but it just kind of crumbles apart. If it’s too dry, you won’t be able to create that ball. If it’s too wet, you will see water coming out from the ball. That’s where you know you have the optimal moisture.
The next thing you want to do is cover the seeds gently with some more seed starting mix. You can give them a little bit of a tamp down with your hand to compact the soil, so they have good contact with the seeds. Then you can water them nicely to settle all that soil around the seeds. You can then put them to bed before they sprout.
2. Grow From Sets
While rhubarb is available to grow from seeds, the plants are mostly acquired from sets. Rhubarb is grown from sets, which means the plant can be divided from a single root. You dig the main root out of the ground and then, with a knife, cut it into the sections that you want.
Make sure there is a bud or growing head on the individual pieces you slice off the root. This is best done in either late winter or early spring Plant your new plants into the well-fertilized and drained site in your garden. The plant will tolerate some shade but does best in a mostly sunny site in the garden. When you first plant Rhubarb in the garden, it is wise to consider giving it a place where you can leave it to grow for several years.
3. Grow Rhubarb in Pots or Containers
Grow Rhubarb in containers; they are convenient on a balcony or deck if you do not have a garden. Growing rhubarb in pots allows you to stand the containers in a little shade if you need to protect them from strong winds. The large leaves of the plant mean it is susceptible to being blown over by the wind.
In containers, you can move the rhubarb into the sun if you feel like it. Water rhubarb frequently, whether it is in the garden or in pots. Give all plants a liquid fertilizer or nitrogen-based granular fertilizer every four to six weeks for the best results. Do this during the main growing season.
Picking the stalks is done correctly if you twist and peel the stalk from the bottom of the plant, not unlike silver beet. This leaves the new growth to grow from the center of the plant. To prepare the stalks for cooking, you must remove the leaves from the stalk.
Avoid using soft stalks or the leaves of them drooping or not in a healthy state. The leaves are poisonous to human beings, but it is all right to compost them. Keep the prepared stalks in the fridge until you need them, as they store well. The color of the stalks is immaterial and does not affect the taste.
Best Time for Planting Rhubarb
Planting rhubarb from seeds will take a while to realize a harvest, so many people plant them from stems that produce roots or seedlings purchased at nurseries. The best time to plant these seedlings or roots is early in spring.
Rhubarb spacing
Rhubarb will grow to about 2 to 3 feet tall and wide, dependent upon which variety you plant. Rhubarb stalks have a mixture of a sweet and sharp sour taste.
When you grow rhubarb, Spacing is important for the vegetable to reach its full potential. The proper spacing for this vegetable is between 24 – 48 inches. The rows in which they are grown should be separated by 36 inches. Anything less than three feet creates an overcrowded environment and harms the plants.
Planting Instructions
Planting rhubarb is relatively easy as long as you have the right environment. Rhubarb likes cool climates and lots of suns, so choose a spot in your garden that gets at least 6-8 hours of sun a day. The soil should be light and well-draining, with plenty of organic material such as compost or manure added in.
When you’re ready to plant, dig a hole twice the size of the root ball and mix in some compost or manure. Place the rhubarb root ball into the hole, making sure it’s even with the surface of the soil, then fill in around it with soil. Water deeply and mulch around the stem to keep the roots cool and moist.
Rhubarb plants can be quite large, so give them plenty of room to grow; at least two feet between each plant is ideal. If you’re growing more than one variety, make sure to space them out appropriately as well; some varieties take up more space than others.
Climate Considerations
Now that you know what rhubarb is, the next step in growing it successfully is understanding the climate considerations. Rhubarb plants prefer cooler climates, with temperatures ranging between 40-75°F (4-24°C). They require a long period of cold dormancy to produce strong, healthy stalks and a good harvest in the spring. Planting rhubarb in areas with hot summers may result in weaker stalks and smaller harvests.
Rhubarb also requires plenty of moisture to survive. It should be watered regularly throughout its growing season – from early spring to late summer – but allow it to dry out slightly between waterings. Over-watering can cause excessive foliage growth at the expense of fruit production. Additionally, adding a layer of mulch around the base of your rhubarb plant will help retain moisture and protect its roots from extreme temperature changes.
Soil Preparation
Soil preparation is key to growing rhubarb successfully. The soil should be well-drained, as rhubarb does not like wet roots. One way to ensure good drainage is to mix in compost or aged manure before planting. The soil should also be slightly acidic, with a pH of 6.0-6.5; if the soil is too alkaline, it can be amended with sulfur or aluminum sulfate. Rhubarb also needs plenty of nutrients; adding a balanced fertilizer such as 10-10-10 around the time of planting will help ensure healthy growth and robust harvests for years to come.
It’s important to avoid overworking the soil when preparing for rhubarb planting, as this can disrupt the beneficial bacteria and fungi that help break down organic material and nourish plants. Working in compost with a garden fork or tiller is typically sufficient for most gardens. Additionally, new beds should be left undisturbed for at least two weeks before planting to give beneficial microorganisms time to settle in and become established.
Rhubarb prefers cooler temperatures and thrives in areas where summers are mild and winters are cold; soils that retain moisture during summer months are ideal for cultivating this crop. If conditions are dry, apply mulch around plants to help regulate moisture levels and minimize weeds.
Fertilization Requirements
Rhubarb requires a steady supply of nutrients to thrive, and fertilization is a key part of ensuring healthy growth. The most important factor in fertilizing rhubarb is timing. Rhubarb should be fertilized just as soon as the shoots emerge in late winter or early spring with a balanced fertilizer, such as 10-10-10. This should be applied at a rate of two pounds per 100 square feet and lightly worked into the soil.
Throughout the growing season, additional fertilizer can be applied every 4-6 weeks or so, making sure to stop about four weeks before harvest for the best flavor. If you’re using an organic fertilizer, it’s best to use one with high nitrogen levels such as blood meal or fish emulsion. For synthetic fertilizers, use one that’s high in nitrogen like 12-12-12 or 15-15-15.
In late fall after harvesting your rhubarb stalks, you should add compost or aged manure to the soil around the rhubarb plants to help build up the soil before winter sets in. This will ensure that your rhubarb is well nourished when it starts growing again in late winter or early spring.
Watering Tips
Rhubarb plants need to be kept consistently moist in order to produce healthy, strong stalks. Water your rhubarb patch deeply once a week with about one inch of water. This will ensure that the roots are reached and the water is absorbed into the soil. If you live in an area with frequent rainfall, it’s important to supplement this rainfall with additional watering during dry spells.
To check if your rhubarb needs more water, dig down about six inches into the soil. The soil should feel cool and moist for optimal growth. If it feels dry and crumbly, your plant needs more water. It’s also important to avoid over-watering; too much moisture can cause root rot and hinder growth.
Watering during the early morning hours will help reduce evaporation and allow the leaves to absorb as much moisture as possible before temperatures begin to rise throughout the day.
Pest Control Strategies
Rhubarb is a hardy plant, and the pests that threaten it are mainly insects. To prevent infestations, you should inspect your rhubarb plants regularly, looking for signs of pests such as holes in leaves or webs. If you find signs of pests, take steps to remove them as quickly as possible.
One effective method for pest control is to use natural predators such as ladybugs, praying mantises, and lacewings. These predators will feed on the bugs that eat your rhubarb plants, thus keeping their population under control. If you have a large garden or farm, consider introducing some beneficial insects into the environment to help keep pests away from your rhubarb crop.
You should also regularly spray your plants with an insecticidal soap solution or neem oil. This will help kill off any existing pests before they can cause significant damage to the plants. Be sure to follow instructions carefully when using these sprays and wear protective clothing if necessary. Additionally, you can use row covers or floating row covers to protect your rhubarb from flying insects while allowing light and air circulation. Taking these simple steps can help provide protection against common pests that threaten rhubarb plants.
Rhubarb Disease and Garden Pests
The rhubarb is a reasonably hardy plant but is prone to some of the usual pests in the garden. When growing rhubarb, you can expect a visit from unwanted garden pests. They include potato bugs, beetle, aphid, slug, caterpillars, snails, and broad mites, to name a few.
Your first line of defense is to keep plants healthy. Start with quality soil and composted material, proper sunlight, and water. To eliminate competition for nutrients, keep the area weeded. Of course, you can use organic insecticides if need be.
Although rhubarb does not have many problems, one that is very serious is footrot. This problem is caused by fungus. Because it will spread to other plants, you should destroy any affected plants.
Allowing the area where you planted the rhubarb to dry should cure the problem, but to be on the safe side, you should relocate the planting to another area. Any black spots you notice on the stem are just a part of the rhubarb and are not a cause for concern.
Harvesting Rhubarb
Harvesting rhubarb is a simple process that can yield delicious results. Rhubarb leaves are not edible and must be discarded, so when harvesting the stalks, make sure to leave several inches of the leaves attached. The stalks should be harvested when they are firm and free from any blemishes or discoloration. It is best to harvest rhubarb in the early morning or evening to avoid the heat of the day.
Once harvested, store rhubarb in a cool place such as a refrigerator for up to four days. To use it right away, cut it into one-inch slices and simmer it with water until tender. This makes it perfect for adding to pies, jams, and other desserts. It can also be frozen for up to nine months if you don’t plan on using it right away.
Storage And Preservation Techniques
Once you have harvested the rhubarb, it’s time to store and preserve it. The two main ways to store and preserve rhubarb are freezing and canning.
Freezing is a great way to store rhubarb for up to a year. Start by cutting off leaves and washing stalks. Cut stalks into 2-inch pieces and place them in a single layer on a baking sheet lined with parchment paper or wax paper. Place the baking sheet in the freezer until the pieces are frozen solid, then transfer them to an airtight container or bag for storage.
Canning is another popular way of preserving rhubarb. Start by sterilizing jars according to the manufacturer’s instructions. Wash and cut stalks into 1-inch pieces, then add sugar (4 cups sugar for every 5 cups of prepared fruit) and mix well. Pack the mixture tightly into jars, leaving 1/2 inch of headspace between the top of the jar and the lid.
Process in a boiling water bath for 10 minutes, making sure there is at least 1 inch of boiling water above the lids during processing time. Once processed, remove from the canner, and let cool completely before storing in a dark dry place for up to one year.
Final Thought
The key to successfully growing rhubarb is proper fertilization, pest control, and harvesting. Fertilize your rhubarb every 4-6 weeks with a balanced fertilizer to provide the necessary nutrients for the plant to produce healthy stalks. Be sure to harvest the stalks when they are at least 9 inches long and free from blemishes.
Pest control methods such as handpicking or using natural insecticides should be employed if necessary. Once harvested, you can store fresh rhubarb in the refrigerator for up to two weeks. If you choose to grow your rhubarb in a container, make sure it is large enough for the roots to spread out and provide adequate drainage.
With these tips in mind, I’m confident anyone can successfully grow their own rhubarb! It is an easy crop that requires minimal maintenance but will reward you with delicious stalks each season. Don’t forget the importance of proper fertilization and pest control; they’re essential for a successful harvest.
Proper harvesting techniques also come into play; be sure to wait until each stalk is at least 9 inches long before picking it off. Finally, if you choose to grow your rhubarb in containers, be mindful of its size and drainage needs. With these guidelines in place, I’m sure you’ll have success with growing your own rhubarb!
Read also: All About Umbrella Plants – Types, Grow, Care and Propagate.
Did you find this post useful? Would you like to get back to it later? Save THIS PIN below to your gardening or vegetable board on Pinterest! 🙂
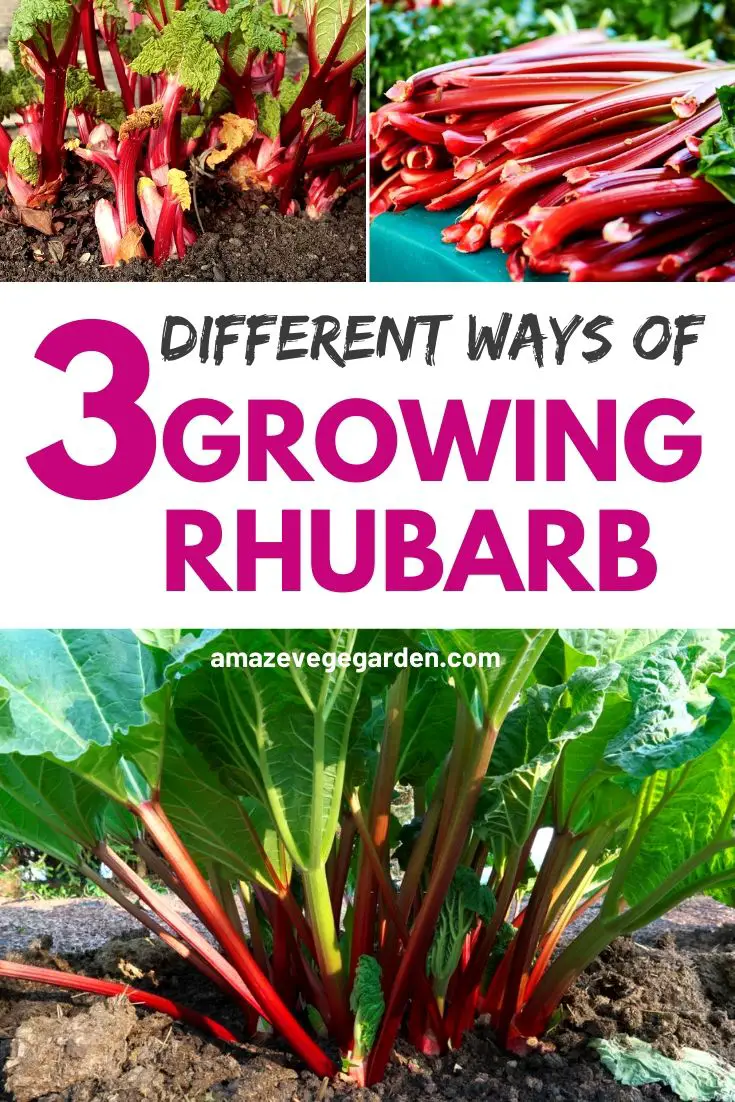
Thanks for the tips! Just an observation, though – in your last graphic (the one with the text in a black background) the top photo (above the text box) is a photo of red Swiss Chard and not rhubarb.
Thanks for pointing it out, It’s my mistake to overlook this. I will do the necessary amendment.
I am interested in more detail about growing in containers. How large a container is needed – how deep and wide? I am renting a home right now, and would like to take it with me when I leave. Can I pot in the garden when I move to a more permanent location? It takes several years to provide a harvest, so I want to get started now.
Thank you,
Growing rhubarb in containers is definitely possible, and it’s a great option if you’re renting and want to take your plants with you when you move. Here are some tips to help you grow rhubarb successfully in containers:
Container size: Rhubarb plants have deep roots, so you’ll need a fairly large container to accommodate them. A container that is at least 24 inches deep and 18 inches wide is a good starting point. The bigger the container, the better.
Soil: Rhubarb prefers well-draining soil that is rich in organic matter. You can use a mix of compost, peat moss, and perlite to create a soil mix that drains well but also holds moisture.
Planting: Plant your rhubarb in the container with the crown of the plant just above the soil level. Water well and keep the soil moist until the plant is established.
Care: Rhubarb needs regular watering and fertilization to grow well. Water deeply once a week and fertilize with a balanced fertilizer every few weeks during the growing season. You can also top-dress with compost to provide extra nutrients.
Winter care: In colder climates, rhubarb may need some protection over the winter. You can move the container to a sheltered location, or wrap it in burlap or other insulating material.
As for potting your rhubarb in the garden when you move, it’s definitely possible, but you’ll need to make sure the soil is well-draining and the spot gets plenty of sunlight. It’s also a good idea to dig a hole in the ground and place the container in it, so the roots can grow down into the soil. Make sure you remove the rhubarb from the container carefully, taking care not to damage the roots. With proper care, your rhubarb should do well in its new location.
What to do with rhubarb that’s in a planter for the winter months
I’m in Canada
To overwinter rhubarb in a planter in Canada, follow these steps:
1. Water the plant well in the fall before the first frost. This will help to insulate the roots and prevent them from drying out.
2. Cut back the leaves and stalks to the ground. This will help to conserve the plant’s energy during the winter.
3. Mulch the plant with a thick layer of straw, hay, or compost. This will help to protect the roots from the cold and keep the soil moist.
4. Move the planter to a sheltered location, such as against a south-facing wall or under the eaves of a building. This will help to protect the plant from the wind and snow.
If you live in a very cold climate, you may want to consider bringing your rhubarb planter indoors for the winter. To do this, place the planter in a cool, dark location, such as a basement or garage. Water the plant sparingly over the winter, just enough to keep the soil from drying out completely.
I love rhubarb and kinda know how it grows in the Midwest, where I grew up. Now I live on the central coast of California. Oddly, I found a retail nursery with rhubarb starts, even though it’s mid July. I am planning to plant two in the ground (I have a tiny yard) and one in a container. I live about a mile from the ocean so it never gets horribly hot but also never freezes. What are my chances at success?
You have a good chance of success growing rhubarb on the central coast of California. Rhubarb prefers cool climates with well-drained soil. Your location near the ocean will provide the cool temperatures that rhubarb needs, and you can improve the drainage of your soil by adding compost or other organic matter.
Here are some tips for growing rhubarb on the central coast of California:
– Choose a location that receives full sun or partial shade.
– Amend the soil with compost or other organic matter to improve drainage.
– Plant the rhubarb crowns in the spring or fall.
– Water the rhubarb plants regularly, especially during the first year.
– Fertilize the rhubarb plants in the spring with a balanced fertilizer.
– Harvest the rhubarb stalks regularly during the growing season.
Here are some additional tips for growing rhubarb in a container:
– Choose a large container that is at least 18 inches deep.
– Use a well-drained potting mix.
– Water the rhubarb plant regularly, especially during hot weather.
– Fertilize the rhubarb plant every few weeks with a balanced fertilizer.
– Harvest the rhubarb stalks regularly during the growing season.
Rhubarb is a relatively low-maintenance plant, but there are a few things you can do to increase your chances of success:
– Mulch around the rhubarb plants to help retain moisture and suppress weeds.
– Remove any flower stalks that appear, as this will encourage the plant to produce more leaf stalks.
– Divide the rhubarb plants every 3-5 years to keep them healthy and productive.
With proper care, your rhubarb plants should thrive for many years to come.
Even though rhubarb is typically grown in the Midwest and other cold climates, it is possible to grow it on the central coast of California with the right care. By following the tips above, you can increase your chances of success and enjoy fresh rhubarb for many years to come.