There’s a moment — and every serious coffee grower knows it — when you hold a ripe, cherry-red coffee fruit from a plant you grew yourself and you feel something close to disbelief. This tiny, glossy orb took three years to arrive. You watered it through two apartments, a broken heating system, and one very concerned cat. And somehow, it’s here.
That’s the thing about growing coffee at home that nobody warns you about: it’s less about gardening and more about commitment. You’re not planting basil. You’re entering into a relationship with a subtropical tree that will test your patience, reward your attention, and eventually — eventually — give you something you can’t buy at any price: beans you watched ripen.
This guide is for the people who are serious about that. We’ll cover everything from choosing the right variety and sourcing viable seeds, to the soil composition that most beginners get catastrophically wrong, to what your plant is actually telling you when its leaves turn yellow. We’ll also be honest about what you’re signing up for — including the parts that make even experienced growers second-guess themselves.

Why Coffee Is Harder (and More Possible) Than You Think
Here’s the counterintuitive reality about home coffee cultivation: the plant itself is not particularly fragile. Coffea arabica is a forest understory species that evolved to handle shade, temperature swings, and occasional neglect. What it can’t handle — what most home environments inflict without anyone realizing — is chronically low humidity.
Most growers fail not from dramatic mistakes but from slow dehydration. The plant looks fine for months. Then it looks slightly unhappy. Then the tips of the leaves go brown, then the whole leaf follows, and by the time you’ve Googled your way to a diagnosis, you’ve lost significant growing momentum. A humidity level below 50% will cause this. Most US and European homes in winter drop to 30–40%. That gap is where coffee plants quietly suffer.
“The most overlooked variable in home coffee growing isn’t light or soil — it’s the invisible moisture content of your indoor air.”
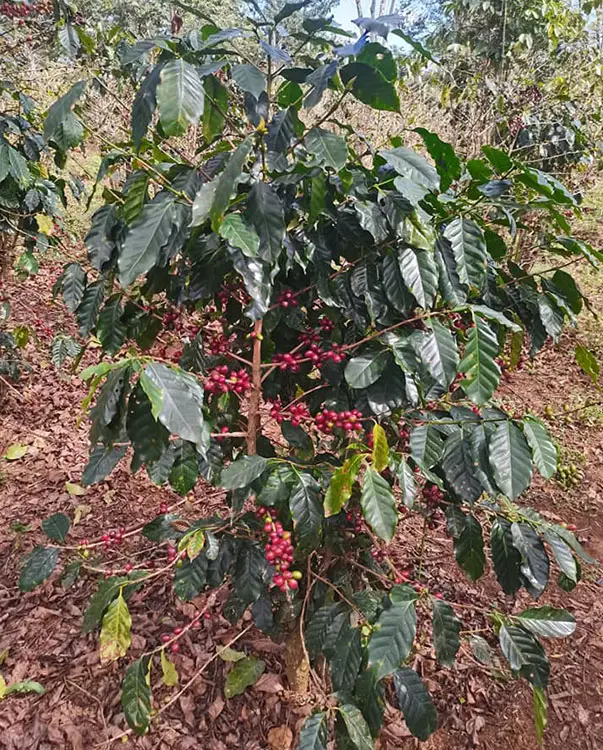
On the more encouraging side: coffee is remarkably tolerant of indirect light, forgiving about repotting timing, and — unlike orchids or certain tropicals — communicates its needs clearly once you know what to look for. Grow it right and it becomes one of the most dramatic, beautiful houseplants you own: glossy, dark leaves, jasmine-scented white flowers, and eventually, those famous red cherries.
Choosing Your Starting Point: Seeds vs. Nursery Plants
The first decision is whether to start from seed or buy a young plant. Both paths work. They just work differently.
Starting from seed is the purest form of the experience — and the slowest. Fresh coffee seeds (never roasted ones; those are dead) germinate in two to four months under ideal conditions, and a seedling needs another six to twelve months before it’s a plant you’d call robust. The advantage of seeds is cost and variety selection: you can source interesting heirloom arabica varieties, Ethiopian landraces, or even experimental cultivars that no nursery would stock.
The critical detail with seeds is freshness. Coffee seeds lose viability rapidly once removed from the fruit — within two to three months without proper storage. This is why buying “green coffee beans” from a roaster almost never works. You want seeds that were harvested and stored in cool, dry conditions within the last eight weeks, ideally from a specialty supplier who understands germination rates.
Seeds should be soaked in warm water for 24 hours before planting. This softens the outer parchment layer and meaningfully speeds germination. Skip this step and you might wait an extra month — long enough to assume the seed is dead and give up.
Buying a nursery plant gets you six to eighteen months ahead, depending on the plant’s age. The tradeoff is variety limitation — most nurseries stock Coffea arabica generically, and you have no insight into its provenance. For most home growers, this is a perfectly fine trade. You’re not cupping for a competition; you’re growing for the love of it.
Soil, Drainage, and the Mistakes That Compound
Coffee’s native habitat — the Ethiopian highlands, the misty slopes of Central American volcanoes — shares one consistent characteristic: excellent drainage. Coffee roots are deeply intolerant of waterlogged soil. They don’t slowly decline in wet conditions; they rot, and they rot faster than you’d expect.
The ideal home mix is roughly 60% quality potting soil, 30% perlite, and 10% orchid bark or coarse grit. This creates a structure that retains enough moisture between waterings while letting excess drain freely. The pH should sit between 6.0 and 6.5 — slightly acidic. This is worth testing with an inexpensive meter, because tap water in many cities is alkaline enough to shift your soil’s pH over months, causing nutrient lockout that looks exactly like a nutrient deficiency.
Get drainage right before you worry about fertilizer. A plant in perfect soil with mediocre fertilizer will outperform a plant in dense potting mix with premium nutrition every time. Roots that can breathe absorb nutrients efficiently. Roots sitting in compacted or waterlogged soil can’t — regardless of what you’re feeding them.
On the question of pots: terracotta is often recommended for humidity-loving plants, but for coffee, the conventional wisdom deserves scrutiny. Terracotta wicks moisture away from the soil, which seems helpful for drainage-sensitive plants — but in a dry home environment, it can dry the root ball too quickly, stressing the plant between waterings. In low-humidity homes, glazed ceramic or plastic pots actually produce better results. In naturally humid environments (coastal climates, homes with good air quality), terracotta is fine.
Light, Temperature, and the “Window Test”
Coffee is a shade-grown plant in nature, which means it evolved beneath a forest canopy with bright but diffused light. What it did not evolve to handle is direct afternoon sun through a glass window — which intensifies UV radiation and heat in ways that outdoor dappled shade never does.
The ideal indoor position is bright indirect light for six or more hours daily. A north- or east-facing window in the Northern Hemisphere typically delivers this beautifully. South- or west-facing windows can work, but use a sheer curtain to diffuse the afternoon sun.
Temperature should stay between 60–70°F (15–21°C), though coffee handles temperatures outside this range better than most sources admit — down to about 50°F for short periods without damage. What it genuinely cannot tolerate are sudden temperature swings: sitting next to a drafty window in winter, or against a heating vent, will cause more stress than a slightly cooler average temperature.
The standard advice — “water when the top inch of soil is dry” — is approximately correct, but it hides the more important truth: coffee responds to rhythm. A plant watered deeply every seven to ten days (depending on pot size, season, and humidity) builds a root system that expects and uses that moisture efficiently. A plant watered in erratic bursts — a little here, forgotten for two weeks, then flooded — develops stress patterns that show up as leaf curl and dropped leaves weeks after the actual mistake.
When you water, water thoroughly. Pour until it runs freely from the drainage holes. Then don’t water again until the top two inches feel dry. This saturate-and-wait cycle mimics the seasonal rain patterns of coffee’s native environment far better than light, frequent watering does.
One non-obvious point: the temperature of your water matters more than most houseplant guides acknowledge. Cold water — straight from the tap in winter — shocks tropical root systems. Let water sit overnight, or mix in a small amount of warm water to bring it to room temperature before applying.
Feeding Your Plant Without Overdoing It
Coffee is a moderate feeder. It responds well to nutrition but punishes overenthusiastic fertilizing with leaf tip burn, the same symptom caused by underwatering, which creates a genuinely confusing diagnostic moment for beginners.
During active growth (spring and summer), a balanced liquid fertilizer at half strength, applied every two to three weeks, is a solid baseline. In autumn, reduce frequency to once a month. In winter, let the plant rest and skip fertilizing almost entirely — it’s not in a growth phase and can’t use the nutrients.
Coffee particularly benefits from occasional doses of magnesium (Epsom salts at 1 teaspoon per gallon of water, once a month) because magnesium is central to chlorophyll production and coffee is a deep, dramatic green when it’s thriving. A slightly yellowish tinge to the leaves despite adequate light is often a magnesium deficiency masquerading as a light problem.
The Patience Phase: Year One to Flowering
This is the section nobody puts first, and it should be. The reason most home coffee attempts end in apparent failure is not horticultural — it’s psychological. The plant is alive, it’s growing, it looks completely healthy, and nothing resembling a coffee bean appears for three, sometimes four years. In the absence of fruit, people assume something is wrong.
Nothing is wrong. You are simply in the patience phase. The plant needs to reach a certain maturity — typically a trunk diameter of about half an inch and multiple mature lateral branches — before it will produce flowers. Flowering is triggered by a slight temperature drop (simulating the end of dry season) and a resumption of regular watering. If your home maintains a consistent temperature year-round, you may need to deliberately create a “cool rest” period of four to six weeks by moving the plant somewhere slightly cooler.
“The flowering moment, when it comes, is worth three years of uncertainty. The fragrance of coffee blossoms — jasmine-sweet, impossibly delicate — in a living room is genuinely extraordinary.”
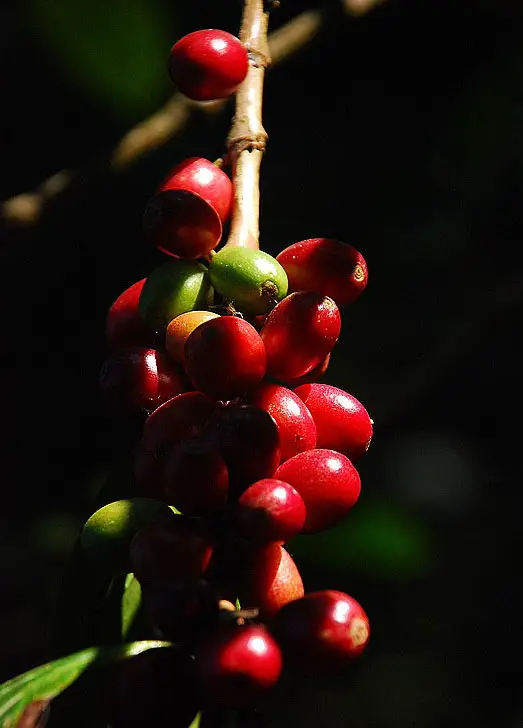
After flowering, the flowers drop and tiny green cherries develop. These take six to eight months to ripen fully to red (or yellow, depending on variety). The total window from flower to harvestable fruit runs roughly nine months on average. Plan accordingly — and keep a journal. Knowing when your plant flowered and being able to track the cherries’ development over months turns the whole experience into something meditative.
Diagnosing Common Problems
Most coffee plant problems fall into a small number of categories. Here’s an honest decision framework for the most common ones, because a misdiagnosis wastes weeks of effort treating the wrong thing.
| Symptom | Most likely cause | First step |
|---|---|---|
| Brown leaf tips | Low humidity or overfertilizing | Check humidity with a meter; reduce fertilizer if recent |
| Yellow leaves (lower) | Natural shedding or overwatering | Check soil moisture; a few lower leaves dropping is normal |
| Yellow leaves (general) | Magnesium deficiency or poor light | Try Epsom salt treatment; assess light levels |
| Drooping, wilted leaves | Underwatering or root rot | Check soil — bone dry = water; soggy = let dry completely and check roots |
| Sticky residue on leaves | Scale or mealybug infestation | Inspect undersides of leaves; treat with neem oil spray |
| No growth for months | Dormancy or rootbound | Check if roots are circling the drainage holes; consider repotting |
Processing Your First Harvest
When your cherries are fully ripe — deep red, slightly soft to the touch, and pulling cleanly from the branch — harvest them by hand. This part is deeply satisfying and surprisingly meditative. You’re unlikely to have more than a handful from a first harvest, which is fine. A small batch teaches you everything a large one does.
The simplest home processing method is the natural (dry) process: spread your ripe cherries on a mesh screen in a warm, ventilated spot and let them dry for three to six weeks. Turn them daily. They’ll shrink, darken, and eventually rattle when shaken — that’s the dried fruit separating from the bean inside. Then you hull the dried fruit (a rolling pin works in small batches), sort the beans, and let them rest in a breathable container for at least two weeks before roasting.
Roasting at home requires a pan, an oven, a dedicated popcorn popper, or a small drum roaster. The roasting process itself is an entire rabbit hole worth exploring separately — but the short version is: coffee beans need sustained heat (around 400–450°F) and constant movement to roast evenly. “First crack” — a popping sound like popcorn — signals light roast territory. Letting it go further develops darker, fuller flavors. Stop before “second crack” if you want to preserve the origin character of your beans.
The Bigger Picture: What This Plant Actually Teaches You
Here’s the thing that took a long time to understand properly: growing coffee is, in the most literal sense, a practice in delayed gratification. Every other fast-gratification element of modern coffee culture — the single-origin espresso, the dialed-in grinder, the pour-over ritual — arrives in minutes. Your plant arrives in years. And that difference in timescale does something to how you relate to the drink.
Growers who make it through the patience phase consistently report the same shift: they begin paying more attention to coffee generally. They taste things they didn’t before. They think about altitude and soil and rainfall when they read about a coffee’s origin, because they’ve now experienced, in miniature, what those words actually mean in terms of growing conditions.
This isn’t romanticization — it’s a genuine transfer of understanding that no amount of reading about coffee can replicate. You can’t read your way to knowing what it looks like when a cherry is ready to pick. You have to watch it change over months. That embodied knowledge is, quietly, the best reason to grow coffee at home.
The essential checklist
- Source fresh, viable seed or a 6–12 month nursery plant
- Mix well-draining soil (60% potting / 30% perlite / 10% bark)
- Position in bright indirect light, 6+ hours daily
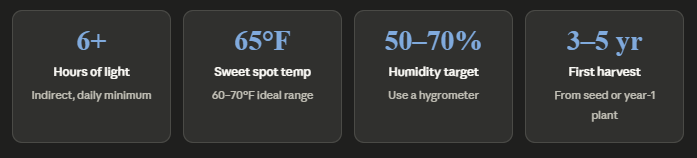
- Measure and maintain 50–70% humidity (get a hygrometer)
- Water deeply on rhythm, not on schedule
- Fertilize at half-strength during active growth only
- Create a cool rest period to trigger flowering in year 3–4
- Track flowering and cherry development in a journal
- Harvest when cherries are fully red and slightly soft
- Dry-process for simplicity; rest beans 2 weeks before roasting
Insights drawn from cultivation observations across arabica growing in temperate home environments. Timeline estimates reflect typical indoor growing conditions; outcomes vary with variety selection, local humidity, and light quality. The coffee varieties discussed are Coffea arabica; Coffea canephora (robusta) follows broadly similar care but tolerates more heat and humidity variation.