There are many advantages to starting your own compost pile, which you will soon realize. Firstly, you’ll be making a very rich, all-natural fertilizer for your garden, and secondly, you’ll be able to put more of your food scraps to good use. You are doing something that can be very good for your garden, and it is also wonderfully natural, meaning that you are improving your garden without hurting the earth.
Definition Of Composting
Composting is an easy and natural way to reduce waste while producing a nutrient-rich soil amendment that can be used in gardens and landscaping. Composting involves the decomposition of organic material (such as plant material, food scraps, and animal manure) into a rich, soil-like substance that can be added to garden beds or used as potting soil. Composting is beneficial for both the environment and your garden, as it reduces the amount of waste going to landfills and helps promote healthy soil.
In order to make your own compost pile, you will need some basic supplies such as a compost bin or tumbler, organic materials such as leaves, grass clippings, fruit and vegetable scraps, eggshells, coffee grounds, etc., water, air (oxygen), and bacteria. The bacteria break down the organic matter into smaller pieces which are then digested by worms and other organisms. This process creates heat which helps speed up the composting process. It is also important to keep your compost pile moist but not wet in order for it to decompose properly.
Once you have all of your supplies gathered together you can start building your compost pile by layering the different materials in alternating layers. Start with a layer of nitrogen-rich material like green grass clippings or kitchen scraps followed by a layer of carbon-rich material like dried leaves or sawdust. Continue layering until you reach around three feet tall then top it off with some soil or finished compost if available. Finally, cover the pile with plastic sheeting or a burlap sack to keep moisture in and pests out. With proper care, your compost pile should be ready to use within six months!
Benefits Of Composting
Composting offers a variety of benefits, not only for the environment but also for your garden and even your wallet. Compost is a great soil amendment, providing vital nutrients to the soil and helping it retain moisture. It also increases the soil’s ability to support plant growth, making it easier to maintain lush, healthy plants. Additionally, composting can reduce your waste output by up to 30%, as organic materials that would otherwise end up in landfills are diverted and recycled into nutrient-rich compost instead.
Making your own compost pile is easy and highly cost-effective. All you need is some basic equipment, such as a compost bin or tumbler, and materials like leaves, grass clippings, kitchen scraps, and manure. When these materials are mixed together in proper ratios with air and water added, they break down over time creating rich compost that you can use in gardens or flower beds without having to buy expensive fertilizer or mulch from stores.
By creating your own compost pile, you can save money while reducing waste and helping the environment at the same time. Plus you will be rewarded with nutrient-dense compost that will help promote healthier plants in your garden or flower beds.
Necessary Materials
Creating a compost pile is fairly simple, but there are some materials you’ll need to get started. First, you’ll need an area in your yard that’s away from direct sunlight and has good drainage. You should also look for a spot that’s easy to access.
Next, you’ll need organic material to use as your compost. This can include leaves, grass clippings, vegetable scraps, fruit peels, coffee grounds, and tea bags. Be sure to avoid meat products, dairy products, and fats.
Lastly, you may want to invest in a few tools to help make the composting process easier. Tools such as pitchforks and compost bins can be helpful when turning the pile or keeping animals out of it. You can find these items at most home improvement stores or gardening centers.
Composting is an economical way to enrich the soil while reducing waste in landfills. With the right materials and knowledge of how it works, you can easily create a compost pile of your own.
Preparing The Area
Now that you have the necessary materials, it’s time to prepare the area for your compost pile. Before you start, make sure the chosen location is level, free of weeds and grass, and away from trees. You should also plan ahead for when your compost pile is finished – what will you do with the soil?
The first step in preparing the area is to create a flat base. Start by removing any rocks or debris from the space. Then use a rake or shovel to level out the surface. Make sure there are no large bumps that could cause uneven distribution of composting materials later on.
Next, build an edge around your compost pile using wooden boards or rocks. This will help contain your pile and keep it from spreading out too much over time. Once your edge is in place, cover it with a tarp to help keep moisture in and discourage rodents from entering. By following these steps, you can ensure that your compost pile will be well-contained and properly set up for success!
Collecting Organic Materials
Collecting organic materials for your compost pile is key to a successful pile. The most common materials are vegetable scraps, fruit peels, eggshells, coffee grounds and filters, tea bags, and yard trimmings like grass clippings or leaves. Any of these items can be added to the pile as you produce them. Keep a container in your kitchen to collect any food waste that can go into your compost pile.
Organic materials from outdoors can also make great additions to the pile. Sticks, branches, or small twigs are great for adding structure and aeration to the compost bin. You’ll need some carbon-rich materials too, like dry leaves or straw, which provide the balance of nitrogen needed for decomposition.
When collecting outdoor organic materials, it’s important to avoid anything that may have been treated with pesticides or herbicides. If you’re uncertain about the origin of something you find outdoors, it’s best not to add it to your compost pile!
Building The Pile
Building the pile is the most important step in creating a compost pile. You’ll need to collect organic materials such as food scraps, leaves, grass clippings, and egg shells that will break down into compost. Start by finding a spot in your yard or garden that’s big enough for the compost pile. Make sure it’s not too close to trees or other plants since they can be damaged by the heat generated by the decomposing materials.
Once you’ve found an ideal spot, begin layering your organic materials in alternating layers of dry and wet ingredients. The dry ingredients should include straw, sawdust, shredded paper, or dried leaves. Wet ingredients should include fruit and vegetable scraps, coffee grounds, tea leaves, and manure from animals like horses and cows. For each layer of wet ingredients add a thin layer of soil to help encourage microbial activity.
To keep your compost pile healthy and active it’s important to turn it regularly with a shovel or pitchfork so that oxygen can reach all parts of the pile. This aeration will also help speed up the decomposition process while keeping away any unwanted pests like rodents or insects. When turning your pile add some more water if needed until it has a moist texture similar to a wrung-out sponge. With regular maintenance, you’ll have rich compost ready to use in no time!
Maintaining The Pile
Once the compost pile is set up, maintain it by adding materials to it on a regular basis. To speed up decomposition, turn the pile every two to four weeks by shoveling the contents from one side of the bin to the other. This will help aerate the material and allow oxygen to penetrate. If the pile starts to look dry, water it until lightly moistened. Monitor it regularly for signs of excess moisture or moldy spots; if either of these occurs, add more dry material like leaves or wood chips.
If you live in an area with cold winters, cover your compost pile with a tarp or plastic sheeting when temperatures drop below freezing. This will keep any heat generated inside the pile and prevent it from dissipating too quickly. Also, take care not to over-water your compost during this time since too much liquid can inhibit decomposition and suppress beneficial bacteria growth.
Your compost pile should produce nutrient-rich soil within three to six months, depending on how often you turn and water it as well as how much material you add. For best results, make sure your bin doesn’t get too hot because high temperatures can kill beneficial bacteria that aid in decomposition. With proper maintenance and care, your compost pile will provide you with nutrient-rich soil for years to come!
Turning The Pile
Once the pile has been established, it’s time to start turning it. This is an important step in ensuring that the compost decomposes properly. Typically, turning should be done every few weeks or months, depending on the size of the pile and how quickly you want to compost.
Before turning the compost, make sure to wear gloves and a dust mask to protect yourself from any bacteria or particles that may have accumulated in the pile. It’s also important to turn the pile into sections so as not to disturb any living organisms within it. To do this, use a pitchfork or shovel and begin at one end of the pile by simply poking into it and flipping over each section until you reach the other end. As you go along, mix up all of the material with fresh air and moisture to ensure proper decomposition.
Once you’ve fully turned the pile, give it a good misting with water if necessary. This will help provide additional moisture to aid in decomposition. Now your compost is ready for use! You can take advantage of its nutrient-rich qualities by adding it directly into your soil or using it as mulch around plants and trees.
Troubleshooting Common Problems
Once you’ve got your compost pile set up, there are a few common problems you might encounter. The first is when the pile is too wet. If this happens, you’ll want to add more dry materials like straw or sawdust to absorb the extra moisture and aerate the pile. You may also need to turn the pile more often so that materials on the bottom are brought up top, allowing air to circulate through them.
If your compost pile has become too dry, you can add water to it and mix it in with a shovel or rake. Just make sure not to add too much water since it will cause anaerobic bacteria to form in your compost. To keep the balance right, mix in some moist materials like grass clippings or fruit and vegetable scraps as well.
In some cases, your compost may start to smell bad due to anaerobic bacteria forming in it. This is usually because it’s either too wet or has been left undisturbed for too long without having air circulated through it. In order to fix this problem, turn the pile more often and add more dry materials if needed. After doing this for a few weeks, your compost should start smelling better again.
Knowing When Compost Is Ready
Once the compost pile has been built, it will take some time for it to break down into usable material. It is important to know when your compost is ready so that you can use it in the garden or around your home.
One way to tell if the compost is ready is by the smell. If the compost smells sweet and earthy, then it is likely that it is ready to use. The texture of the compost should also be considered. When finished, the compost should be crumbly and dark brown in color.
Finally, a simple test can be done by squeezing a handful of compost together and then releasing it. If the material holds together, then it’s likely that your compost is finished and ready to use. To ensure that all organic materials have broken down, check for any recognizable pieces of organic matter before using them in your garden or around your home.
Frequently Asked Questions
What Are The Best Organic Materials To Use For Composting?
When it comes to composting, the best organic materials to use are those that will break down quickly and provide essential nutrients for plants. Additionally, these materials should be easily accessible and affordable. There are a variety of organic materials that can be used for composting, including kitchen scraps, leaves, grass clippings, and even small sticks or twigs.
Kitchen scraps are one of the most common ingredients in a compost pile. Many types of food scraps, such as fruit and vegetable peels and cores can be added to the pile. The bacteria in the pile will help to break down these materials quickly, providing valuable nutrients for your plants. Additionally, adding kitchen scraps is a great way to reduce waste by reusing items that would otherwise end up in the garbage.
Leaves are another excellent source for compost material. They help to add structure and aeration to the pile which encourages microbial activity. Leaves also contain essential nutrients like nitrogen which help with plant growth. Additionally, leaves tend to be plentiful during certain times of year making them an easily accessible resource for composting.
Grass clippings are also great additions to a compost pile as they provide nitrogen-rich materials that boost microbial activity in the pile. Grass clippings should be mixed with other materials like leaves or shredded paper for optimal results since they tend to form mats when piled together and slow down the decomposition process.
Small sticks or twigs can also be added to a compost pile but should generally not make up more than 10% of its content as they take longer to decompose than other organic materials. Sticks can help add structure and aeration while providing some additional nutrients like phosphorus and potassium which helps aid in plant growth.
All of these materials can contribute important elements required for healthy composting; however, it’s important not to overload your pile with too much material at once as this can cause it to become compacted or unbalanced resulting in slower decomposition times or anaerobic conditions – both of which will inhibit microbial activity in your pile. Ultimately, understanding what type of organic material works best for different stages of your composting process is key for creating high-quality compost that benefits your garden or landscape beds over time!
How Often Should The Compost Pile Be Turned?
Turning a compost pile is an important part of the composting process. It helps to aerate the pile, allowing oxygen to reach deeper layers and speeding up the decomposition process. Additionally, it helps to keep the pile from becoming too compacted and prevents bad odors from forming. So, how often should you turn your compost pile?
The answer to this question depends on what materials you are using in your compost pile. If you are using mostly green materials like kitchen scraps and grass clippings, then your compost should be turned in every two weeks or so. This allows fresh oxygen to reach the bottom of the pile, which will help bacteria break down organic matter more quickly. If you’re using more brown material such as sawdust or shredded leaves, then turning should occur about once a month because these materials can produce anaerobic conditions if not aerated properly.
It’s also important to note that when turning a compost pile, it’s best to mix all the layers together rather than just stirring up the top layer or fluffing up one side of the pile. This will ensure that all of the material inside gets properly mixed and aerated for optimal decomposition. Additionally, it’s beneficial to add water when turning your compost as this will help keep everything moist so that microbes can do their job efficiently.
When done correctly, turning a compost pile is essential for ensuring that everything breaks down properly and quickly while also preventing unpleasant odors from developing due to anaerobic conditions. To get the most out of your compost bin or heap, make sure to turn it at least once every two weeks if using mostly green materials or once a month if using more brown materials – just be sure to mix all of the layers together and add some water for good measure!
Is Composting Suitable For Small Or Urban Gardens?
Composting can be an excellent way to fertilize and enrich the soil, but is it suitable for small or urban gardens? The answer is yes! With careful planning and the right materials, composting can be done in any space.
Composting in a small garden or urban area requires a bit more planning than for larger spaces. You’ll need to find a spot that won’t disturb other plants or disrupt foot traffic. It’s also important to have easy access to the pile from all sides so you don’t have to stretch your arms too far when turning it. You’ll also want to make sure the pile doesn’t contain anything that could attract pests, like meat scraps or kitchen waste.
You should also take into account how often you will need to turn the pile (at least once every two weeks). If you don’t have enough time or energy to turn it frequently, then you may want to consider setting up smaller compost piles instead of one large one. This will make it easier and quicker to turn them over as needed. Additionally, having multiple smaller piles allows for more control over the composting process since each pile can be dedicated to different materials such as leaves, grass clippings, and kitchen waste.
Composting in small or urban spaces is certainly possible but requires careful consideration of location, materials used, and how often it needs to be turned. With these considerations taken into account, anyone with a small garden or apartment balcony can enjoy the benefits of composting their own organic fertilizer!
How Long Does It Take For The Compost To Be Ready To Use?
Composting is an incredibly useful way to both reduce waste and create nutrient-rich soil for your garden. But how long does it take for the compost to be ready to use? The answer depends on a few factors, including the size of your pile, the materials you are composting, and if you’re actively turning it.
The length of time that it takes for your compost pile to break down into usable soil can vary from a few weeks up to two years. If you are using a smaller compost bin or pile, then you may only need to wait a few weeks before you can begin using the soil in your garden. On the other hand, larger piles may require up to two years before they are fully broken down into usable material.
The type of material that you add to your compost pile can also affect how long it takes for the pile to be ready for use. Materials such as kitchen scraps will usually decompose faster compared to woody materials like twigs or leaves. Additionally, if you are actively turning your compost pile on a regular basis this will help speed up the process and make sure that all the materials have been properly broken down into usable soil.
No matter what type of compost bin or pile you have set up in your garden, with regular maintenance and some patience, eventually it will be ready for use! With nutrient-rich soil being produced as a result, it’s well worth the wait!
Do I Need To Cover The Compost Pile With A Tarp Or Other Material?
Covering a compost pile can be an important step in the composting process. Whether it’s with a tarp or another material, covering your compost pile helps to keep moisture in and other elements out. This helps create the ideal environment for microbes to break down organic matter into valuable nutrients for your garden.
When selecting a cover, you’ll want to choose something light enough that it won’t smother the pile and prevent oxygen from reaching the microbes, but heavy enough that it won’t blow away. A tarp is usually a good option. You can also use an old sheet or burlap sack if you don’t have a tarp available.
It’s important to make sure the covering is securely attached so that it won’t move around. To do this, use rocks or stakes to anchor the edges of the tarp or sheet in place. If there are gaps between the ground and your covering material, you may want to add extra weight around them as well. This will help keep pests out and keep rainwater from eroding away any of your compost materials.
To ensure you’re creating an optimal environment for composting, be sure to check your compost pile every few weeks and adjust the cover if needed. Doing so will help ensure that your pile remains healthy and ready for use when you need it!
Composting in a Bin instead of a Compost Pile
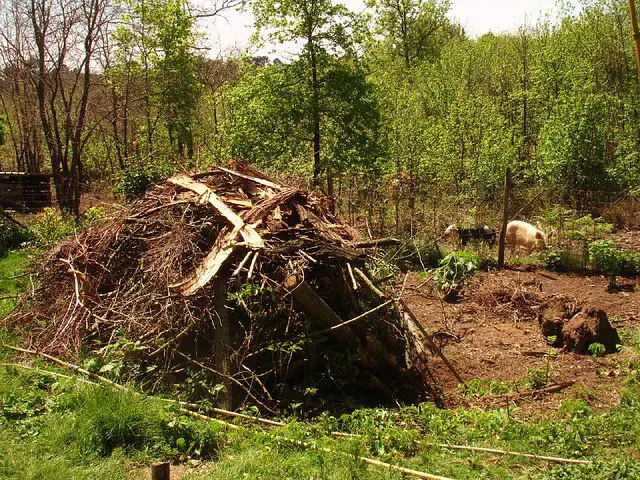
Many experienced composters and master gardeners will sometimes tell you that you don’t even need a compost bin to do your composting. You can do it in a big pile. You can do a 3-feet(Length) by 3-feet(Width) by 3-feet (Height) pile, and that’s going to be how you do your most effective composting.
Technically you know that’s more or less accurate if you’re good at composting and you’re experienced, and you know what you’re doing. But this is not really working for some people, especially those with little or no experience in composting.
Many cities and municipalities have rules or laws against composting with uncovered piles because they can attract rodents, and the smell can also stink. If you do it correctly, there’s no smell, and it won’t attract rodents. Your neighbors may not like it, and they may complain to the municipal council, which will make you in trouble. Suppose you’re not good at composting. You might end up with a big trash heap instead of an operating functioning compost pile.
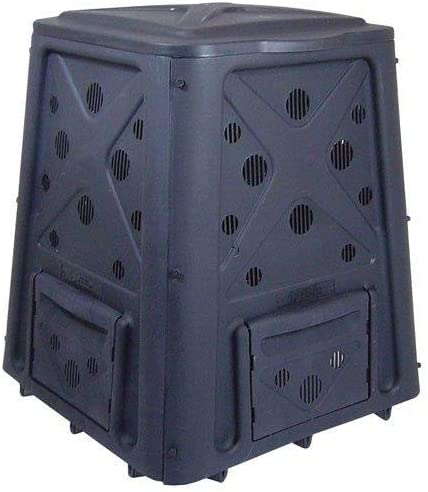
To avoid all these issues, you should do your compost with the bins. Compost bins are nice and neat. You can keep everything covered up to keep any rodents away.
If you live in an arid area, compost bins can help keep the moisture in since they’re dark in color. They will capture the heat from the sun and help your compost heat up. They are straightforward and convenient to use.

Compost piles vs. Composting in a Bin
Compost Piles
- Hard to measure and keep the size of compost that you want.
- Can be against the law in your city.
- It can be smelly.
- It can be messy.
- Can attract rodents.
- Your neighbor might complain about it.
Compost Bins
- Easy to keep the size of the compost that you want.
- No stink smell is being released.
- Easy and convenient to use.
- Keep everything nice and neat.
- Keep the compost moist.
- Capture the heat from the sun.
If you have a tumbling compost bin, then it will ease your job of composting.