Irony aside, anyone can master the art of worm farming. Contrary to popular belief, it takes more than just a few worms and dirt in order to maintain a successful worm farm; rather, there is an intricate balance of factors that must be carefully attended to in order for such a venture to truly thrive.
For those who are looking for ways to contribute their resources towards sustainability efforts or are simply curious about this practice, creating and maintaining a worm farm may seem daunting at first glance. In truth, however, with the correct guidance and appropriate dedication, even those new to vermiculture can become proficient in no time.
Worm farms serve as environmental stewards by transforming organic waste into nutrient-rich soil while also providing natural pest control benefits due to their predatory nature. They are capable of producing both castings – which contain vital minerals used for plant growth – and liquid fertilizer – known as ‘worm tea’ – that greatly enhances soil fertility if applied correctly. With proper care and attention put towards their upkeep, they can easily become self-sustaining units that require minimal maintenance over time.
You will need to have one small bin inside a larger bin, with a layer of damp newspaper in the top bin, covered with damp soil. This is the basis of a worm bin. With the worms allowed to crawl around in the soil and newspaper, you have a container of scrap fruits and vegetables added to the worm farm once a week. Garden waste must be mulched and left to rot in a container for a week before slowly being fed into the worm bin.
What Is A Worm Farm?
A worm farm is a form of composting system in which earthworms are used to convert organic material into soil-enriching castings. Worm farms consist of trays, or bins, filled with bedding such as garden soil and shredded newspaper, cardboard or coir fiber where the worms live and feed on food scraps.
The worms process the food waste and produce casts that can be harvested from the bottom of the bin and added directly to gardens as fertilizer or mixed with other materials for use as potting soil. Additionally, liquid nutrient-rich tea can also be collected in some systems.
Worm farming has become an increasingly popular method of composting due to its convenience, smaller space requirements, ease of maintenance, and minimal odor compared to traditional compost piles. It requires little effort beyond providing basic care and feeding for the worms; no turning or stirring is needed, unlike more labor-intensive conventional methods. Furthermore, it produces a high-quality end product that provides numerous benefits for plants in addition to being environmentally friendly by reducing waste sent to landfills.
As a result, this type of composting is gaining traction among hobbyists looking for ways to reduce their environmental impact as well as professional growers seeking a reliable source of nutrient-rich fertilizer. With these advantages in mind, it’s clear why many have begun exploring how they too can benefit from having their own worm farm at home or business.
Benefits Of Having A Worm Farm
A worm farm offers a plethora of practical perks to those looking for an efficient, eco-friendly way to reduce their impact on the environment. Here are four primary benefits that come with having a worm farm:
- Composting – Worms produce nutrient-rich soil from food waste and other organic materials, creating compost in just weeks rather than months or years as is the case with traditional composting methods.
- Worm tea fertilizer – With regular feeding and maintenance, worms create liquid vermicompost which can be used as natural plant fertilizer without any toxic additives.
- Noise reduction – Unlike most other livestock, worms do not require much noise making them ideal for urban settings where noise levels need to be kept low.
- Recycling – By recycling scraps of food and other biodegradable matter into nutrient-rich soil, you’ll keep more out of landfills while also reducing your carbon footprint.
Setup Requirements
Setting up a worm farm requires resources and preparation. Firstly, it is necessary to acquire the right materials for housing your worms. Plastic or wooden boxes with holes in them are suitable; however, if using plastic, make sure that it is food-grade quality and contains no toxins.
Secondly, you will need bedding material such as shredded newspaper or coconut coir to provide comfort for the worms. It should be damp but not wet when added to the box. Finally, you must obtain live composting worms from an established source like a gardening center or online retailer.
Once all the components have been gathered together, assemble the box by adding the bedding material first followed by the composting worms and finally topping off with some soil or leaf litter for extra nutrition.
How to Start a Worm Farm?
All you need to know about worm farming is the fundamentals in order to start one in your garden. After the initial setup, many worm farm owners find that the most time and effort is spent on maintenance because the worms will continue to do their work on their own provided the right conditions (food, water, and temperature).
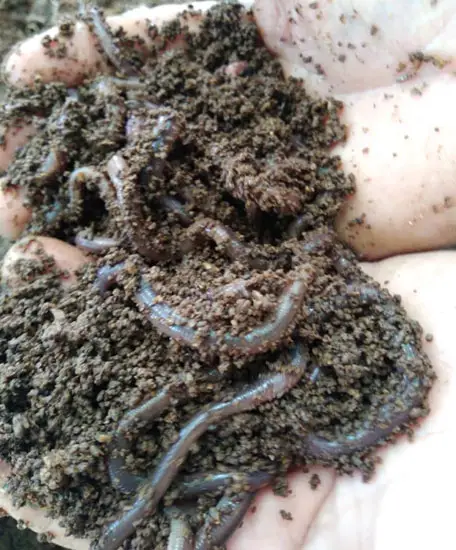
To begin your worm farm, you will need the worms themselves in addition to the basic worm farm setup, which can be either homemade or purchased online. When first confronted with the wide variety of worms available, most people simply give up here. Fortunately, you can stick to a standard format. Fast-eating and manageable, red wrigglers are a great choice. You can’t ask for better worms for a new worm farm than these.
Worm farm setup
You should get the worm farm ready for use before you start adding worms and food scraps, as doing so will ensure the best possible results from your efforts. Unfortunately, many people rush this step and end up with less-than-ideal farms once things get rolling. Spending a little extra time on the initial layout of your worm bin will save you a lot of trouble in the long run.
Setting up the worm bin is a multi-step process that requires some background knowledge. Because so many people become confused by overly detailed instructions, we will instead provide a concise summary of the steps involved.
- Bins: It is recommended that you use two different-sized recycling bins. Usually, there are three, with one occupying each of the two others. Two holes, opposite each other, should be drilled into the top of the smaller bin. If you’re wondering whether the bottom bin is for collecting the worm tea, you should have smaller holes spaced about two inches apart all the way through the bin.
- Location: Your worm bin will thrive or perish depending on its location. It needs to be in a cool, dry place, like a garage or, in warmer countries, under a tree. A common way for new worm farmers to lose their worms is by failing to protect their compost from freezing temperatures in the winter.
- Layered: The two smaller containers can now be stacked atop one another in the larger sump container. The worms’ new home will be the top bin, where they can wiggle up and down the layers of newspaper and soil as they want. Worm castings are collected in the central bin. You can use the bottom bin to catch any dripping water from your compost.
- Feeding: While feeding the worm for the first time, add a layer of damp newspaper on top of some damp mud. Put the prepared food scraps on top of everything. It will get the worms on the correct layer of the worm farm and eat the scraps of food and live in the mud more quickly.
- Composting: When you first set up your worm bin, you need only a small amount of water in the sump to keep the top layer of soil, newspaper, and worms from drying out. Once the worms get to work, they’ll turn all that detritus into rich compost. Any time you need compost, you’ll have to move the top layer to a new bin if you’re using a system with a bin and a sump.
What Materials Do You Need To Make a Worm Farm?
You might think a finished worm farm is the most intricate garden addition after seeing one. On the other hand, with a little nudging from the owner and the aid of a picture, you can learn that the opposite is true. Worm farms are one of the most elementary methods to improve plant health while working in a garden.
Build a worm farm with just some bins, newspapers, moist soil, and leftovers. In addition to these, once every few weeks you should add more soil for the worms to live in, and you may need to empty some of the compost to make room for more. But it really is that easy, and most worm farms can take care of themselves just fine all year round.
Getting everything set up properly for the first time can be the most challenging part of starting a worm farm. Those who have tried and failed to start worm farms before can provide some of the best examples of successful farms today. It’s easy to experiment with different worm farm setups until you find the right one for your environment, thanks to how cheap they are to create.
How Many Worms Do You Need To Start With?
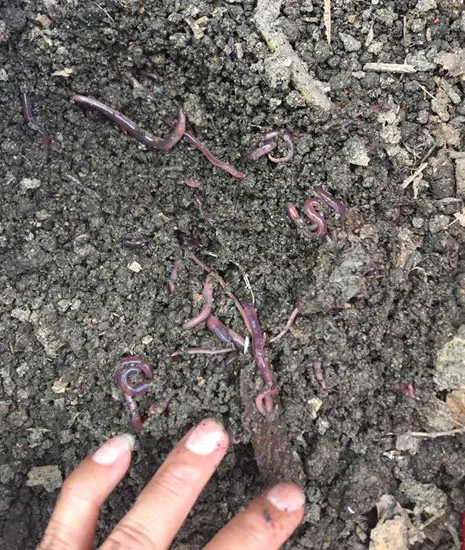
Throw in the worms once you’ve got everything else ready, including damp newspaper, good soil, and leftovers. At this point, you should start thinking about where you can get your hands on some worms; some people go to bait shops, while others get a head start by trading with other worm farmers.
In order for your worm farm to get off to a good start, you’ll need at least 20 worms so that they can breed without killing each other. Many worm farms can’t handle more than a few dozen worms at a time, so make sure you don’t overcrowd your setup.
Worms that are too close together in your worm farm prevent them from moving around and having a pleasant experience. Over time, your worm farm will expand, and as this happens, you’ll want to make sure there aren’t too many worms in there. You can use the extras to fertilize your garden, or even start a new worm farm.
Ideal Environment For The Worms
Providing the perfect environment for worms is paramount to successful worm farming. For ideal conditions, a few key elements must be taken into account, from temperature and moisture levels to substrate materials and shelter. Temperature control is essential to ensure healthy, thriving worms.
Worms thrive best in temperatures between 55°F-77°F (13°C – 25°C). A stable temperature range should be maintained at all times as extreme fluctuations can cause stress on the worms which lead to health issues such as decreased breeding activity and slower growth.
Humidity plays an important role in setting up a conducive home for your worms. Too little humidity or too much can both have detrimental effects on the welfare of the worms. To maintain optimal humidity levels, make sure that there are air holes around the lid of the container so that gases can escape and fresh air enters while keeping moisture at bay. Additionally, adding dampened newspaper strips or cotton wool balls will help regulate proper humidity levels without making it uncomfortably humid for the worms.
Lastly, providing suitable substrates like shredded cardboard and newspaper for bedding material helps keep them warm and insulated against sudden changes in environmental temperature along with giving them a safe place to hide when necessary. It also serves as a source of food since these organic materials contain cellulose which breaks down easily allowing easy digestion by worms who feed off of decomposing organic matter found within their natural habitat.
Choosing The Right Soil And Container
Worm farming is a rewarding process that can yield many beneficial results. When starting a worm farm, it is important to consider the type of soil and container necessary for optimal growth conditions.
The first step in selecting the right soil is to understand what kind of medium worms need in order to survive. Generally, they require loam-based soils with high levels of organic matter and good drainage capabilities. The ideal blend should contain some composting material such as leaves or straw along with some topsoil or clay mix.
This combination will provide worms with the nutrients they need while allowing them to breathe properly since oxygen enters through their skin pores. Additionally, adding some sand helps maintain the moisture content in the soil without making it too dense.
Once an appropriate medium has been chosen, deciding on a suitable container is essential when setting up a new worm farm. Different types of containers are available depending on how much space one has at home and how intensively one wish to manage the farm. Some popular options include plastic bins, wooden boxes, terracotta pots, or even recycled objects like old bathtubs.
It’s important to make sure that whatever container you choose has enough air holes drilled into it so that oxygen can enter freely and prevent any waterlogging from occurring inside the bin.
When choosing both soil and container for your worm farm, ensure that all materials used are non-toxic and do not contain harmful chemicals which could be detrimental to the health of your worms. With this knowledge in mind, begin your journey of creating a sustainable environment where these small creatures can thrive.
Collecting The Worms
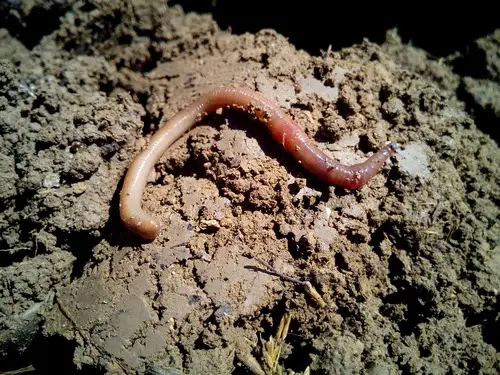
The next step in creating a successful worm farm is collecting the worms. With the soil and container ready, it’s time to take advantage of all that nature has to offer. Worms are available from many sources – garden stores, pet shops, or even your backyard. They can be collected by hand or purchased online; both methods require some knowledge about the species being acquired.
There are different types of worms with various characteristics and preferences for environments. The most common type used for composting is Eisenia fetida (red wigglers). These small but hardy creatures thrive in moist, dark conditions where there is plenty of organic material to feed on. Other varieties may also work well depending on the desired outcome; however, each should be researched before adding them to your bin.
It’s important not only to select the right kind of worm but also to consider how much you need when starting up your farm. A good rule of thumb is one pound per square foot – this ensures enough space for reproduction and adequate food resources so they can reproduce successfully. Once you have gathered enough worms, gently place them into the bedding and cover them lightly with dampened newspaper strips or burlap bags until they become accustomed to their new home. Now we’re almost done setting up our worm farm-the final step will be providing sustenance for these wriggly friends.
Feeding The Worms
Feeding the worms is an important part of worm farming. Choosing a nutritious food source and avoiding any potential contaminants is essential for creating optimal conditions to help the worms thrive.
Organic matter such as vegetable scraps, fruit peels, leaves, eggshells, and coffee grounds are ideal sources of nutrition for the worms in addition to their bedding material. Avoid feeding them items that may contain pesticides or chemical fertilizers like grass clippings from lawns treated with these products.
Foods high in acidity should also be avoided, such as citrus fruits and tomatoes. Additionally, dairy products, meat, oils, and processed foods should not be given to worms because they can cause odor problems due to decomposition.
It is also important to ensure that only small amounts of food are added at a time so that oxygen levels remain adequate inside the bin. Overfeeding will reduce available oxygen which could potentially kill off your entire colony within just 24 hours. When providing food for the worms it is best practice to bury the organic matter beneath some dry bedding material before adding more water if necessary; this helps keep odors down while keeping moisture levels balanced. This simple step allows you to provide nourishing meals without causing unpleasant smells or excess liquid build-up in your system.
These practices create an environment conducive to healthy worm populations and will help maintain proper nutrient balance throughout your farm’s ecosystem moving forward. To properly care for your worms it is now necessary to focus on maintaining appropriate moisture levels in order for them to fully benefit from all of their tasty treats.
Maintaining Moisture Levels
Studies have found that the optimal moisture level for a successful worm farming experience is between 60% and 80%. It is important to monitor soil moisture levels in order to keep worms healthy, as too much or too little water can cause irreparable damage.
The most effective way of monitoring soil moisture levels is through manual checking. This involves using either your finger or a tool such as a shovel to dig into the topsoil layer and feel if it is moist enough. If not, then add water until the desired amount has been reached. The use of mulch can also help retain moisture within the bin but should be applied lightly due to its ability to trap oxygen out of the system when used excessively.
Vermicomposting systems are designed with drainage holes at the bottom of each bedding tray which allows excess liquid to drain away from the bin without damaging any living organisms inside.
These systems may come equipped with an adjustable valve that will allow you to control how much water flows from one tray to another depending on soil moisture levels. Utilizing this feature ensures that even distribution of moisture throughout all trays and helps maintain a consistent environment for all inhabitants.
Managing Temperature Levels
Maintaining optimal temperature levels in a worm farm is essential for its success. Worms are ectothermic, meaning they rely on their environment to regulate body temperature. If the worms become too hot or cold, they will enter into a state of stress and stop eating; this can lead to death if not addressed quickly.
When it comes to maintaining ideal temperatures in a worm bin, there are several factors that should be taken into account:
- Location – Place your bin away from direct sunlight or any sources of heat/cold drafts.
- Insulation – Use insulation such as Styrofoam sheets around the sides and bottom of the bin to help maintain an even temperature inside.
- Ventilation – Make sure adequate ventilation is available by adding holes at regular intervals throughout the walls and base of the bin. This will allow air to circulate freely and keep temperatures within normal ranges.
- Covering – Use something like burlap or plastic sheeting over the top of the bin when necessary to protect against extreme weather conditions (i.e., snowfall or high summer temperatures).
- Moisture Levels – Monitor moisture levels regularly, as excessive moisture can cause fluctuations in temperature that could harm your worms.
How Do You Harvest Worm Farm Castings?
Harvesting worm farm castings is an essential part of the process for any successful and sustainable worm farm. The benefits of harvesting include producing a nutrient-rich material that can be used as fertilizer, improving soil health, and reducing waste. Although it may seem daunting at first, with proper preparation and understanding of the process, anyone can successfully harvest their own organic compost from their worm farm.
The most important factor in harvesting is timing; it’s best to wait until your worms have digested all the food they’ve been given before beginning to collect castings. This allows them to produce more high-quality compost than if you were to prematurely remove what they’ve already processed. When ready, begin by carefully separating out any remaining uneaten pieces of food or bedding material from the collected castings using a sieve or tray system.
Once everything has been separated out, move on to drying the harvested compost thoroughly before use. Good ventilation is key here—exposing the worm casts to sunlight will help speed up this process significantly but be sure not to leave them exposed for too long as this could damage some beneficial microorganisms within the mixture. After drying for a few days (or weeks depending on humidity levels), your freshly harvested worm farm castings are now ready for use.
Troubleshooting Common Issues
Worm farms are relatively easy to maintain, but problems can arise. It is important to be aware of common issues and how to troubleshoot them:
- Odor – If your worm bin is emitting an unpleasant smell it could indicate a few different things; the most likely cause is a lack of oxygen due to too much moisture or food that has not been adequately processed by worms. To fix this, reduce the amount of food added, aerate the compost more often, and increase ventilation.
- Worms leaving the bin – This could mean there isn’t enough organic matter in the bin for them to eat or that there may be too much ammonia from urine-soaked bedding material which will burn their skin if left untreated. The solution is to add more carbon-rich materials such as shredded newspaper or cardboard and to replace any soiled bedding with fresh material regularly.
- Pests – Flies, ants, mites, and other pests can invade your worm farm if conditions aren’t kept clean and dry. Monitor your bins closely for signs of infestation and take measures such as adding predator insects like centipedes or beetle larvae if necessary. Additionally, ensure you have adequate drainage holes at the bottom of each container and use lids when possible.
To prevent these issues from becoming problematic in the first place, regular maintenance is key which includes monitoring temperatures within the bin, checking soil moisture levels, turning over compost layers periodically, avoiding overcrowding with worms, examining food scraps before adding them to the bin and ensuring all bedding materials remain dry and uncontaminated by animal waste products.
Preventative Maintenance Tips
An ounce of prevention is worth a pound of cure. Keeping your worm farm in healthy condition requires not only occasional troubleshooting but also preventative maintenance to ensure its longevity and performance. Taking the time to inspect and care for your worms’ habitat can help maintain their health and productivity through all seasons.
The first step in preventive maintenance is regular inspection. This should include checking the temperature range inside the bin, looking for signs of pests or disease, and ensuring proper bedding consistency. Additionally, it’s important to monitor ventilation levels and aeration by occasionally observing how much moisture is present in the soil or vermicomposting material. Regularly turning over any food scraps that have been added will also promote adequate airflow throughout the bin.
Finally, an essential part of preventative maintenance involves providing ample hydration to keep your worms happy and productive. Make sure there are enough water sources available, such as fresh vegetables or fruit pieces soaked in water overnight and placed into the bin every few days. Clean out all standing liquid from containers within the bin regularly to avoid mold growth which could harm your worms’ health. By following these simple tips you can ensure optimal conditions for years to come.
How To Keep Worm Stay Warm In Winter Outside
In order to maintain a healthy worm farm in the winter, steps must be taken to ensure that the worms stay warm and dry. First, consider where the worms are being kept: if outdoors, find a sheltered area such as a shed or porch; if indoors, keep them away from vents and drafts. The temperature should ideally remain between 55-77 degrees Fahrenheit (12-25 Celsius).
If temperatures drop too low, add extra bedding on top of the existing compost pile to create an insulated layer. Insulation can also be provided with hay bales around the sides of the enclosure. Additionally, adding water to the soil keeps it moist and increases its ability to retain heat better than when it is dry.
The amount of sunlight exposure is also important for keeping worms warm during winter months. For outdoor enclosures, try positioning your worm bin closer to trees or other natural barriers that block the wind but still allow light in; alternatively, you could use shade cloths for additional protection against cold winds.
Indoors make sure there’s plenty of natural light coming in which will help increase warmth. It may even be beneficial in some cases to provide artificial lighting by using a small desk lamp near the worms’ habitat–just make sure not to burn them.
Finally, remember that your worm’s health depends on proper maintenance throughout all seasons; therefore regular monitoring and cleaning out of any dead material is essential for providing adequate warmth over winter months. Keeping these points in mind will mean happier healthier worms come springtime ready for repurposing wastes into rich soil.
Repurposing Wastes Into Rich Soil
When embarking on the journey of worm farming, repurposing wastes into rich soil for your plants is an essential part of the process. Remarkably, worms can take organic materials that would otherwise go to waste and transform them into valuable resources. As a result, you are able to provide your plants with nutrient-rich soil while simultaneously reducing waste in landfills and helping the environment.
Here are some items you can use to create healthy soil:
- Fruit peels
- Coffee grounds
- Eggshells
In order to turn these items into usable compost material, they must be chopped or blended together until they become small enough to mix with other fertilizer components such as sawdust, leaves, and grass clippings. Worms will then consume it over time and help break down any large particles. This creates a nutrient-dense mixture full of beneficial bacteria which is perfect for growing vegetables and flowers. So not only does this method save money but also helps reduce landfill waste significantly.
The key takeaway here is that by properly managing our food scraps we can contribute towards healthier soil for our plants without having to spend a dime on store-bought fertilizers.
How Long Can You Leave a Worm Farm Unattended?
It’s a lot of work to keep the worms fed and to replenish the bedding every week, but you enjoy it. The question of how long you can leave the worms to their own devices arises, however, because you might occasionally want to take a vacation and leave them alone.
A worm farm can be left unattended for up to six weeks provided that fresh bedding, adequate food, and the appropriate closures have been made. This is the longest period that can pass before someone needs to simply check in on them and provide food.
In most cases, people will have to leave their worm farms alone to let nature take its course. The best worm farms are the ones where you can leave the worms alone for a week or two without worrying about them.
Potential Dangers To Be Aware Of
It is important to consider the potential dangers when making and maintaining a worm farm. While worms are generally beneficial organisms, they can still be subject to some hazards or threats that may affect their health and well-being in an enclosed environment such as a worm farm.
The first danger to watch for is extreme temperatures. Worms prefer moderate temperatures between 50°F and 80°F (10°C – 27°C). If the temperature gets too hot or cold it can lead to dehydration and ultimately death of the worms. In addition, fluctuating temperatures can also cause stress on the worms leading to reduced reproduction rates which will eventually reduce populations within the bin. It’s best practice then to ensure that your worm farm is kept in an area with consistent temperatures that fall within this range.
Another hazard worth noting is common pests like mites, ants, and flies. These insects feed on decomposing organic matter – just like the worms do. Unfortunately, if left unchecked these bugs have been known to overwhelm worm farms resulting in significant losses of both worms and harvestable material for composting. To prevent infestations from occurring you should regularly monitor your bins for signs of any pest activity as well as take steps to eliminate possible entry points into the bin itself like holes or cracks where pests could otherwise gain access inside.
Finally, when caring for a worm farm there are always risks associated with cleaning out old bedding materials or harvesting vermicompost from time to time. Always wear protective clothing such as gloves, goggles, and masks whenever handling potentially hazardous substances so as not to come into contact with them directly.
Conclusion
Creating a worm farm entails only the addition of suitable soil, the acquisition of suitable containers, and the facilitation of the worms’ natural processes. Many people who keep worm farms also keep gardens, so the compost the worms produce is put to good use. Worms can also be farmed for sale or used in fishing.
Don’t let the natural moisture escape by leaving the worm farm’s lid open.
Read also: How To Improve Your Garden Soil Without A Compost Heap