
Your spider plant is sending you signals. That brown tip you snipped off last week? It came back. The leaf that yellowed at the base? Another one just joined it. You water less, move it closer to the window, talk to it on Tuesday mornings. Nothing changes. The problem isn’t your watering schedule. It isn’t the light. It’s the dirt.
Here’s the part most houseplant guides skip: spider plants aren’t actually fussy about soil in the way people think. They’re not orchids. They’re not African violets. They survive in almost anything. But surviving and thriving are different zip codes. The soil sitting in that nursery pot right now—the stuff that came with the plant—is probably the worst thing for it. It’s designed for greenhouse production, not for your living room. It holds water like a sponge, compacts around the tuberous roots, and creates the exact conditions for the slow, invisible rot that kills more spider plants than every pest combined.
What Actually Matters (And What You Can Ignore)
Quick version: you need a mix that drains fast, holds a little moisture, and sits somewhere between pH 6.0 and 7.0. Perlite or coarse sand does the heavy lifting. Coco coir or peat moss handles water retention. Compost or worm castings feed the plant without frying the roots.
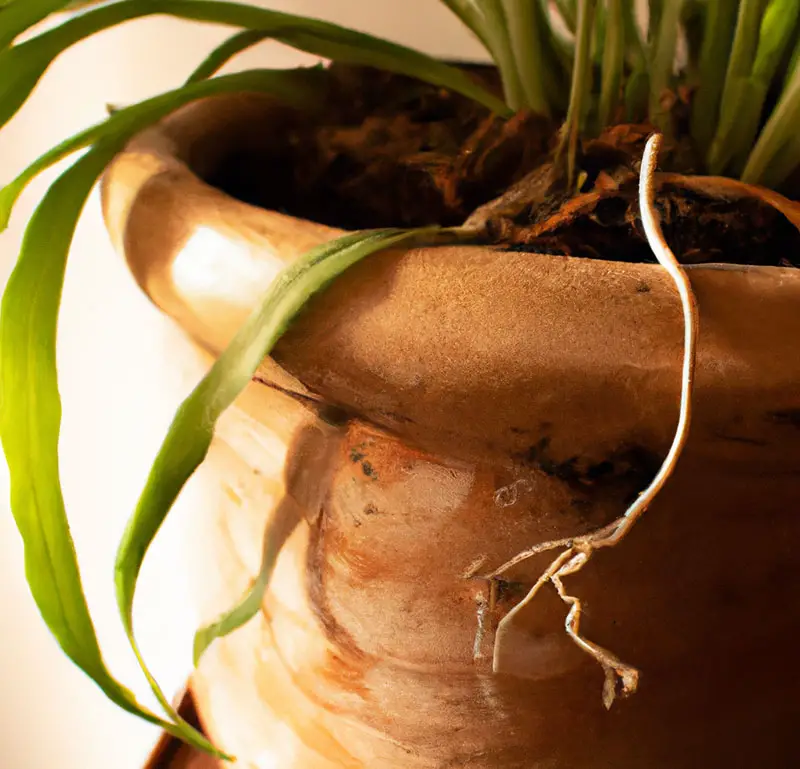
The longer version starts with root architecture. Spider plants grow fat, white, tuberous roots that look like tiny carrots. Those roots store water. They don’t need soil that stays wet. They need soil that dries out just enough between waterings so the roots can breathe, then rehydrates quickly when you pour. If the soil stays wet for three days after watering, you’re not growing a spider plant. You’re growing root rot with a spider plant on top.
The overlooked variable here is compaction. A mix that drains well on day one can turn into concrete by month four. Peat-based mixes break down, settle, and squeeze the roots. Every watering makes it worse. This is why so many people repot a struggling spider plant into fresh soil, watch it recover, then lose it again six months later. The soil didn’t fail. The structure did.
The Three-Ingredient Mix That Actually Works
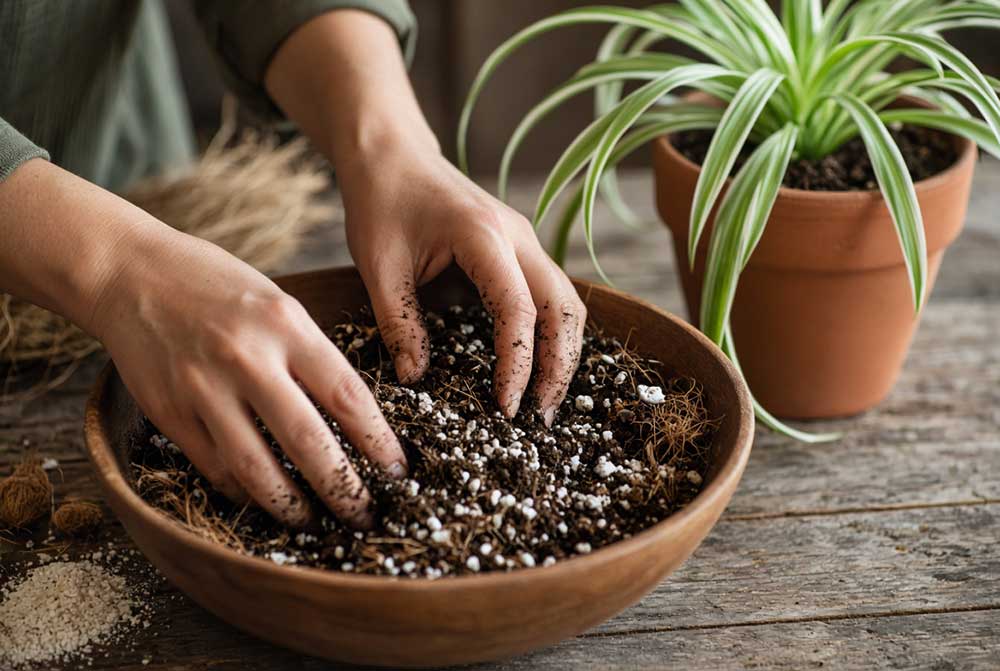
Most commercial potting soils are fine as a base. They’re not fine as a finished product. You need to cut them. The ratio that works in practice, based on what I’ve seen across dozens of repottings: three parts standard potting mix, one part perlite, one part coco coir.
That’s it. No limestone, no charcoal, no secret amendments.
The perlite creates air pockets. The coir holds moisture without turning soggy. The potting mix provides the baseline nutrients. When you squeeze a handful of this blend, it should fall apart. If it clumps into a ball that holds its shape, add more perlite. If it crumbles into dust and won’t hold together at all, add a splash more coir.
A different ratio shows up in professional production guides: three parts peat with three parts coco coir and two parts perlite. That’s a lighter, more aerated mix. Great for propagation. Overkill for a mature plant in a six-inch pot. The three-one-one works.
The Perlite Question Nobody Answers Straight
You’ll find forum posts claiming perlite contains fluoride and causes brown tips on spider plants. This is partially true and mostly misunderstood. Perlite does contain trace fluoride. So does tap water. So does most potting soil. The problem isn’t the presence of fluoride. It’s the concentration that accumulates when water can’t drain away.
Danziger’s technical guide for commercial growers is blunt about this: spider plants are sensitive to fluoride and chloride, and the solution is to maintain soil pH above 6.3. Higher pH locks up the fluoride. It doesn’t evaporate or disappear. It just stops being bioavailable. This is why the pH range matters more than most people admit. A mix that sits at 5.5—common with straight peat moss—puts your plant in the danger zone. Aim for 6.5.
If you’re using tap water with high fluoride, perlite isn’t your enemy. Poor drainage is. Water your plant until it runs out the bottom, then empty the saucer. That single habit prevents more brown tips than switching to distilled water.
What Most People Miss
The biggest mistake isn’t choosing the wrong soil. It’s not repotting soon enough. Spider plants fill their pots with those tuberous roots faster than almost any other houseplant. RHS recommends repotting every two to three years, but that’s for plants in optimal conditions. A spider plant in a warm room with bright indirect light can fill a six-inch pot in twelve months. When roots start pushing above the soil line, you’ve waited too long. The plant is strangling itself.
The second mistake is choosing a pot that’s too large. A spider plant in a pot that’s three inches wider than its root ball will sit in wet soil for weeks. The roots can’t reach the edges fast enough to pull moisture out. Size up by one or two inches maximum. The roots will colonize the new space and tell you when they’re ready for more.
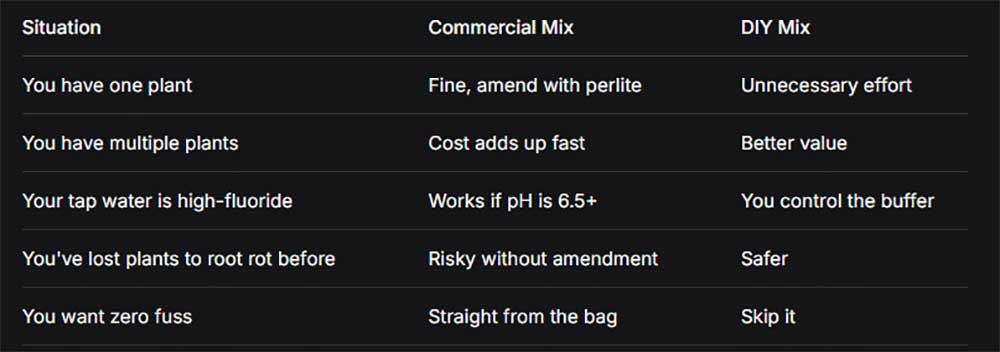
When to use a commercial mix vs. DIY:
Repotting checklist (difficulty: 2/10, time: 15 minutes):
1. Water the plant two days before. Dry roots tear.
2. Slide the plant out. Squeeze the sides of the pot if it sticks.
3. Break up the root ball with your fingers. Don’t be gentle—spider plants recover from root disturbance better than most.
4. Shake off as much old soil as you can. This matters more than people think.
5. Trim any brown or mushy roots with clean scissors.
6. Fill the new pot one-third with your mix.
7. Hold the plant so the crown sits level with the rim.
8. Backfill, press lightly, water thoroughly.
9. Wait four to six months before fertilizing. Fresh mix has nutrients.
The Real-World Reality
In practice, the plants that struggle most are the ones in soil that looks fine from above. The surface dries. The top inch feels right. But three inches down, where the roots actually live, it’s a different story. Stick your finger in. If it’s wet below the surface when the top is dry, your mix is stratified. The coir or peat has settled into a dense layer. You need to repot.
A mix that works for a pothos won’t work for a spider plant. Pothos tolerate wet feet. Spider plants don’t. African violet soil is often recommended as a shortcut, and it works—but only because it’s lighter and more aerated than standard potting mix. You can achieve the same result with a bag of regular mix and a bag of perlite.
The pH sweet spot is narrow for a plant this forgiving. Below 6.0, fluoride toxicity climbs. Above 7.0, iron and manganese become less available. The plant won’t die immediately at either extreme. It’ll just look tired. Fewer pups. Duller leaves. More brown tips. Those symptoms build over months, not days. By the time you notice, the soil has been wrong for a season.
A Note on Peat
Peat moss works. It also acidifies over time and compacts into a brick when it dries out completely. If you use a peat-based mix, you have to stay on top of watering. Let it dry too far, and it becomes hydrophobic. Water runs down the sides of the pot and never reaches the roots. Coco coir doesn’t have this problem. It rehydrates evenly. It also doesn’t decompose as fast, which means your soil structure holds longer.
The trade-off is nutrients. Coir has almost none. You’ll need to fertilize more often, or blend in compost. A mix of three parts coir, one part perlite, and one part worm castings gives you the drainage of a soilless mix with enough nutrition to carry the plant for a few months.
What to Watch For
Brown tips that keep coming back after you switch to filtered water. Yellowing lower leaves that feel soft, not crispy. A pot that feels heavier than it should a week after watering. These are all signs your soil is failing. The fix is the same every time: fresh mix, smaller pot than you think, water until it runs clear, then wait.
Your spider plant doesn’t need perfect soil. It needs soil that doesn’t sabotage it. Three ingredients. One ratio. Fifteen minutes. That’s the whole secret.
