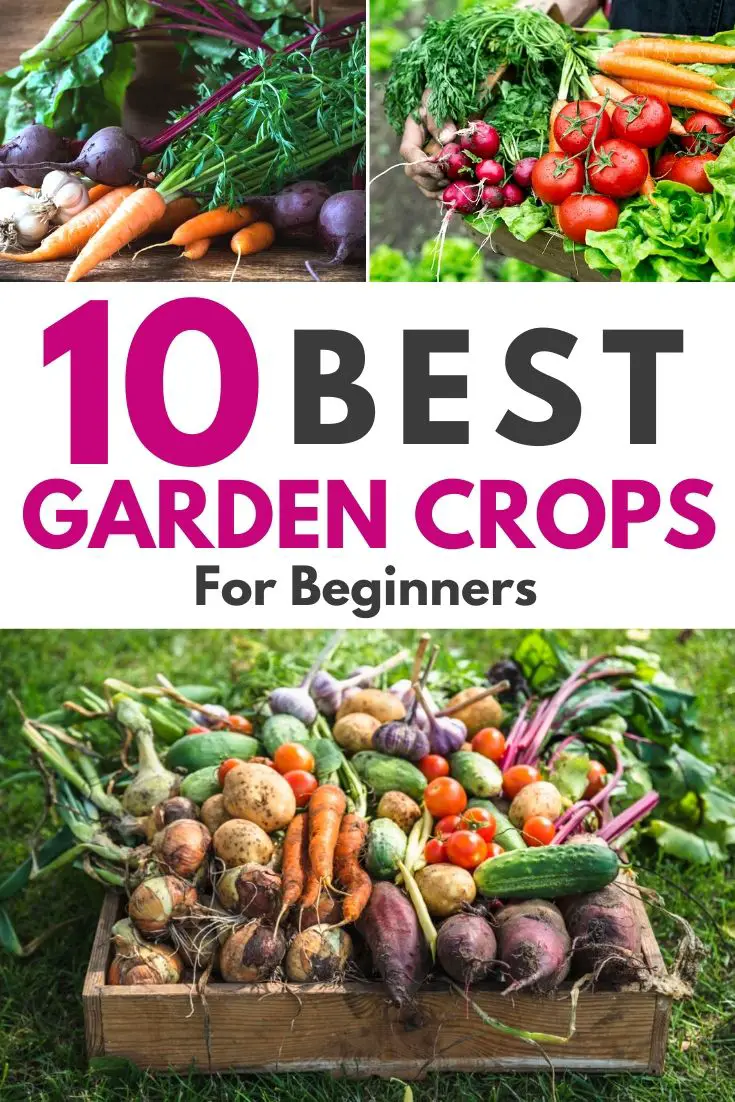
There are so many choices to make when deciding what to grow for your first effort in growing a food garden – that is, vegetables and fruit – that you can be overwhelmed if you try too many of them.
So choosing the 10 best garden crops for beginners is a list you need to make – and not me!
Why? Because I believe that you should choose based upon what you like to eat! Your preference and palate may be entirely different than mine.
An example of what I mean is chillis – I can’t stand them – yet they are easy to grow, and many folks use them brilliantly in their recipes.
So this 10 best garden crops for beginners is only a starter list – which you need to choose from and make your own list of 10 best crops.
The main criteria for choice are NOT overburdened with work and maintenance if gardening is new to you. Gardening should have a strong element of pleasure in it – and if the chores become too onerous and time-consuming, then you will lose interest.
The pleasure comes from watching what you plant grow and then come to fruition. If you are a slave to this, then you won’t have the time to sit back and do this ‘watching.’
It is actually a real challenge to not only plant something but to keep it growing – nurturing until the result is ready for picking and transfer to your kitchen. There is real satisfaction in solving a growing problem and beating the bugs and birds who will compete for your crop of fruit or vegetables.
The next benefit, of course, is in the eating – your own fresh fruit and vegetable are so much better than the supermarket bought. Many store-bought fruit and vegetables are grown from hybrids that have been bred for shape and color – and in the process, have lost a lot of their flavor.
The following choices are based on them having some or all these qualities.
1. Ease of growing – not overly high maintenance
2. Capacity to be grown in pots/containers
3. Can stand some neglect
Suggestions
- Chillis
- Tomatoes
- Garlic
- Oranges or Mandarins
- Oregano
- Lettuce
- Potatoes
- Strawberries
- Asparagus
- Green Bean
All of these can be grown in the post or large containers as well as the ground.
1. Chili
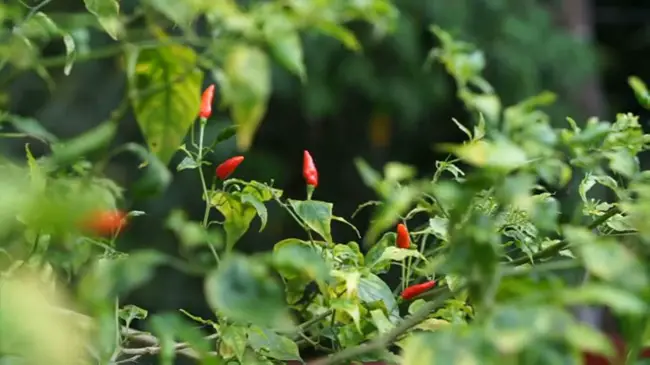
Getting your seeds to mature into healthy and fruitful chili pepper plants is not magic! First, you must start with a good batch of seeds. Your local supermarket does not carry a large variety of pepper seeds. You would do better buying them at a nursery or even from a gardening site on the internet.
An important thing to remember is they do get too old to grow…. I don’t understand why but it is true to look at the expiration date on the package before you make a purchase. Many gardeners also scrap the kernels from the inside of chilies that they are eating and plant them. I don’t recommend this for a beginner. If you chose to do this, remember the seeds must be very dry before planting.
Growing of chili pepper seeds
Now plant the seeds. If you live in a year-round warm climate, you can plant your seeds outside as nature intended; however, most of us live in a place where the weather does not allow for the outdoor growing of chili pepper seeds all year.
If you own a greenhouse, this is the best place to start the germination process. Pick a warm place in your home, perhaps, a sunny window sill. Next, you need to pick your container. Pretty much anything will do, even some old Tupperware storage bowls. Be sure to add some small holes in the bottom to allow for drainage.
Next, pick your soil. You can find several starting soils at your local nursery. Peppers do best in sandy soil. You don’t want to pick clay base soil. Your plants will not do well there. Plant your seeds no more than ¼ of an inch deep in the soil and cover lightly with the mixture. Water the surface just a bit, so it is a moist set to pick and let them grow.
So you can see the seed sprouting, now what?
It is exciting when you see your plants popping up through the soil, do not rush. Your plants will have two sets of leaves. Do not transplant them until they grow the second set of leaves. When you first see the efforts of your work, it is a great feeling, using a little seed and making it grow into something you can eat.
After the second leaves, you can gently transplant into the ground or a larger container to give them extra room to grow. I have been called “A Bull in a China Shop” I do not have a light touch. Be careful when handling they are very fragile.
Looking after your chili plant
After just seed has grown into a plant, it needs light only about six hours a day, be sure to check the soil every couple of days to make sure the soil stays moist. Add only small amounts of water to the surface when needed.
How do the chilies grow?
You will germinate your seeds into a plant. When you see the first set of leaves, you can gently cut off any weak-looking ones to allow the others to thrive. After you get the second set of leaves and move them into a bigger pot, place them in a warm sunny spot, keep them moist, and eventually, you will begin to see little flower buds.
The branches are fragile, and your peppers are heavy. Much like tomatoes, you need to add small stakes to hold them up and keep reaching for the sun.
2. Tomatoes
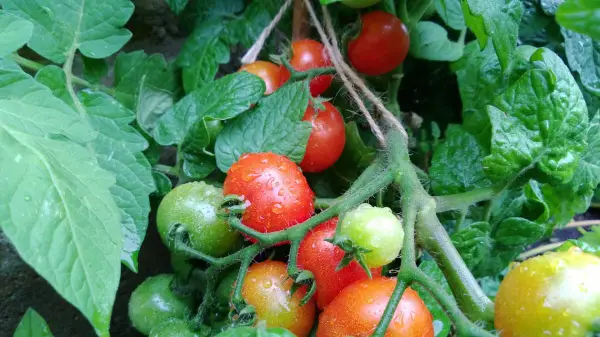
A lot of people around the world are fond of growing tomatoes from seeds. These people find challenges and excitement upon growing tomatoes from seeds until they are ready to harvest the results of their hard work. Growing tomatoes from seeds require more effort than growing grown tomato plants already, which are bought in a nursery.
As we all know, tomatoes are one of the most common cooking ingredients that we can find in our kitchen. If you are a tomato lover, it would be best to have your own tomato garden and grow your own tomatoes. Aside from being a stress reliever, tomato planting can also be exciting.
Since you are a tomato lover, you surely have a lot of tomato fruits in your kitchen. When cooking, try to remove the seeds of the tomatoes that you will be using as an ingredient. You can then use these for your plan of growing tomatoes seeds.
Usually, growing tomatoes from seeds are not that difficult. All that you needed is little patience and knowledge. First of all, it is essential to choose the right varieties of tomatoes to be grown. Choose those varieties that will be suitable for the weather conditions, the climate of your place, and the texture of your soil.
But, if you find that you don’t have enough space to grow tomatoes, don’t worry as they can also be grown in containers. More often than not, tomato growers would suggest beginners sow their tomato seeds indoors for about 6 to 8 weeks before transplanting them outdoors.
Sow your tomato seeds about half an inch below the soil of the seedbed. Be sure that you keep the soil moist. This depth will protect your seeds from being attacked by soil-born diseases.
After 2 to 3 weeks, the tomato seeds already start to germinate. After 6 to 8 weeks, the tomato plants are then ready for transplanting. You can then transplant them into containers.
Growing tomatoes from seeds can be a big challenge for those who are just new to tomato planting. Even those who have been growing tomatoes a couple of times already are still having difficulties when it comes to growing tomatoes from seeds.
But, if you can come up with healthy tomato fruits, you will surely be pleased and say to yourself that it is worth the sacrifice and effort you have given.
3. Garlic
There was a time, as an inexperienced cook, when I rarely used fresh garlic. It was annoying to have to buy an entire head of garlic when I only needed a clove or two for a recipe and more annoying when the rest of them dried up or sprouted before I used them. I’m still not fond of the bite of raw garlic, but it seems like almost every recipe I cook now begins with sauteing chopped onions and minced garlic.
Dan sometimes comes sniffing into the kitchen, asking what smells so good – often, it’s just onions and garlic so far. When that combination hits a pan of hot olive oil, the savory aroma sizzles throughout the room, and you know something delicious is on the way.
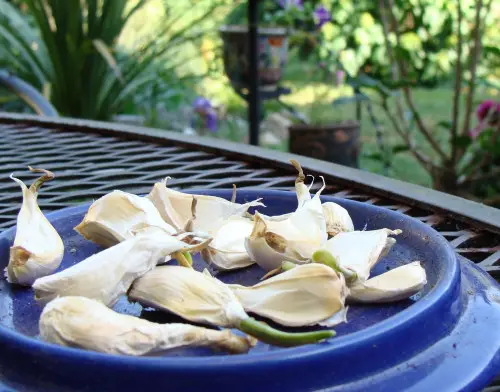
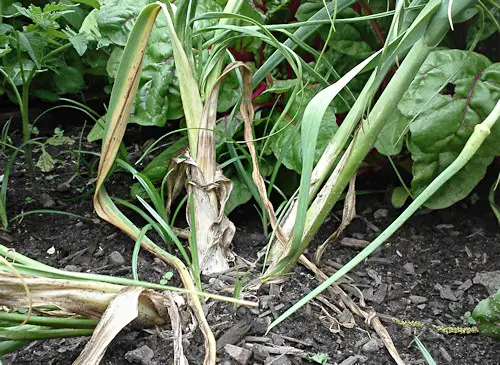
Last November, some of the garlic in my kitchen began to sprout. We separated the cloves and planted them in the garden, hoping the critters wouldn’t find them tasty. A couple of weeks ago, Dan and I debated whether they were ready to harvest. The somewhat difficult aspect of growing bulbs and root vegetables is that it’s hard to tell what they will look like before you pull them.
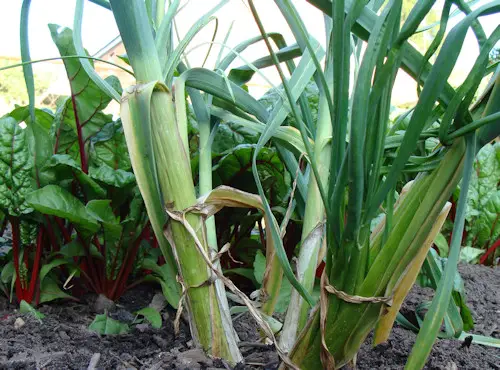
We looked up tips on gardening websites and decided to go with the advice that when about half the leaves have turned brown, they’re ready to pull. So we let them go a little longer. Last weekend, you browned the leaves, and the plants were beginning to tip over. It seemed to be time to harvest our garlic.
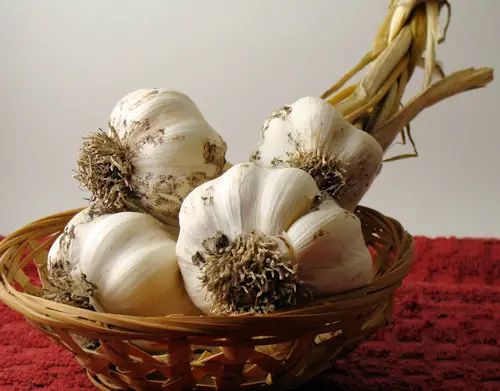
We were rewarded with four beautiful, home-grown heads of garlic, and now we know how to tell when the cloves are nice and plump. These will go into something delicious very soon.
Planting Fall Garlic
Last summer and this fall, I missed having my blog regarding which varieties of flowers, herbs, and vegetables I planted last spring, so I’m going to make a concerted effort to keep a record here of my activities.
About a month ago, my friend Pam gave me three different types of garlic to try out, and today, I finally got them on the ground. The larger vegetable garden is mostly in the shade until the sun comes back next spring, so I planted them in the new raised bed Dan built last spring. It gets lots of sun, and the soil temperature is 68°F, while the air temperature is 50.
The three types are (in order of planting – left, center, right, in the front of the bed):
German Extra Hardy
This type of garlic featured a unique and strong taste that lingers for a while after eating. Winter-friendly and produces huge bulbs, each with 4-5 cloves. Long roots give it the ability to winter over without heaving out of the ground. The strong raw flavor and high sugar content making it one of the best for roasting.
Viola Francese
This is a soft neck variety grown all over SW France and NW Italy. Large purple and white cloves and excellent flavor. The bulbs are huge — 4-5 bulbs per pound—about 15 cloves per bulb.
Transylvanian
This is the famed artichoke garlic of the Dracula legends. Harvests in late spring/early summer – stores into winter. It can get quite large.
4. Oranges or Mandarins

We all love sweet oranges and mandarins For their taste and their rich taste and vitamin C content. However, it is often a disappointment to discover that our beautiful orange tree growing in our backyard produces only sour or how to get sweeter oranges half-sweetened fruit.
One of the reasons that orange trees fail either to bloom or grow sweet oranges is a lack of sun and nutrition. There are certain steps you can do to encourage your orange tree to produce sweeter juicier fruits.
Orange trees do need at least eight hours of sun each day. Otherwise, they will fail to bloom or only bloom sparsely. Orange trees need high heat to form the natural sugars that make oranges taste sweet.
This is especially true for navel oranges, while Valencia oranges have lower heat requirements and may be better suited to your area.
The ideal would be to have one of each as they fruit at different times of the year.
You can also apply potassium sulfate in a foliar spray just before flowering and once again after the flowers turn to fruit buds.
Try also to ensure that the surrounding areas of the trunk are clear of other plantings that could compete for the nutrition that the tree requires.
5. Oregano
Growing Oregano from seed in March is ideal if kept inside. If you want to sow them directly into the garden, it is advisable to wait until the ground has warmed up, about the end of May to the beginning of June.
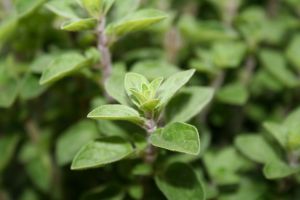
Sow in pots with 4-6 seeds per pot. If you prefer, you can sow more into the pot and then thin out the weaklings. Germination can be difficult, and sometimes it may take up to 6 weeks.
Suppose the seeds have not germinated by this time. It was likely that they have died. You do not need to put the pots into the light, but they must be kept warm.
Once the seedlings have grown a little, transplant them, taking care of their fine root system into a container or the ground.
When sowing directly into the ground, sow them thinly, do not actually bury them. Press them into the ground and water them regularly. Rather than spend time thinning out, it is easier to stop watering the weaker seedlings if possible.
Once the plant is established, it will throw underground stems, utilize them by digging the plant up every 2 or 3 years and dividing it into 3 or more separate plants. This will also help stop the plant from turning woody. Oregano only needs to be watered once or twice a week during dry periods. By not adding any fertilizer, it will produce stronger flavors.
You can begin harvesting when the plant has reached about 5cm tall and has at least 12 leaves. When harvesting oregano, pick the leaves first thing in the morning after the dew has dried because once the sun warms up the leaves, they lose some of their oils. It is the oils that give both the smell and taste. Cut tender young stems. This will also help to keep the plant producing new growth.
When the plant reaches about 8cm tall, you can cut back the whole plant, and it will re-grow and produce another crop of tender young leaves. Pick any flowers as soon as they appear; otherwise, the leaves will turn bitter and left unpicked. The flowers will, of course, turn to seed which will self propagate,e and you will have oregano in abundance.
Growing Oregano in a container is usually successful as long as you remember to bring it inside during the winter and put it in a sunny position. You only need to water container plants during the winter when the compost or soil is dry. If you over water, the plant will rot and die.
6. Lettuce
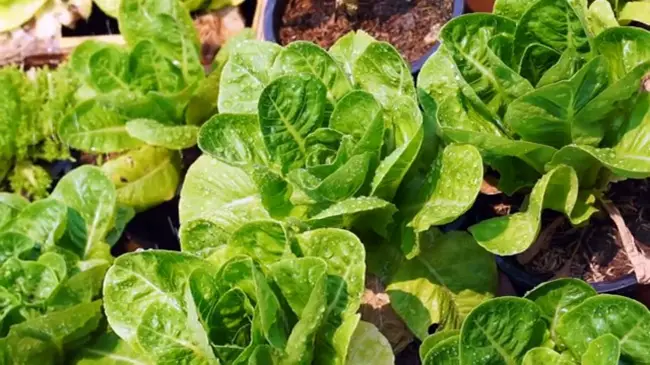
I have been an amateur vegetable gardener for a short while now, and growing lettuce is probably my favorite vegetable to grow. I started growing lettuce and other goodies to cut back on our grocery budget and soon realized how fun and rewarding it can be.
I will share some tips and tricks I have learned over the last few years on how to grow lettuce. Remember that gardening and growing lettuce can be fun for the whole family, including kids. Get them involved, and they will soon develop a love of gardening.
How to Grow Lettuce
Different types of lettuce will grow easier and flourish depending on your climate and where you are located. So it is a good idea to do a bit of research on what type of lettuce grows best in your area. Once you determined what types of lettuce you wish to grow, follow our how-to-grow lettuce article for best results.
Lettuce is not too picky on soil type, which makes growing lettuce ideal for new gardeners. However, the ideal growing soil growing conditions are well-drained soil that is capable of holding water. Lack of water can cause lettuce to wilt or bolt, especially in mid-summer when it is the hottest. Soil mixed in peat moss is ideal but avoid nutrient-rich compost or fertilizer as this could cause rot in the roots.
When growing lettuce, it’s best to avoid the direct afternoon sun. This is too hot. Morning or late afternoon sun is best for lettuce to grow. The shade is ideal when and an important part of how to grow lettuce. Lettuce is perfect for growing in between other taller vegetables as they can provide cover for the lettuce if the garden has direct sun all day. Just make sure to keep them well-watered as lettuce required lots of water to grow quickly.
Lettuce Planting Times
- Butterhead – Plant from mid-March to August: Harvest in approximately 12 weeks
- Iceberg – Pant mid-March to July: Harvest in 15 weeks
- Loose-leaf – Plant in April to June: Harvest in approximately 12 weeks
- Cos: Plant from March to August: Harvest in 12 weeks
Lettuce Planting Procedure
If you want to know how to grow lettuce and enjoy crisp fresh lettuce all summer, it’s a good idea to plant your lettuce every 3 weeks or so. This allows for a continuous harvest all summer, and you are not overloaded with lettuce all at once. Lettuce does not keep well in the ground when it has matured and is ready to be harvested, and we all know lettuce does not keep well in a fridge for long periods of time either.
Plant your lettuce seeds about half an inch deep and about one foot apart. You can also plant a continuous stream of seeds close together. Then as they sprout, you can thin them out, this ensures quick growth, and you can leave the faster-growing spouts. Your seeds should sprout within 8 to 13 days. Keep them well-watered.
Caring for your Growing Lettuce
I personally think learning how to grow lettuce is the easiest of all vegetables, and caring for your growing lettuce is as simple as keeping them well watered and keeping the weeds away. Weeds will rob the lettuce of valuable water and nutrients in the soil. Weeds also can attract pests that could damage your growing lettuce and slow its growth.
I personally recommend if you are new to growing lettuce that your start with loose leaf lettuce as it is the easiest to grow and the most resilient to disease and undesirable growing environments. Have Fun growing lettuce, and we hope you now know everything you need to know on how to grow lettuce and enjoy all growing seasons.
7. Potatoes
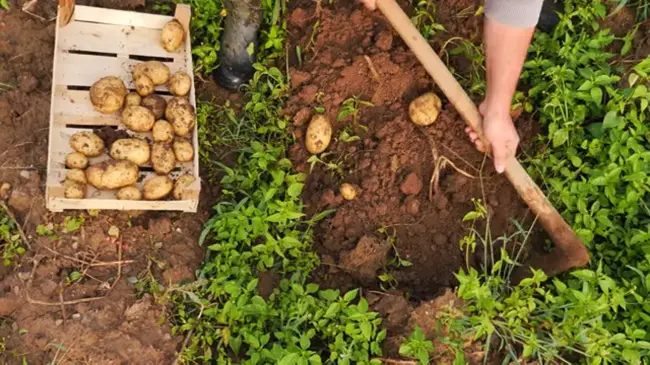
Potatoes are in high potassium content that contributes to a healthy heart diet. Research shows that diets high in fruits and vegetables, particularly rich in potassium, help maintain a lean body as we age. As far as the dietary content of potatoes is concerned, it is an essential vegetable. You can cook it in all forms from baked, roasted, boiled, fries, and mash.
Growing potatoes is easy as long as you have moist soil, potato seeds, and cool weather. They come in a lot of variety. Better check with the local nursery for a variety best suited to your climate and soil conditions.
Start planting potatoes from late spring, where the soil temperature is 45 degrees F and moist soil. You can grow potatoes from “green” potatoes or sprouting potatoes. These seed potatoes are best sown when it is exposed to sunlight 1-2 weeks before planting.
Preparing the soil. Soil preparation is important. Potatoes only grow in loose, moist, but not soggy soil. Breaking the grown and preparing plant rows or just mound is as important in growing potatoes. You can also use the straw method of planting. You just need newspaper, manure, and straw.
First, wet the area to be used, spread manure, and cover with wet newspaper. Next, place the seed potatoes 15-18 inches apart and cover them with a straw. Add manure over the straw. Repeat the process until the layer of straw is 15 inches. Add more straw to prevent the sun from reaching the plant as they grow.
To have the best yield fertilizing the soil needs to be done even before planting. Animal manure is best, and mixing it up well with soil while having to let it stand in a day or two. Make sure that the soil is not soggy with water but just moist enough.
Growing potatoes is now ready to commence. Seed potatoes are to be planted 15 inches apart to give room for them to grow. Make sure that the seedlings are kept from too much cold or even frost. You can use loose sheets of straw or a plastic tent and remove them when sunny.
Cultivate your potatoes towards harvest time. Potato crops need sunlight and water each day. You can harvest your potatoes when the potato plant starts to die, approximately 4 weeks after flowering. You should store potatoes in a cool and dry place to keep them fresh. Keep potatoes out of light. Don’t wash potatoes before storing, for this will prevent potatoes from rotting.
8. Strawberries
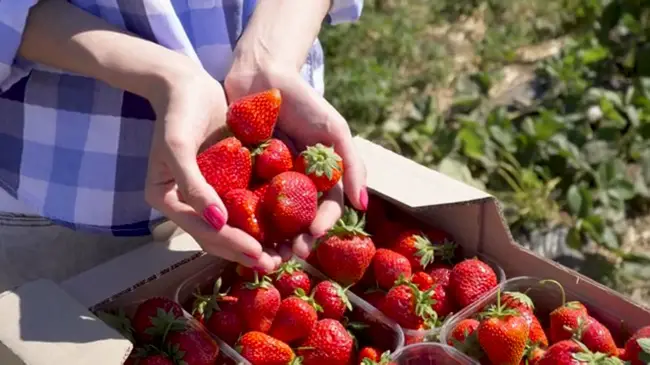
Growing strawberries at home is a great thing to do, but so few people actually do it. It’s funny, we all love strawberries, but we are afraid to grow them independently because we believe that it must be very difficult or expensive to grow them at home.
In fact, it’s none of that. Growing strawberries offers many advantages in comparison to purchasing strawberries in a shop. It is healthier, cheaper, better for the environment, and it is actually a great deal of fun.
Firstly, growing strawberries is fairly easy, as strawberry plants are very adaptable. They only need standard soil, an adequate amount of water, and lots of sunlight.
Strawberries can grow in gardens, pots, or other types of containers. Even if you have only a small window sill that gets a lot of sunlight, you can grow strawberries. When growing your own strawberries, harvesting them is so easy that you go to the garden and pick them up. Compare them with getting to the car and driving to the nearest shopping mall, finding them there, and waiting in a check outline.
Secondly, growing strawberries at home minimize waste and the use of pesticides, and therefore it is very ecological. You don’t have to burn petrol on the way to the closest shop. Furthermore, there is no transport cost in moving strawberries from a farm to your local shop.
Producers of commercial strawberries use all possible pesticides and fertilizers to produce more in a shorter period of time and maximize profits. Many of the chemicals which they use can have devastating effects on the environment.
They can also be very harmful to your own health. When growing strawberries in your own garden, it is not necessary to use any of these chemicals.
With strawberries, freshness is essential. Strawberries tend to go bad just a couple of days after the harvest, and therefore it is essential to eat them as quickly as possible.
Commercial strawberries have to be transported from farms to shops where they are stored and wait for a customer to pick them up. All this process takes a long time. When growing your own strawberries, you can be sure of the absolute freshness of the strawberries you are eating.
Furthermore, home-grown strawberries tend to have much higher nutritional value, as they are allowed to grow longer. Commercial strawberries are grown very quickly to increase the amount that they can produce for a fixed period.
That means that they might lack some of the crucial vitamins and minerals. On the contrary, when growing strawberries at home, you can ensure that they have enough time to grow and accumulate all the vital nutrition.
To sum up, growing strawberries at home seems to be an excellent way to produce your own great-looking, tasty and healthy strawberries that include all the important vitamins but do not contain harmful chemicals. Therefore I strongly recommend you to try growing strawberries.
9. Asparagus
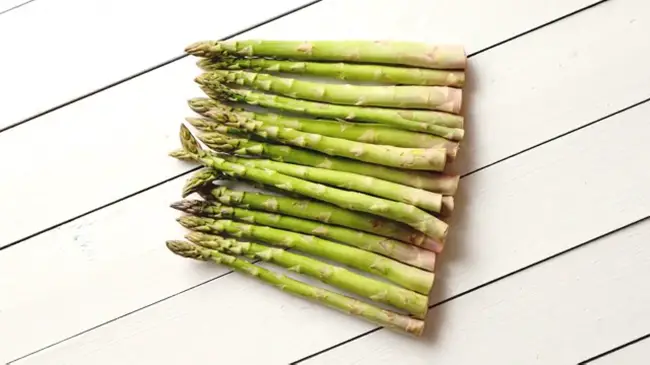
Successfully growing asparagus means finding a balance between having a healthy root system and good foliage growth. Both are needed to have a steady and long-term supply of this tasty vegetable. You can start it from seeds or roots, also called crowns.
There are two opposing opinions about planting roots – either in a trench or not. Whatever planting method you choose, growing asparagus requires some planning.
Asparagus is a perennial that sets roots five to six feet in the ground once established. Wherever you start growing your asparagus, plan to leave it. It does not transplant easily. The first asparagus we planted was in an old oval stock tank.
It was about three feet high, so we thought it was easy to simulate the trench plan. They did not like growing in the tank. Asparagus needs to be able to spread its roots five or six feet horizontally too.
The next attempt was the trench method described on the packaging that the roots can be in. you dug trenches about eighteen inches wide and twelve inches deep. Composted manure was put in, then some sand, and then the roots.
Out of the thirty roots planted, ten grew. The other method of growing asparagus from roots without creating a trench is simply to dig a hole and plant them as you would most perennials.
This method may well give you a better success rate of plants growing, but because the roots are closer to the surface, they should be protected for at least the first winter. It is recommended that organic matter such as composted manure be added in the fall.
In the first year, do not pick the asparagus. Let it open up into the fern and mature. This part of growing asparagus is important as it needs to establish strong roots. Also, the mature growth should be leftover in winter to provide the roots with all the energy possible. The next year, you can harvest spears by snapping them off before the fern branches unfold from the main stem.
With such a poor rate of success with growing asparagus from roots, I decided to try seeds. I made very shallow rows in the open spaces of the rows you had planted the roots in. The tiny seeds took very well and wintered well. They will not be mature enough actually to eat for several years, but they are growing.
Asparagus is a vegetable that has a taste similar to corn. Because it is a perennial, it is the first vegetable to be harvested in spring. Many people are not introduced to it in childhood, and so must acquire a liking for it. Getting a bed started takes some work, as does most gardening. If you enjoy eating it, you will appreciate growing your own asparagus.
You may also want to know which are the best asparagus companion plants.
10. Green Bean
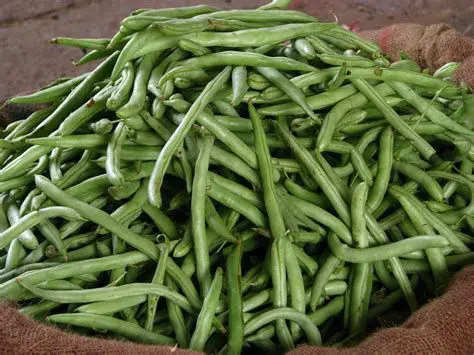
As they are most often called, Green Beans are one vegetable that is easy to grow, and practically everyone loves them.
If you want to have fresh vegetables all summer, you can plant some at different times so they will not all be getting ready for harvest at the same time.
Planting the vegetable every three weeks until the middle of the season will allow you a supply of beans that you will enjoy throughout the summer months.
Planting
These beans are a warm soil plant. You should not plant them until after there is not a chance of frost. The soil should be consistently above 65 degrees when the bean plants go in the ground.
You will enjoy an even better yield if it is 70 degrees or above. You can start the beans inside by planting them in peat pots.
Letting them grow until they are about 4 inches tall before taking them outdoors is optimum. Of course, this depends upon the condition that there will be no more frost.
When choosing the area for planting your beans, choose a good drainage spot, and the soil should be quite fertile.
It is a good idea not to plant where certain other vegetables have been planted recently. This would include beans, lettuce, potatoes, or cabbage.
It would help if you moved the beans every year to keep them from getting diseases from the soil that could cause root rot.
If you are planting the pole variety of beans, which the gardener typically plants, you should plant them on small mounds.
Make the mounds about 3 feet between them, and the rows should be about 3 or 4 feet wide.
It would help place a stake in the mound center, and the seeds (about 3 or 4) pushed into the soil about an inch deep. If you keep the mounds watered, the beans should sprout in approximately a week.
Plant care
Fertilizing the area where you will plant the beans is necessary to help them grow. You can add the fertilizer as you dig the dirt up for planting.
They will need to be fertilized as they are growing as well. A half of a cup of fertilizer for 10 feet will suffice. Make sure and water well after spreading the fertilizer. This will allow it to wash into the soil.
These beans should be watered once weekly when the weather is very dry. You should direct the water at its roots rather than the plants.
The soil should not be allowed to dry out completely. The beans like the areas moist while they are growing. One of the main reasons for blossom drop is the lack of water.
Harvesting
It varies with the type of seed you plant for green beans, but the typical growing period is anywhere from 45 to 75 days. You should pick them before the pod begins to bulge.
The Beans should have a good crisp feel, and when broken in two, they should snap. The beans should be harvested using care not to damage the plant because it will produce more beans.
Hold onto the plant and pull the bean off, and one of the recommendations is to pick the beans while the plant is dry.
Final Thought
Now think of your favorites – in comparison to the above list – and make a list of between five to ten of them – think of them being on your plate eventually.
All vegetables and fruit benefit from good, well-composted, and mulched soil – that is all the main preparatory work you really need to do.
And why a list of ten? Well, actually, 10 best garden crops for beginners may even be too many – five may be a better list, especially if you have limited space – e.g., only a balcony or apartment courtyard.
Growing in pots makes care a lot easier, too – though you will have to water more and feed up more – this can be a pleasurable thing to do and not be burdensome work. I love having a daily look at my pot-growing capsicums and watering them, and watching the fruit get bigger each day – they are fast!