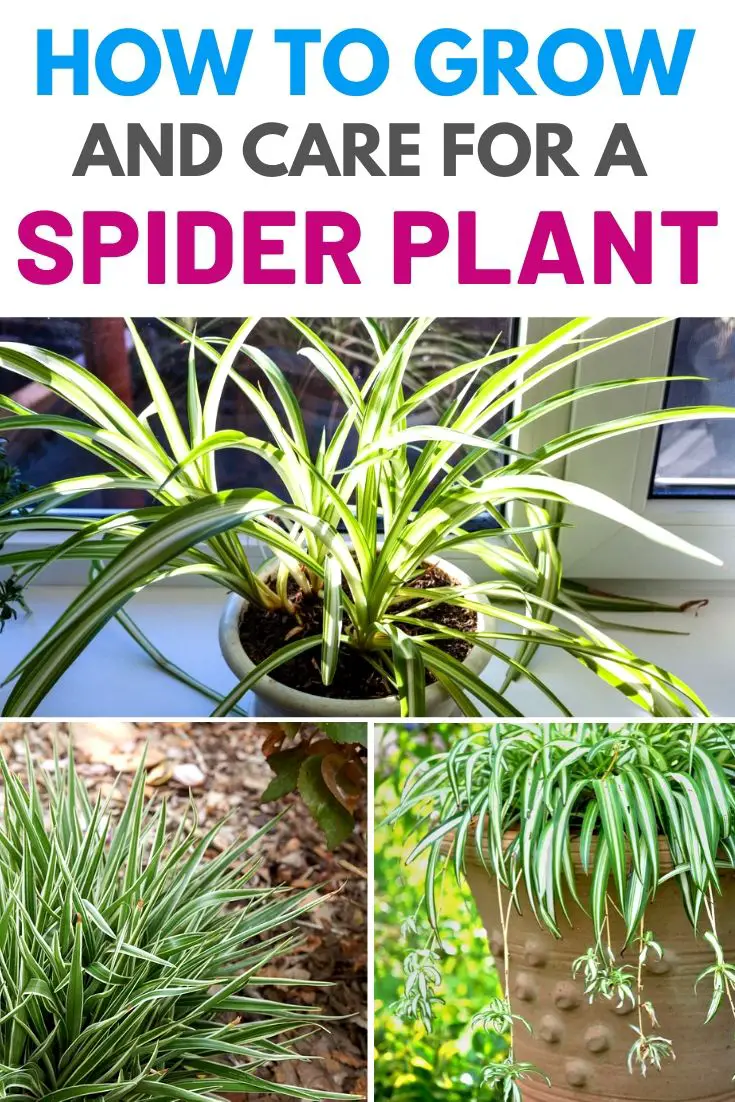
The Spider Plant (Chlorophytum comosum) is a popular houseplant with its distinctive foliage and ease of growth. It has long been prized for its air-purifying abilities, as well as its ability to thrive in many indoor environments. With proper care and attention, the Spider Plant can provide vibrant beauty while also helping improve air quality in any home or office.
For those looking to start their journey into growing Spider Plants, this guide offers detailed instructions on selecting appropriate containers, soil mixtures, watering schedules, light requirements, fertilizing routines, pest management methods, and repotting procedures.
In addition, tips are provided on propagating new plants from existing ones using either stem cuttings or offshoots. Finally, advice is included on dealing with common problems such as wilted leaves or yellowing foliage so that readers may successfully cultivate the perfect specimen for their space.
Overview Of Spider Plant
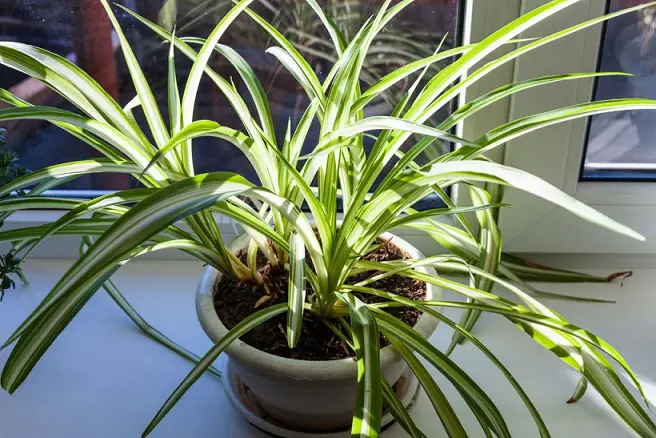
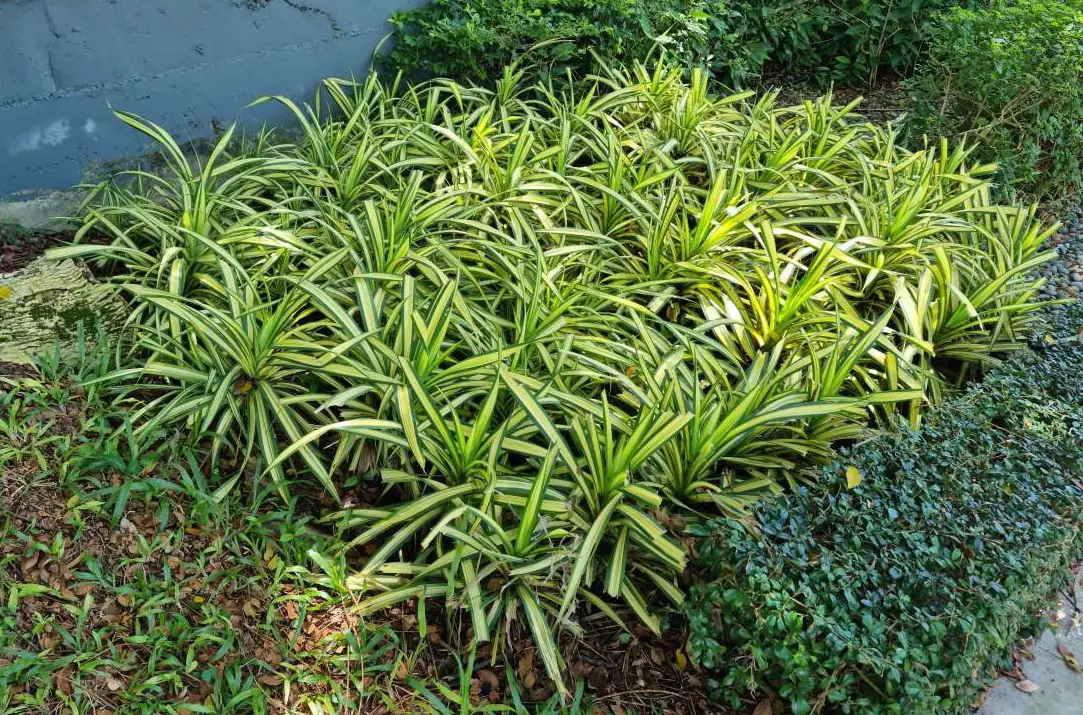
Spider plants are a beloved common houseplant, popular for their ability to thrive in various conditions. The long cascading foliage with its small white flowers is an attractive addition to many living spaces and makes them ideal plants for beginners. As hearty as they appear though, spider plants require careful attention to ensure healthy growth and development.
The scientific name of the spider plant is Chlorophytum comosum, which comes from two Greek words meaning “green” and “hair”. This genus of perennial flowering herbaceous evergreen plants consists of about 200 species that vary by leaf shape, coloration, flower size, and stem length. Spider Plants can be found in temperate regions across North America and Asia including India, China, Japan, Australia, and Africa but originated in South Africa.
Spider Plant has been cultivated by humans since Victorian times when it was thought to have air-purifying properties due to their ability to absorb toxins like formaldehyde and benzene from the environment. Despite being easy-to-care-for houseplants today, it is important not only to provide these plants with basic growing requirements such as light level, water amount, temperature range, etc. but also to understand what kind of soil type provides optimal nutrition for this plant’s health. With this knowledge, one can successfully grow a thriving spider plant garden.
Suitable Growing Conditions
Spider plants are highly adaptable to a variety of growing conditions, making them excellent choices for novice gardeners. In general, spider plants prefer bright, indirect sunlight although they can tolerate some direct light with adequate humidity and moisture levels. The ideal temperature range is between 65-75°F (18-24°C). If the environment gets too hot or cold, it may cause problems such as wilting leaves or yellowing foliage.
When grown indoors, spider plants should be placed in an area that receives plenty of natural light. Avoid placing them near drafty windows or air conditioners where temperatures can fluctuate dramatically. To ensure healthy growth, provide enough space around the plant so that air can circulate freely without any obstruction.
In addition to providing proper lighting and warmth, regular watering is essential for the optimal health and growth of spider plants. Water when the top inch of soil feels dry; this will help to keep the soil evenly moist but not soggy. Overwatering can lead to root rot while underwatering causes discolored leaves due to a lack of nutrients. With the right care and attention, your spider plant will thrive in its new home.
Potting And Soil Requirements
Spider plants need to have the proper potting soil and container in order to thrive. Gardening experts recommend using an airy soil mixture with plenty of organic matter such as peat moss or coco coir. The soil should also be well-draining with some perlite added for extra drainage. A good potting mix can easily be purchased from most garden centers.
When selecting a pot for your spider plant, it’s best to choose one that is about 2 inches larger than its current size; any larger may cause root rot due to over-watering. Terracotta pots are ideal because they allow water to evaporate quickly, but plastic containers work just as well if they have adequate drainage holes at the bottom. Additionally, you may want to consider adding charcoal to the potting mix which will help prevent mold growth caused by excess moisture retention.
The goal when planting your spider plant is to provide an environment where both roots and foliage can flourish without being overly wet or dry. Careful attention should be given to ensure that your potted spiderette has the right combination of sun exposure, humidity levels, temperature, potting medium, and appropriate size container so it can reach its full potential.
Watering Techniques
The spider plant is a very resilient and tolerant species of the houseplant. However, for it to thrive in its new home, one must understand the basics of watering techniques. Spider plants prefer moist soil and do not like to dry out too much between waterings. To properly water your spider plant here are some tips:
- Water when the top inch or two of soil has become dry – this can be tested with a finger or a moisture meter.
- The best way to water is from the bottom up – place the pot in a sink full of room temperature water until bubbles come up through the drainage holes then allow time for excess water to drain away before returning the pot to its saucer/dish.
- When using tap water let it stand overnight so that chlorine evaporates; rainwater, softened or reverse osmosis filtered water is ideal but not essential as most tap waters will suffice; avoid Distilled water which contains no nutrients necessary for growth.
- Always use lukewarm rather than cold water as this causes less shock to roots and leaves.
By following these tips you should have healthy-looking foliage without having over-watered or under-watered your spider plant.
Sunlight And Temperature Preferences
Spider plant prefers bright, indirect light. It can tolerate low to moderate direct sunlight but should not be exposed to intense direct sun as this may scorch its foliage. This houseplant is best suited in temperatures between 65-75°F (18-23°C). Any temperature below 45°F (7°C) or above 80°F (27°C) could cause the leaves to become limp and discolor. In areas with very hot summers, it would be beneficial to move spider plants indoors when outdoor temperatures exceed 75°F (24°C). Spider plants are hardy houseplants that thrive on neglect, so even if they don’t get ideal conditions, they will still likely survive.
When growing a spider plant indoors, it is important to monitor the humidity levels since dry air can cause brown tips on the leaves. To increase indoor humidity levels near your spider plant, place a bowl of water nearby and mist regularly. Proper care for your spider plant includes good drainage; make sure pots have adequate holes at the bottom for excess water and soil to escape through.
Fertilizer Usage
Spider plant owners should use fertilizer when their plants need a boost. Fertilization is essential for healthy growth and can be done twice during the growing season in spring and summer, but not necessary if the soil has enough nutrients. When fertilizing spider plants, it is important to choose an appropriate fertilizer that contains macro-nutrients such as nitrogen, phosphorus, and potassium.
Additionally, using small amounts of micronutrients like iron, zinc or manganese is also beneficial for promoting healthier foliage. It is best to dilute liquid fertilizers with water before applying them to prevent the burning of the leaves due to too much concentration.
After the application of fertilizer, it is recommended to give plenty of water to wash off any excess from the leaves and roots so that they do not suffer any damage. With proper care and attention given to fertilization schedules, spider plants will remain healthy and look attractive all year round.
Plants that have been overfertilized may experience wilting or yellowing of the leaves which must be addressed quickly by decreasing fertilizer usage or flushing out the soil with fresh water.
Pruning And Trimming Instructions
The spider plant is a resilient and durable houseplant that requires occasional pruning for optimal growth. Pruning can be done to keep the spider plant looking neat and tidy, or it can be used as a way to manage the size of the plant if it has grown too large for its space. With just a few simple steps, you can easily trim your spider plant’s leaves and stems in no time.
To begin, start by carefully cutting away any brown foliage or limp leaves using sharp garden shears or scissors. Make sure not to take off too much – only remove what needs to go so that you don’t damage the rest of the healthy parts of the plant. Next, cut back all hanging stems by at least one-third of their original length. This will help promote new growth while keeping your spider plant from becoming unruly. Finally, use caution when separating outgrowth buds; gently pinch them away with your fingers rather than pulling them apart which could potentially cause injury to both yourself and your beloved spider plant.
In order to ensure successful pruning, always keep an eye on how your spider plant looks after each session. Trimming should lead to more lush and healthier growth overall, but if there are signs of distress such as wilting or discoloration then you may need to hold off on further pruning until those issues have been resolved.
How to Maintain Your Spider Plant
When your spider plant gets too big, you can separate it or put it into a bigger pot. Separating your spider plant as it grows will allow your spider plant to thrive and allow you to have more spider plants. It is always advised to keep your spider plant happy with lots of room to grow.
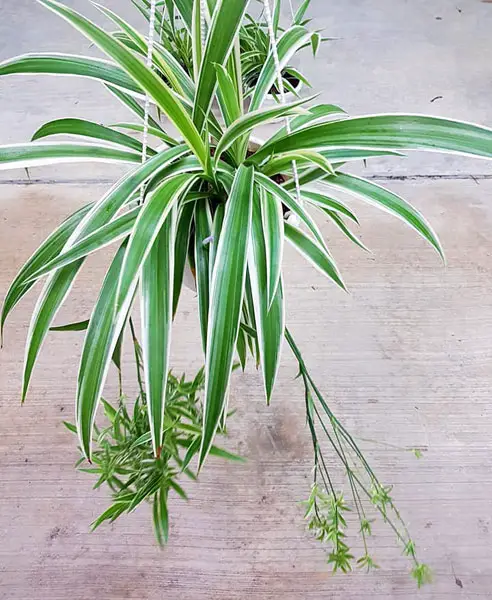
Spider plants are also known to benefit from a little bit of pruning. The spider plant will grow buds that mature into baby spider plants. These babies can be placed in their own soil and grown into brand-new spider plants. You can leave the babies attached to the mother in their own pot next to the mother spider plant and detach it once the baby has developed.
You will water the baby a little more than you would a full-grown spider plant, but still not too much. If you wish to separate them from the mother, they will also make do with a bit more sunlight than a full-grown spider plant.
How to Keep Your Spider Plant Looking Its Best
Another problem that spider plants are known to have is slight browning at the edges of their leaves. You shouldn’t worry too much about this, as it is natural. It is believed to be caused by salts in the water that builds up in the soil.
One way to combat this is by thoroughly rinsing the soil and allowing it to drain every once in a while to eliminate some of the salt build-ups. Doing this every few months will be a great way to keep your spider plant looking its healthiest and fullest, though it’s more of an aesthetic issue than a really healthy one.
If you want to avoid draining, you can also use purified water that doesn’t contain salts and minerals. This can be expensive, but spider plants do not need to be watered too often and only really need enough water to keep their soil barely moist.
Propagation Methods
Coincidentally, propagating spider plants is a simple and rewarding task. There are several methods to propagate the resilient plant, each offering its own unique benefits. The most common method of propagation is through root division; this technique involves carefully splitting the dense roots into two or more sections with enough foliage on each section for it to grow as an individual plant. To further ensure success when dividing the root ball be sure to use sharp shears or scissors to avoid damaging any of the fragile roots.
Stem cuttings can also be used to easily propagate new spider plants. This method requires taking 4-5 inch stem cuttings from existing growths and planting them in moist soil or vermiculite. It may take anywhere from 1-2 months before they become established – during this time make sure you keep their environment consistently warm and humid but not wet. They should eventually develop healthy leaves signaling that they have taken root and can now be transplanted into the regular potting mix.
Finally, for those looking for an easier solution spiderettes (or baby spider plants) form naturally around the mother plant’s base over time if conditions allow it; these babies can then simply be plucked off and planted elsewhere where they will continue growing happily without much effort needed.
Read also: How To Grow Croton Plants Indoors Or Outdoors
Repotting Tips
Once the signs of stress in spider plants have been noted, it is time to consider repotting. A healthy root system and a well-draining pot are essential to avoid further issues with the plant’s health. In order to create the right environment for your spider plant, here are some tips on how to properly repot it:
First, select an appropriate pot size. The new pot should be slightly larger than the current one – about two inches larger at most. Make sure that there are drainage holes so excess water can escape from the soil. Then prepare a lightweight potting soil mixture specifically tailored for epiphytic plants such as spider plants; this will ensure proper nutrition and moisture content while providing good aeration around its roots.
Next, remove the old pot carefully and check if any pests or diseases have spread into the root system before transferring your plant to its new home. Prune away dead leaves or stems, then place your spider plant into its new container making sure not to cover up too much of its foliage with soil because it needs access to air circulation. Finally, gently press down on each side of the soil and give your newly potted spider plant a generous amount of water so all soil settles evenly around its roots.
Common Pests To Watch For
Spider plants are generally very resilient and can thrive in a variety of environments. However, there are still some pests that gardeners should be aware of to keep their spider plants healthy and thriving. As the old adage goes: an ounce of prevention is worth a pound of cure.
Aphids are one pest that could potentially cause problems for your spider plant. These small insects feed on parts of the leaves and stem, creating yellow spots or discoloration. They also produce an abundance of sticky honeydew which attracts sooty mold, another potential problem. The best way to stop aphid infestation is by using insecticidal soap or horticultural oil sprays that will smother them without harming other beneficial organisms.
Mealybugs are another type of pest you may encounter when growing spider plants. These soft-bodied insects suck sap from the stems and leave leaving behind a white fluffy wax residue as they feed. Mealybug damage can stunt growth or even kill the entire plant if not treated quickly enough with appropriate pesticide sprays or systemic insecticides like neem oil or horticultural oils.
Gardeners must remain vigilant to prevent these common pests from invading their precious houseplant collection – but this doesn’t mean you need to constantly worry about them. Regularly inspect your plants for signs of trouble such as discolored foliage, wilting branches, webbing between leaves, and strange bugs crawling around in the soil.
Disease Prevention Strategies
Spider plant gardeners have several strategies to keep their plants healthy and free of disease. There are both preventive measures they can take as well as treatments for diseases that may already be present.
Preventative Measures:
- Provide Proper Care: Spider plants need ample sunlight, proper soil drainage, adequate water levels, and appropriate fertilizer in order to remain healthy.
- Monitor Environmental Conditions: Be aware of the humidity level of your growing area and adjust accordingly if needed. Make sure there is good air circulation around your plants to avoid fungal illnesses such as powdery mildew or gray mold.
* Inspect Regularly: Check for any signs of distress on a regular basis so you can identify problems quickly before they become too severe.
Treatments:
- Remove Affected Areas: If you find any affected areas cut them away from the rest of the plant using sterilized pruning shears immediately to prevent the further spread of infection.
- Use Fungicides & Insecticides: When treating spider plants with fungicides or insecticides make sure to follow all instructions carefully for the best results. Avoid over-application which could damage the foliage or cause other harm to the environment and surrounding wildlife.
By following these guidelines, spider plant gardeners will be able to keep their beloved plants safe from disease and ensure they stay healthy throughout the season.
Potting Mix Recipes For Spider Plant Care
A successful spider plant care routine requires the right potting mix. A common example is that of Samantha, a novice gardener who was determined to get her spider plants flourishing with lush green foliage. She found success by creating the perfect recipe for her potting mix: equal parts soil and peat moss with enough perlite or vermiculite to ensure proper drainage. This mixture gave her spider plants all the nutrients they needed without risking overwatering them due to poor drainage.
The secret ingredient in any good potting mix recipe is organic matter such as composted leaves and manure which provides essential minerals and microorganisms required for healthy growth. It’s also important to balance out some heavier soils with something lighter like sand or pine bark mulch, ensuring that your spider plants have access to both water and oxygen in their container environment. Finally, when it comes time to repot your spiders every few years, adding fertilizer helps keep nutrient levels high while providing additional protection against disease-causing pathogens.
All these elements combine into an ideal foundation for growing beautiful, healthy spider plants—one that will allow you to confidently troubleshoot any common problems that may arise during the lifespan of your beloved greenery.
Signs Of Stress In Spider Plants
Spider plants are notoriously resilient, but that doesn’t mean they don’t suffer from stress. It is important for gardeners to recognize the signs of distress in their spider plant so that appropriate action can be taken quickly to ensure its health and well-being.
The first sign of a stressed spider plant is wilting or drooping foliage. If this occurs, it could indicate too much heat or sunlight, inadequate water, or a nutrient deficiency. Browning leaves may also be an indication of a lack of humidity or overly dry soil.
Yellowing leaves may suggest overwatering; however, if accompanied by root rot, then insufficient drainage within the pot might be causing the problem. Additionally, yellowed edges on the leaves can indicate salt buildup due to hard water or fertilizer burn caused by over-fertilizing with high concentrations of nutrients. In any case, when spotting these symptoms it is best to take immediate action before further damage takes place.
Root growth should also be monitored closely as this helps determine whether repotting is necessary to provide adequate space for healthy development. Slow-growing roots often point towards compacted soil lacking oxygen and nutrients essential for proper growth and flowering.
Troubleshooting Common Problems
Spider plants are resilient species and can tolerate some degree of neglect. However, there are common problems that can arise if the plant is not properly cared for. These include browning leaves, yellowing foliage, wilting stems, and stunted growth.
The first step in troubleshooting any of these issues is to ensure adequate light levels. Spider plants require bright indirect sunlight to thrive; direct sun exposure may cause scorching or burning of their delicate leaves. In addition, they like slightly moist soil but should be allowed to dry out between waterings so as not to become over-saturated with moisture. If the potting mix remains too wet or too dry it will stress the roots and lead to leaf discoloration or wilting.
Finally, spider plants benefit greatly from regular fertilization during periods of active growth (spring and summer). A diluted fertilizer solution applied once every three weeks helps them grow vibrant and healthy foliage. Without additional nutrients being added to the soil periodically, their growth may slow down significantly.
To maximize spider plant health and longevity, providing proper care including sufficient light levels, appropriate watering schedule, and timely fertilizing applications is essential.
Ways To Maximize Growth Potential
Spider plants are one of the most popular houseplants, with over 300 million cultivated annually. To ensure that your spider plant achieves its fullest potential, it is important to understand how best to maximize its growth rate. Here are 6 ways for owners of this beloved plant to get the most out of their greenery:
- Provide adequate sunlight – Spider plants require bright indirect light for optimum growth; placing them near a window or on a sunny balcony will help encourage strong leaf and root development.
- Keep soil consistently moist – As with all plants, spider plants need consistent moisture in order to thrive; water when the top inch of the soil surface feels dry and provides enough hydration so that excess drains from the bottom of the pot.
- Feed regularly – Fertilize monthly during the active growing season (spring/summer) using balanced liquid fertilizer diluted according to package instructions; feeding less frequently but more heavily once every three months can also be beneficial.
- Prune as needed – Remove yellowed leaves or stems that have grown too long by snipping just above where they meet the main stem, which will promote bushier foliage and healthier overall structure.
- Repot periodically – A container slightly larger than the current size should be used when repotting; the new soil should contain added organic matter such as compost or peat moss for increased fertility and drainage capabilities.
- Be vigilant about pests – Check regularly for signs of infestation, including small webs or discolored spots on foliage; if detected early enough, pesticides designed specifically for use on spider plants may be able to eradicate problem before significant damage has occurred.
In a Nutshell
Spider plants love rich, well-draining potting soil, but not “wet” soil, and when fertilized every two to four weeks, they will grow exceptionally well in low light conditions. However, they benefit from a sunny window twice a week or so, but like most other plants, they do not like drafts or the cold.
Spider plant propagation is relatively easy because they send out shoots or stalks, and in the end, our baby spider plants. All you need do is remove the baby spider plant and root it in water until they reach an inch or so, then just transplant it into a pot or container filled with rich, well-draining potting soil.
As the roots begin to become bound (set into) to the soil, the new plant will produce baby spider plants of its own. For this reason, you should not transplant them into too large of a container.
Many people who have never grown houseplants have discovered that not only do they help keep the air clean during those long cold days of winter but they also provide added beauty to your home. Once you start growing indoor houseplants, you will always want to hang them in windows or display them.
Read also: Why Grow the Borage Plant in Your Herb Garden?