Providing the needs of your orchids well will give you a flourishing and blossoming garden of exotic flowers. When caring for your orchids, pay attention to the flowers, stems, leaves, growing medium, pots, preventing any infection and diseases, and the orchid’s roots.
The roots absorb water and nutrients from the growing medium. Therefore, through the orchid’s roots, water and nutrients are supplied to the entire plant. Nourished and sustained well, your orchids can then carry out their daily life processes, thrive, and beautiful bloom.
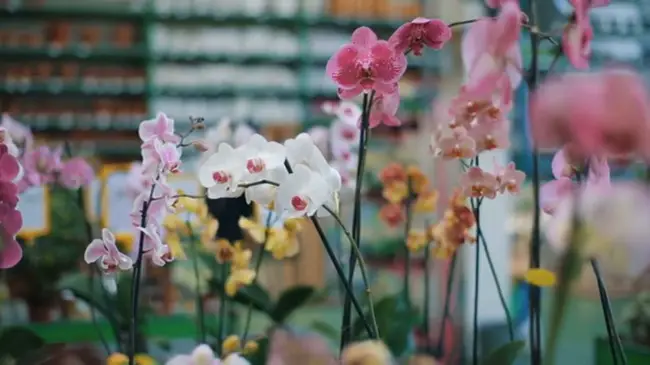
Orchids roots serve as a support for the entire plant because it anchors in the soil. There are two types of orchids according to the kind of roots: fine-rooted and thick-rooted orchids. One type of fine-rooted orchids is the Oncidium, and an example of the thick-rooted orchids is the Phalaenopsis.
Orchid roots need to be trimmed and cleaned of debris to remain healthy. Trimming and cleaning the orchid’s roots should be done every six months or so.
Orchids Roots And Types Of Orchids
There are two types of orchids according to their root characteristics: the fine-rooted orchids and the thick-rooted orchids. Oncidium is an example of a fine-rooted orchid. White Phalaenopsis is an example of a thick-rooted orchid.
As an important aspect of proper orchids roots care, trim the plants regularly to remove unwanted parts.
Clean debris on the roots and growing medium of the orchids so that the orchid’s roots will remain as healthy as they can be. Regular trimming and cleaning of orchids roots of your orchids are typically done every six months to foster the proper growth and development of the plants.
How To Clean And Trim Orchids Roots
Here are steps on how to clean and trim the roots of your orchids. Prepare plant clippers or sharp scissors. These are tools you need to trim the orchid’s roots. Along with these, ready a newspaper and a pair of gardening gloves. Remove the old potting mix you have been using as a planting medium for your orchids.
Place the roots on the newspaper or any covering that you can throw after the procedure. Check for any presence of rotted or dead roots. Identify the green roots, healthy roots, the yellow stringy, dry roots or the hollow, and the dry mushy roots. Inspect the roots well to determine if you need to cut the old roots off the root bulb.
After examining the rooted or decayed root of the orchids, cut a little higher from the point of the decayed or rotted area to remove the entire dead root. Cut all the rotting roots so that the healthy roots can function well. The entire orchid root system needs proper air circulation.
The roots ought to be free from any decay or rots to function at the optimum level. After cutting all the decayed and rotted roots, repot the orchid using a new and fresh potting mix.
Prevent Fungus Infestation In Orchids Roots
Prevent fungus from attacking the orchid roots because it can cause root rot, yellow leaves, and the death of your plants. Prevent the possibility of fungi infection in the orchid’s roots through the following steps.
Do not water your orchids on a cool or cloudy day. Avoid overwatering your orchids as well. Allow the plant to dry in between watering. Too much water can cause root rot. Change the old growing medium to a fresh medium before it decays.
If you notice a fungal infection in your plant, treat it immediately to prevent infecting other plants. Life springs from the roots of your orchids. Healthy roots pave healthy channels for the fresh and lively growth of your orchids.
Nutrient Absorption In Orchids Roots
The true vitality of your orchids comes from the roots. The roots of orchids are responsible for the absorption of water and nutrients from the soil. The roots as the origin of life for your orchids serve as anchors that support the entire plant.
Absorbed water and nutrients are then supplied to all parts of the plant to carry out the necessary life processes for proper growth and development. The roots of the orchid plant are very crucial. That´s why you have to do the necessary tasks that promote the proper functioning of this component of your orchids.
Orchids Roots Nourish The Plant
From the roots, life springs. That’s why you need to care for orchid roots if you want lovely blooms. The roots of orchids plants are vital to their entire system because they supply the needed water and nutrients to all parts. Taking proper care of Orchids Roots ensures the proper growth and development of your garden.
By this, it means you need to maintain your orchids and nourish them well. The roots, the leaves, stems, flowers, the growing medium, and the pots are of primary importance. See to it that infection and diseases do not invade the plant.
Types Of Orchids According To Orchids Roots
Why are Orchids Roots vital to the whole orchid plant? It’s mainly because these components are responsible for absorbing water and nutrients from the growing medium. Through this process, the plant can subsequently carry out its daily life processes and grow healthily. Orchids’ roots anchor in the soil. Basically, that’s why it supports the whole plant.
There are two kinds of orchids plants basing on their roots: the fine-rooted orchids and the thick-rooted orchids. Under the category of fine rooted orchids, you’ll find Oncidium as an example, and for the thick rooted orchid, there’s the Phalaenopsis.
Trimming And Cleaning Orchids Roots
It’s time to repot your orchid after removing the rotten or dead roots. It would help if you replanted your orchids in a new and fresh potting mix. While growing orchids, be wary of fungus infection in the roots as well.
Prevent fungus infection in the roots of your orchids with these tips. Avoid watering on a cool or cloudy day. Overwatering causes orchid root rot, so don’t do this to your plant.
Allow the plant to dry in between watering. If the fungus does attack your orchids, have it treated immediately so that it does not harm your orchid’s roots and the entire plant.
A Straightforward Guide in Repotting Orchids
Repotting orchids is another essential task when propagating orchids. This may not be a difficult task to perform, but you have to execute the procedures carefully. This is because to prevent any unwanted damage or injury to your growing orchid plant. And of course, you do not want to risk the life of your orchids just because of a single mistake in repotting them.
The main purpose why repotting of orchids is performed due to the following reasons:
- To provide fresh media to the root system of the orchids;
- To promote good aeration; and,
- To provide a larger pot that can sustain the orchid’s growth for a year or two.
You have to prepare a complete set of repotting equipment so that you can avoid unnecessary delays and perform it in the best way possible. Here are some important equipment in repotting of orchids:
- Right growing medium such as orchid bark, fir bark, coconut husk, tree fern fibers, perlite, and sphagnum moss;
- A new large pot that can sustain the growth of your orchid plants for about a couple of years;
- Sanitized lava rock or clay pot shards, which will serve as a covering for the drainage holes in the pots;
- Bamboo pole and wire plant tie, which are used to anchor your newly repotted orchid plant. They will guide the upward growth of the orchids as they are starting to adjust in the new pot;
- Get a sanitized knife or pruning clippers to trim dead roots or too long roots of your orchids; and,
- Get an anti-fungal powder or pruning sealer and apply it to any open cuts that you found on the rhizome. This will help to prevent fungal infection in your orchid plant.
Here are some helpful tips as you perform repotting of your orchids:
- Choose the appropriate compost for your orchid plants. There are various compost mixtures available in nursery or garden centers. Some of them include orchid grade bark chippings, lump peat, foam; sphagnum moss, bark and foam mix; and rock wool.
- Select the orchid with old growths and papery sheaths because it needs to be cleaned up and repotted.
- Perform repotting during the late part of spring and early part of summer.
- Do not repot your orchids when they are flowering. It would help if you repotted them after they have bear flowers.
Read also: How To Rebloom Orchids – Learn The Secret Method
Propagating Orchids Stem successfully
Orchid propagators that have advance knowledge and experience should only do orchids stem propagation. This is because stem propagation involves complex procedures that beginners may encounter difficulty or problems it.
Materials necessary in Growing Orchids Stem
As you perform orchids stem propagation, you have to be equipped with correct and complete tools and materials. A complete set of materials and tools will help you easily perform the orchids’ stem propagation procedures without hassles.
A complete set of tools includes a rectangular plastic tray, spray bottle, square flasks, soft toothbrush, razor blades, 7-inch forceps or tweezers, sterile culture tubes with one-hole stoppers, and tube rack hold the culture tubes, labeling material, synthetic cotton, and autoclave machine.
You also need materials in stem propagation such as distilled water, dishwashing detergent, liquid household bleach, stem propagation media, and agar-agar. After you have prepared all the materials and tools, you can start the stem propagation procedure immediately.
Some tips in Propagating Orchids Stem
If you are raising an epiphytic orchid, you can use cutting to grow them. You have to take out aerial roots from various places on the stem. Then, it would be best if you cut the stem right below the roots of the orchid. Then, you have to place a small amount of growing medium inside the pot.
Make sure that the pot has enough holes to promote good drainage. Place the stem in the growing medium with roots facing down. Put more medium that will cover all the roots and will support the stem in place.
If you are propagating terrestrial orchids, you should take the cutting near the base of the orchid. Before cutting, you have to make sure that you include one pseudobulb and a couple of roots.
Then, set a small amount of growing medium in the pot. The pot should have enough holes that can promote moderate drainage.
Next, you have to place the cutting in the growing medium with roots facing down. You have to add more medium to cover the roots and hold the cutting in place. You have to keep the pseudobulbs above the growing medium.
Read also:
- Knowing Different Types of Orchids
- Proper Identification of Orchid Problems and Provide The Treatment