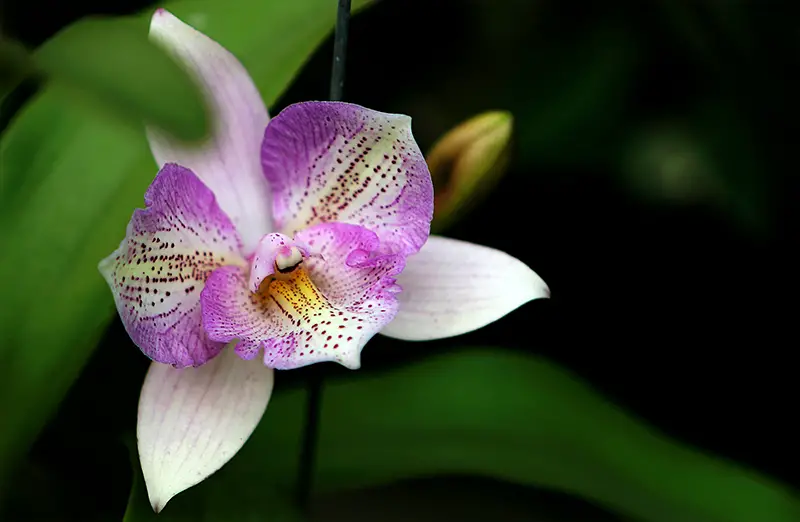
Growing orchids is a fun and exciting past-time activity. As they bear flowers, you can place them indoors or outside your home and make them attractive decorations. You can also add flowers in bouquets or corsages for special events.
Orchids can really be used in various ways. But as you go along propagating them, there are inevitable circumstances that you can encounter, and one of them is orchid problems. Orchids also make it difficult to determine when problems can deteriorate and die quickly if they are missed and resolved.
Healthy orchids are obvious to the naked eye. Really sick orchids may not be as obvious at first glance. Often, the fungal disease can be well-progressed and close to killing a plant before signs become obvious. The best way to avoid these kinds of problems is to learn the early-stage signals that indicate disease.
Like all other plants, Orchids need to have the same basic needs to avoid problems and pests. However, due to the nature of orchids and, in particular, their diverse geographic origins and types – epiphytes or terrestrial, how problems are addressed can differ from considerably mainstream plants.
There are several reasons why there are orchid problems. You have to identify the cause of the orchid problems so that you can immediately institute appropriate interventions. This will help prevent causing damage or leaving detrimental effects on your growing orchid plants. Thus, your plant can still grow healthy after undergoing a problem.
In propagating orchids, the orchid grower can encounter a lot of orchid problems. Beginners might doubt what to do, but the first thing you should do is to identify what triggered the event because this will guide you in creating a plan for proper interventions.
Here are some orchid problems that an orchid propagator can encounter:
1. Pest
Pests are one of the most common problems in orchids. Various pests can cause harm to your plant, which includes slugs, mealybugs, weevils, common scale, Boisduval scale, thrips, greenflies, blackflies, and spider mites.
They feed on the plant’s sap, which causes the plant’s leaves to become yellow and its growth to halt. The aphids are the worse concern because they penetrate the leaves of the orchid, causing it to wilt and turn brown. Spider mites are another pest that can attack your orchid, leaving your plant dry and more susceptible to illness.
Treatment:
All of these pests can be killed by using natural insecticides like neem oil or citrus-based sprays. If you must use a pesticide, do it with extreme caution and after carefully studying the product label. But, prevention is key, so isolate your orchids from other susceptible plants and do regular pest checks so you can act quickly if necessary. Make sure your plants are getting enough water and fertilizer to survive and develop without pests.
2. Fungal
Fungal infections can kill an orchid in no time at all. If you have a plant with leaves containing yellow streaked areas turning to black streaks or circles, you are likely dealing with some fungus.
Treatment:
Here are some steps you can take to treat your orchids that are infected by fungal:
- Determine the type of fungal infection: Orchid plants can be affected by a variety of fungal infections, including black rot, brown spot, and anthracnose. Identifying the specific type of infection will assist you in selecting the best treatment method.
- Remove infected areas: Once you’ve identified the infected areas of the plant, cut them away with a sterilized pair of scissors or a blade. Make sure to cut deeply into healthy tissue and discard infected parts.
- Apply fungicide: After removing the infected tissue, apply a fungicide to the healthy tissue that remains. Choose a fungicide designed specifically for orchid plants and carefully follow the label instructions.
- Increase air circulation: Since fungal infections thrive in humid, stagnant air. Improve the air circulation around your orchid plant to prevent future infections. Place a small fan near the plant or keep it in a well-ventilated area to accomplish this.
- Maintain proper watering: Fungal infections in orchid plants are commonly caused by overwatering. Ascertain that the plant is not submerged in water and that the pot has adequate drainage holes. Only water the plant when the soil is dry to the touch.
- Keep the plant clean: Use a damp cloth or sponge to clean the leaves and other parts of the orchid plant on a regular basis. This will aid in the removal of any dust or debris that may harbor fungal spores.
3. Viruses
Viruses do not only attack humans but as well as orchids. Odontoglossum ringspot virus (ORSV) and Cymbidium mosaic virus (CymMV) are two of the most common viruses that cause problems in orchids.
If left untreated, they can cause significant harm to the plant. Unlike fungal, which can be treated with fungicides and other chemicals, viruses cannot be stopped except by the application of extremely cautious preventative measures. The first step in getting new plants is to inspect them carefully. If the leaves have spots or streaks of discoloration that do not disappear with a wipe of the cloth, the plant may be infected with a virus, and you should not buy it.
It’s important to keep an eye out for signs of plant viruses as you bring your plants indoors, such as mottled leaves, yellowing or necrotic foliage, and deformed flowers. Possible symptoms of viral infection in plants include the following. You should immediately isolate the plant showing these symptoms from the rest of your collection to prevent the spread of the illness.
If your orchid has been infected with a virus, isolate it. You have to throw gloves that have been exposed to the infected orchids and sterilize all the tools you have used in the infected orchid.
Treatment:
In some cases, removing affected parts can help contain the virus – however, this will weaken the plant’s vigor so use caution when deciding which approach to take.
If possible, identify what kind of virus has infected your plant as different kinds require different approaches for containment. Knowing whether you’re dealing with a potyvirus or cucumovirus will make it easier to develop a specific strategy for managing it.
The best way to deal with viruses is prevention! Make sure each new addition passes inspection before bringing them into your environment and practice good hygiene by cleaning pruning shears between uses on multiple plants. Taking steps like these can go a long way toward keeping your orchid garden healthy and beautiful.
4. Root Problems
Root problems can also occur if they are placed in an unsuitable area for growth and development. And if the orchid grower has not provided all the needs of the plant. This can lead to the yellowing of leaves, and your orchids will not bear flowers.
Treatment:
The first step in determining if your orchid has a root issue is to inspect the roots for any signs of damage, rot, or discoloration. If you see anything out of the ordinary, it’s time to take action before the problem gets worse. You’ll want to carefully remove any damaged roots and repot your orchid in fresh potting mix. Make sure you don’t overwater as this could further exacerbate any existing root issues.
Next up, keep an eye out for nutrient deficiencies which may cause stunted growth and yellowing leaves. A good way to tell if there’s a lack of nutrients is by examining the color of the new leaves – they should be vibrant green rather than light-colored yellowish-green hues. If nutrition is lacking, add fertilizer specific to orchids and follow directions closely when applying it; too much fertilizer can be just as bad as too little!
After that, examine how often you are watering your plant. Overwatering can lead to soggy soil and waterlogged roots, causing them to become unable to absorb oxygen leading to the death of roots over time – called ‘root rot.’ So make sure you’re keeping track of your watering schedule and stick to it religiously!
When repotting your orchids, it’s important to check the roots for signs of rot from too much water. If they are soft to the touch, you need to place them into drier soil and refrain from overwatering.
It is often possible to recover an orchid with soaked roots if the potting media is changed immediately for a drier alternative. The roots are allowed to dry out completely.
5. Yellowing Of The Orchid’s Leaves
Many orchid growers experience issues with the leaves becoming yellow. There are a number of potential causes, and identifying them will help you get your plant back on track.

Here are some possible causes:
- Not enough light: Orchids need bright, indirect light—if yours isn’t getting enough, its leaves will start to turn yellow.
- Too much fertilizer: Overfertilizing can cause leaf burn which results in them turning yellow.
- Temperature fluctuations: If the temperature drops too low at night, it can also lead to the yellowing of the leaves.
- Water imbalance: Either overwatering or underwatering can result in the leaves becoming discolored.
Treatment:
It’s essential that you identify why your orchid’s leaves have started to turn yellow so you can take action right away! Depending on the underlying cause, there are different steps you should take to correct it. For example, if not enough light is causing the issue then moving your plant closer to a window might help; whereas if overwatering was responsible then cutting back how often you water would do the trick. Ultimately, knowing why is key when trying to fix any problems with an orchid.
If none of these potential issues seem like they’re behind your plants’ yellowed leaves then consider taking it into a greenhouse where someone more qualified than yourself may be able to diagnose and treat whatever is going wrong. In addition, researching online about other reasons why an orchid’s leaves might start turning yellow could provide valuable insight as well!
The bottom line here is that no matter what’s causing your orchids’ troubles, being proactive and doing research will give you a better chance at restoring their health and vibrancy sooner rather than later! Taking care of an orchid requires dedication but with patience and proper knowledge, beautiful blooms are achievable!
To prevent the yellowing of the orchid’s leaves, you have to provide for all their needs to promote proper growth and development.
6. Bacterial Infection
If you found your orchid seems to have bizarre-looking patches on its leaves. It starts as a sort of a wet spot, the color changes a little bit, and then as days go by, it progresses pretty fast and takes over more and more of the leaf in the original place where the wet spots started to appear a brown thing going on.
Your orchids are actually going yellow. Then you know the disease is actually spreading. You may find some bacterial brown rot, and you need to take some action to solve the issue.
Treatment:
You will need a sterilized pair of scissors or a sterilized blade. To sterilize it, you can use alcohol and clean the blades of your scissors as much as you can. You can also flame them a bit, as this will take care of all the pathogens that might be present on your scissors.
When dealing with a bacterial infection orchid, you need to remove the affected portion. If you still have a piece of leaf that is not affected, you can cut it into healthy tissue, so you will see where the edge of the infection is.
If you have any, you should use a sort of bacteriacide or fungicide, but some substances are forbidden. Also, you might be the type of person who doesn’t like to use pretty toxic substances, so if you are acquainted with
bacteriacide or fungicides, then you can use them regularly.
If you are not the type of person who wishes to use pre-toxic substances, you can use hydrogen peroxide, which you can actually find this at your local pharmacy. It disinfects wounds, so it is not toxic but does get the 3 percent concentration.
You can pour hydrogen peroxide into a little bottle and spray the entire orchid or just the part of the affected orchid. Hydrogen peroxide has the benefit of actually eliminating fungi.
You may also try to use cinnamon on cut wounds. You may wonder how cinnamon works well. Practically cinnamon dehydrates. This means that a layer of tissue will get very dry. A dry layer of tissue cannot get infected, so this is why you can use cinnamon as a prevention for reinfection of the leaf.
You can apply cinnamon only on the portion that you just cut. Remember to try not to spread cinnamon on the surface of the media and the roots. This is due to dehydration, and roots really don’t like to be dehydrated.
7. Dry off the Orchid
Water can get trapped and promote rotting infections, bacterial, and fungal infections, and other diseases. This can be the reason your orchid got sick. To prevent this, try not to water your orchids from above, particularly for new-growth orchids. If you are forced to water your orchid, make sure that you dry off the new growth as best as possible.
Treatment:
When it comes to drying off the orchid, you can use tissue paper to remove as much water as possible and if you cannot get in all the crevices, try placing your orchid in front of a fan for a couple of hours, and this will prevent infection.
You can also place the orchid in front of a fan as close as possible. Make sure that the orchid will not tip over because of the blow of the fan. Also, make sure that the leaves don’t brush against each other, destroying each other.
Also, try to maintain your growing area very well-ventilated. Fresh air is essential, so make sure that you open the windows. If it’s too cold outside, at least keep them open for five to ten minutes to refresh the air.
Let the orchid benefit from the draft, and in about an hour, it’s going to be completely dry.
8. Toxic Plight
Orchids are susceptible to mineral toxicity as well. While the plant needs a certain number of minerals to be healthy, too many can cause poisoning that, in some cases, can kill the plant. You can identify this problem when younger leaves turn yellow (those yellow leaves again) as soon as they mature.
Treatment:
In particular, orchids have a sensitivity to phosphorous. You can remedy all mineral issues by changing the potting media and employing the correct fertilizer.
9. Too Much Sunlight
As briefly mentioned above, some problems can occur from too much sunlight. Leaves that are yellow with brown or black spots can indicate ‘sunburn.’ To determine if this is the case, move plants out of the sun and remove any affected leaves (or part of a leaf).
Treatment:
If the yellowing and spots return in this reduced lighting, you can eliminate the sun being the cause and start looking at other potential causes such as a fungus or bug infestation.
Finally
Orchids provide some of the most gorgeous and delicate flowers available in the whole plant kingdom. Part of taking good care of your orchids is spotting and rectifying problems as quickly and effectively.
In addition to the points provided in this article, you should become familiar with the specific needs of your orchid. Doing so will guarantee your orchids remain beautiful, provide enormous satisfaction, and be admired for years to come.