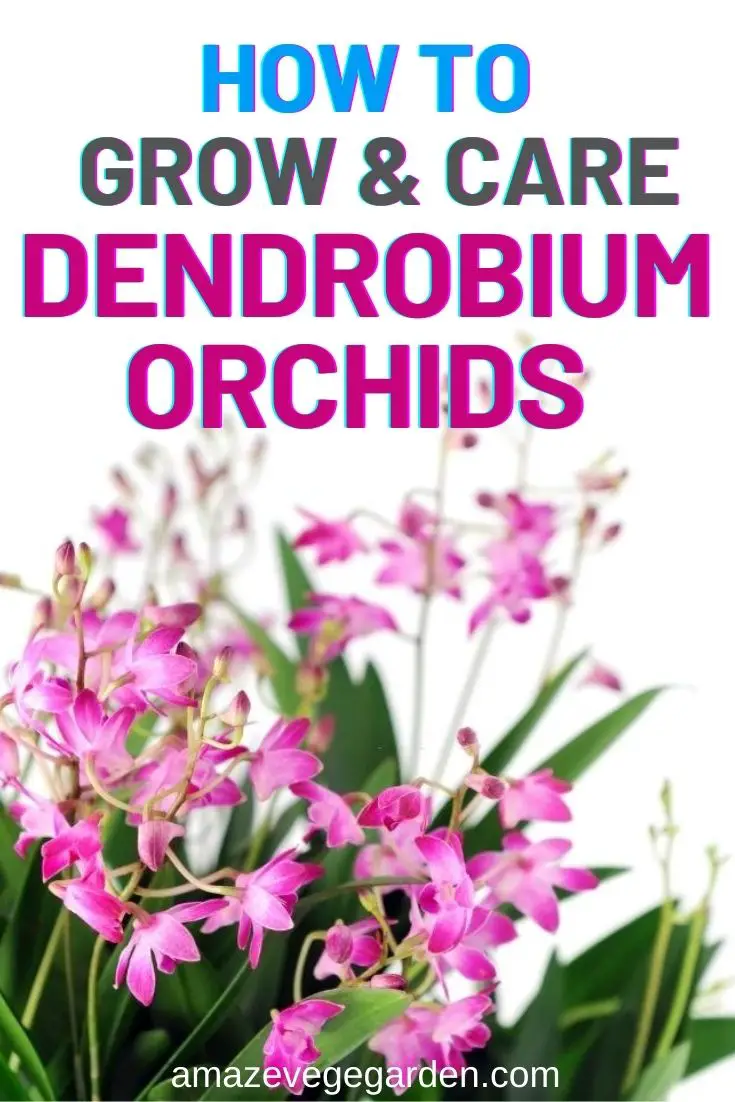
Welcome to the world of dendrobium orchids! I’m here to guide you through everything you need to know about growing these beautiful blooms. Growing dendrobiums is incredibly rewarding; once you master them, your home will be filled with vibrant colors and unique textures that simply can’t be found elsewhere. With just a few simple steps, even novice gardeners can learn how to successfully nurture and grow their own amazing dendrobium orchid display.
Dendrobium orchids are a species of orchid that come in a variety of shapes, sizes, and colors. They can be found growing wild in tropical regions all over the world, but they’re also grown as houseplants and commercially. These beautiful plants require some special care to flourish and produce gorgeous blooms.
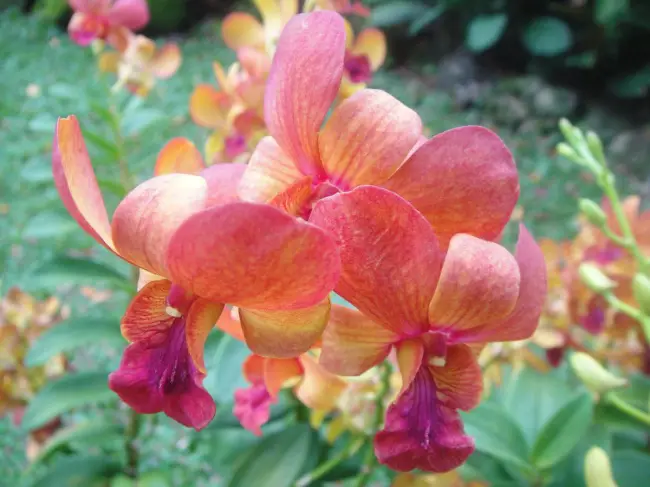
What makes dendrobiums so special? These stunning flowers are native to tropical regions around the world. In addition to being highly attractive, they’re also relatively low-maintenance plants that don’t require much care beyond watering every now and then. Plus, they come in an array of shapes, sizes, and colors – from soft pink petals to bold purple hues – giving you plenty of options when creating your perfect floral arrangement.
Are Dendrobium Orchids Easy To Grow?
I’d like to emphasize that Dendrobium Orchid is an excellent choice for those new to orchid cultivation. I’ve heard from many people who express interest in growing Dendrobium but are unsure how to get started. As a beginner orchid grower, it’s easy to feel overwhelmed, but fear not!
I am going to alleviate your worries by sharing with you how to grow Dendrobium. When it comes to growing Dendrobium orchids, they can say to be one of the easiest plants to grow into flowers.
What you need to do is to provide the right environment for your plant, which includes proper light, temperature, humidity, and watering levels. Dendrobiums prefer bright indirect sunlight so make sure it’s placed in an area that allows for this without too much direct sun exposure.
The temperature should stay between 65-85 degrees F during their growing season (spring-fall). On top of this they require high humidity – 60% or higher – so consider using a humidifier if needed. Lastly, water them regularly but do not overwater; wait until the soil has dried out before giving them another drink.
Then, you need to prepare the fertilizers and repotting needs. A balanced fertilizer such as 20-20-20 every two weeks during their active growth period will help keep them healthy and happy.
You need to repot your dendrobium once a year into fresh media like bark chips or sphagnum moss with good drainage holes at the bottom of your pot. This helps ensure nutrients are continually replenished throughout their lifecycle and keeps the roots from becoming rootbound over time.
It is good for you to pay attention to signs that might indicate something isn’t quite right with your plant: yellowing leaves can be caused by nutrient deficiency while brown spots typically point towards environmental issues like too little humidity or temperature fluctuations – both easy fixes! If you’re diligent about providing the necessary care requirements then there’s no reason why growing dendrobiums shouldn’t be successful.
Supplies Needed For Growing Dendrobium Orchids
Now that you know the ideal climate for growing dendrobium orchids, it’s time to collect supplies. To get your plants thriving, start by gathering a variety of materials designed specifically for orchid care. First up: potting mix!
Orchids require their own special blend of bark and moss in order to flourish. A typical good-quality mix will include shredded fir bark, sphagnum moss, charcoal bits, and pieces of cork. These components are essential as they create an optimal environment for these unique plants while also encouraging drainage and aeration. For best results be sure to purchase a pre-made bagged soil mixture rather than creating one yourself.
Next on the list is containers. Traditional ceramic pots make great homes for dendrobiums but there are other options available such as clear plastic containers which allow you to monitor root growth more easily. Whichever type you choose make sure that it has plenty of holes along the sides and bottom so water can drain out freely after watering sessions.
With all the necessary equipment gathered together, it’s time to move on to preparing the perfect potting mix for your dendrobium orchid collection!
Preparation Of Potting Mix
Compared to growing other orchids, dendrobiums are a bit like the chef’s special of the orchid world. They require more attention to detail and enjoy being coddled in their cozy potting mix home. Preparing the right soil is key for these precious beauties.
Like any gourmet meal, creating the perfect potting mix requires just the right ingredients at just the right ratio. Dendrobiums need a blend that drains well but still retains enough moisture for them to stay hydrated during dry spells. To accomplish this balancing act, use equal parts fir bark, peat moss, and perlite or coarse sand along with some slow-release fertilizer pellets mixed in. This combination provides an ideal environment where your plant can thrive.
The next step is adding charcoal pieces for extra drainage and aeration—these little bits will help keep excess water from clogging up air spaces between particles and causing root rot. Finally, you’ll want to moisten everything before planting so it holds together better when you add your dendrobium seedling into its new home.
Watering And Fertilizing A Dendrobium Orchid
Watering and fertilizing a dendrobium orchid is an important part of its care. You should water your orchid once every 7-10 days, depending on the environment it’s in. Make sure you use lukewarm water as cold water can shock their roots. Don’t let the potting mix dry out completely; if that happens, rehydrate with several soakings over a few hours until all signs of moisture have returned to the soil.
Some people are wondering do they need to water their dendrobium orchids from the top or bottom. Well, it actually doesn’t matter. The thing that does matter is you need to make sure that you pour enough water through the pot to ensure the roots are getting soaked.
You also need to fertilize your dendrobium orchid regularly for healthy growth and blooms. Use a balanced 10-10-10 fertilizer diluted to one-quarter strength during the active growing season (usually spring/summer). Stop fertilizing when buds start forming, then resume again after flowering has finished. Be careful not to overwater while doing so – otherwise, you risk root rot!
Having Enough Sun
Have you been wondering what type of light your dendrobium orchid needs to thrive? While all orchids need some sunlight, the amount and intensity that a dendrobium requires can vary depending on its origin. Dendrobiums from tropical climates may require more direct sun than those from cooler areas.
In general, most species prefer bright indirect light for the best growth and flowering. This means placing them near an east-facing window in winter months when there is less natural lighting available outside. You shouldn’t place them near the north-facing window, there is nothing you can plant or flower in there. However, it’s important not to expose these plants to too much direct sun as this could burn their leaves causing permanent damage.
For optimal results, try to keep the temperature around 70 degrees Fahrenheit during the day and slightly lower at night. In addition, misting will help increase humidity levels which are essential for healthy root development. By allowing enough exposure to sunlight while keeping temperatures moderate and humidity high, you will be providing your dendrobium with ideal conditions for successful growing!
Pruning And Repotting A Dendrobium Orchid
The health of a dendrobium orchid depends in large part on how often you prune and repot it. If you do it well, it will help your plant live for a very long time.
Before everything else, if the dendrobium’s leaves begin to turn yellow or brown, it’s time to prune. This indicates that the old foliage is no longer feeding the plant and should be removed to promote new development. Cut back the plant so that you are just above the point where two leaves join at the base. Just like any other plant, a dendrobium will need some time to recover before new buds grow if you prune it down to two leaves.
It is recommended to repot your dendrobium every two to three years, though this will vary depending on the size of your plant. Fill the container about three-quarters of the way with new, orchid-specific potting mix before settling the roots in. Until new growth grows, spray the top of the soil lightly after transplanting.
In order to maintain your dendrobium in top condition over time, it will require regular repotting as well as pruning. A healthy orchid can be enjoyed for many years, regardless of the presence or absence of pests and illnesses, if its owner takes the time to learn when and how much care it requires.
How To Protect Your Dendrobium Orchid From Pests And Diseases
Controlling pests and diseases is crucial to maintaining healthy dendrobiums, as any seasoned orchid grower can tell you. Thankfully, there are several easy measures you may take to safeguard your plants from harm.
- Keep a close eye on the plant; every so often, inspect the leaves for any symptoms of pests or illness. If you see something that doesn’t seem quite right, don’t delay in fixing it so it doesn’t spread to the rest of the plant.
- Make sure your dendrobiums always have access to plenty of water, as low humidity increases their susceptibility to fungal and bacterial illnesses. If you don’t have access to a humidifier, spritz them frequently with water.
- Remove infected or dead leaves quickly so that the disease doesn’t spread to other areas of the plant. Whenever feasible, use sterile trimming instruments to avoid spreading any unwanted bacteria or viruses.
By taking these three steps, you’ll be on your way toward eliminating any potential problems with pests or diseases in your dendrobiums!
How Do I Care For My Dendrobium Orchid After Flowering
Caring for a dendrobium orchid after flowering requires regular maintenance and attention. Once the petals of the flowers have fallen, it’s time to prepare your plant for new blooms. Properly pruning the stems is essential in allowing light into the center of your plant, so that fresh growth can emerge.
You’ll need to clip off any dead stem tips and remove spent flower clusters from their stalks. This encourages healthy regrowth as well as prevents the disease from spreading through your orchid. Next, use sharp scissors or shears to cut back dead woody stems by about two inches just below where the last node was located on each branch.
Make sure not to leave too much foliage when trimming; leaving too many leaves will block sunlight from reaching lower parts of the plant which could prevent future blooms from occurring.
Repotting your dendrobium every year or two will help keep its roots healthy and promote better air circulation around them. When doing this, be careful not to damage existing roots; make sure they are spread out evenly within the new potting mix before securing them with stakes if necessary.
It’s also important to provide adequate drainage for excess water; add small pieces of rock or perlite in between layers of soil for this purpose.
How Long do Dendrobium Orchids Last?
The life expectancy of dendrobium orchids varies greatly from one species to another and from one growing environment to another. Depending on the species, with the right care they can live for many years. If you provide your orchid with the conditions it requires, it will thrive and survive for as long as possible. With the right conditions, such as plenty of sunlight, water, and fertilizer, your dendrobium should flourish and produce beautiful flowers year after year.
Their necessity for repotting every year to two years is a crucial element in their short lifespan. By reintroducing soil nutrients and promoting unrestricted growth of new roots, this practice helps keep plants in good health. You can also see if any of the older stems or leaves have gotten diseased and need to be removed.
Dendrobiums are low-maintenance plants that thrive with occasional but significant shifts in humidity and temperature. If you take good care of your flowers, they should continue to bring you happiness for many years.
Light is essential for orchid development and flowering. The blooming period could extend up to three months with proper maintenance.
When talking about how long an orchid lasts, we should talk about the plant itself rather than its flowers. It is a common misconception that after the flowers fade, the orchid will as well. The opposite is true. How long the flowers last will be affected by factors such as the conditions in which they are grown. Orchid plants have a very long lifespan.
Should You Cut Off Old Dendrobium Orchid Stems or Canes?
Many people wonder if, after flowering a Dendrobium cane, can they cut it away because most of the time, it doesn’t look so nice. Most people think the canes are actually stemmed, and they just cut it off to keep the beauty of the flower. But if you know orchids by now, you should know these flowers are special, so the canes are special too.
They are not just flowering stems, and you should never cut Dendrobium cane unless they die away. I will tell you more about Dendrobium and explain why you shouldn’t cut the canes and when you actually can.
I have a Dendrobium that is deciduous, and every year it will lose its leaves. This is perfectly normal with this type of Dendrobium. However, as the years pass, you are going to end up with a whole bunch of bare canes. That’s why you should not cut live canes.
First of all, many species and varieties of orchids can rebloom themselves. So even if they bloomed last year, they could create buds and blooms this year.
Second, even if the canes might look dead, they are actually not. The dried sheets cover them. They actually store water and nutrients to feed the new growth. Practically, the more canes you have, the more they will help, and they will store energy for new growth.
Third, the new canes will have leaves and bloom sprout from the base of the older ones. If you cut an older cane too low, there will be no more available eyes for new growth to be produced. Therefore, if you overdo your orchids, you can actually kill them because you will cut the growing structures.
However, this doesn’t mean that your Dendrobium orchid should have old canes forever. Nothing is actually forever, and the orchid can regenerate itself periodically as well. As the years go by, the oldest canes can actually dry off. It has no more structure, and it is shriveled, and it will eventually die off.
In this case, it is perfectly safe for you to cut these canes, and it is actually advisable for you to do so because they can attract disease if you leave them unattended. They can harbor pissed, and they actually don’t do anything for the orchid.
If the cane is dead, obviously, it cannot store energy, water, and nutrients. It just cannot rebloom anymore. Having pendant Dendrobium is problematic as you can always tangle yourself in them or bump them over. Maybe if the cat wants to play with the canes, it will damage the orchid.
Therefore, it is actually advisable to cut them off using a pair of pruners or scissors. If you work with them on other plants or other orchids, it’s a good idea to sterilize them in between plants.
If the cane is not dead all the way just yet, you may just cut it to the point where it died off. You have to snip it off, and that’s it. You will see there’s nothing green on the cane, and you may find it’s yellow-brown. When you spot on, this cane is obviously dead. In time, this section will die off if you didn’t cut it off.
Therefore, you should cut it when it’s completely dry, and that is when it’s advisable to cut the cane no matter what type of Dendrobium you have.
What To Do If Dendrobium Orchids Dying?
When dendrobium orchids show signs of distress, it’s devastating. Thankfully, you can take some action to save them.
The first thing you should do is examine the surrounding area where your plant is situated. In contrast to other plants, dendrobiums should not be placed in direct sunlight but rather in strong indirect light. If their leaves are drooping or curling, spraying them every day may help restore their health. In addition, water thoroughly, but only when the soil feels dry; root rot is a typical problem with these plants, and over-watering can lead to it.
If that doesn’t work, try repotting the plant into new potting soil and feeding it a slow-release fertilizer once a month over the spring and summer. Place a fan nearby to increase airflow around the plant if at all possible (not directly blowing on it).
If the leaves are mushy or blackened, you need to cut them off and throw them away. Whenever you have leaves that look wet and soaked, they have probably been having a bacterial infection or bacterial rot. This type of infection can affect leaves and can be very problematic because the leaves form the core of the orchid. Fortunately, Dendrobium Orchids have canes to store nutrients, so they boost new growth.
Even though not all the pseudobulbs look good and some of them probably will have to be removed. It would help if you got rid of the leaves, which don’t look good. Then you might be able to salvage the plant. You need to cut the affected portions but keep healthy tissue remains so that the leaf will photosynthesize and feed the canes.
How Do You Keep Dendrobium Orchids Alive?
Since dendrobium orchids originate from tropical regions, they are light-hungry plants. But some species require less sunlight, like the Phalaenopsis variety. They can thrive in a low-light environment, which is why it is best for indoor use.
For best results, place your orchids near the window to catch sunlight during the morning and/or evening. Do not place the orchid in the full noon sun because the midday sun can be too hot and harmful to the plant. Too much heat will burn the leaves and wilt the flowers.
An excellent location to place your orchid is the eastern side of your home. In the absence of sunlight, especially during winter, you can use artificial light such as a fluorescent lamp.
This video shows a good way of watering the Dendrobium orchids.
How Do I Get Dendrobium Orchid To Rebloom
It’s not easy to coax a dendrobium orchid into blooming again, but it can be done with a bit of patience and the right technique. Like an orchestra conductor, you need to take the lead in providing your plant with just the perfect conditions for reblooming. To successfully encourage your dendrobiums back into bloom, you’ll want to follow these steps:
- Provide optimal light – For best results, give them bright filtered sunlight during their growing season (April-August).
- Give adequate water – During its active growth period, keep soil evenly moist by watering at least once per week.
- Feed properly – Feed monthly using balanced fertilizer as directed on packaging throughout the flowering season.
- Maintain temperatures** – Dendrobiums prefer cooler nighttime temps between 55°F-60°F and daytime temps around 75°F-85°F.
As an experienced gardener, I understand that each individual species has different preferences when it comes to temperature and other environmental factors; however, following these general guidelines should help ensure that your beloved orchids stay healthy and vibrant even if they don’t always show off those beautiful flowers.
What Type Of Mix Should I Use When I Repot My Dendrobium?
Repotting your dendrobium orchid is an important part of its care. It’s important to use the right type of mix when you repot as it will ensure that your plant stays healthy and blooms year after year.
When selecting a potting mix, make sure it’s one specifically designed for epiphytic plants like orchids. The soil should be well-draining but also have enough organic material to retain some moisture. Look for mixes that contain perlite, bark, peat moss, coconut coir, pine needles, or sphagnum moss. Avoid any soil with added fertilizers as this can cause root burn or nutrient imbalances in your plant.
Finally, remember to water your dendrobium thoroughly whenever you repot it so that all of the roots get soaked and no air pockets remain in the potting mix. Then sit back and enjoy watching your beautiful flowering Dendrobium thrive! With proper care and attention, you can look forward to many years of stunning blooms from this elegant tropical flower.
How Do I Get Dendrobium Orchid to Rebloom
I have tried to rebloom some of the more difficult plants indoors and haven’t had much luck having them rebloom. However, I did luck by having Phalaenopsis rebloom, which I found the easiest one. I didn’t give up throughout the process, and I am surprised when it started reblooming after a year.
How do I get to that point? Well, I gave it a bright light next to a narrow garden with some nice LED lighting. Also, I have fertilized it but only a couple of times. I do know that you want to fertilize them when they don’t have flowers, so I did use a liquid fertilizer, and I did it about three or four months after it blooms once and then once again a couple of months.
I do place the Dendrobium Orchid on a humidity tray with some rocks and pebbles. You can use marbles also if you want to. Then you can put water just below the rocks. When the water begins to evaporate, it will humidify the plant. The water should always stay below the rocks because you don’t want the bottom of the plant sitting in water.
You can use the orchid bark to hold the plant. The reason we use orchid bark is that orchids are naturally grown in the jungle hanging from trees. They are terrestrial plants, so they don’t grow in the soil. So the orchid bark is only being used to hoard that to hold the plant upright. By doing so, it doesn’t fall or droop.
By holding the plant upright, the orchid bark has a lot of air space in it, so you’re basically replicating what would be happening in the jungle.
Over time, the orchid bark will break down and becomes more like heavy soil. At that point, you really need to repot the orchid so in new orchid bark that has not broken down.
Another thing you need to keep in mind is to leave your Dendrobium alone after the bloom cycle. When they are blooming, don’t overwater them. What I did was watered it when the bark was just about dry. Not all the way dry, but very close to being dry. I used warm water on Dendrobium and let the water run through.