What are some of the impediments to having a great-looking backyard?
-
You do not have a green thumb, which means you do not want to spend time every day weeding and fertilizing
-
You do not like mowing a lawn
-
You want to conserve water, and most lawn-based yards seem wasteful to you
Maybe you can relate to all these things, but you can also relate to wanting a great-looking backyard. So what do you do?
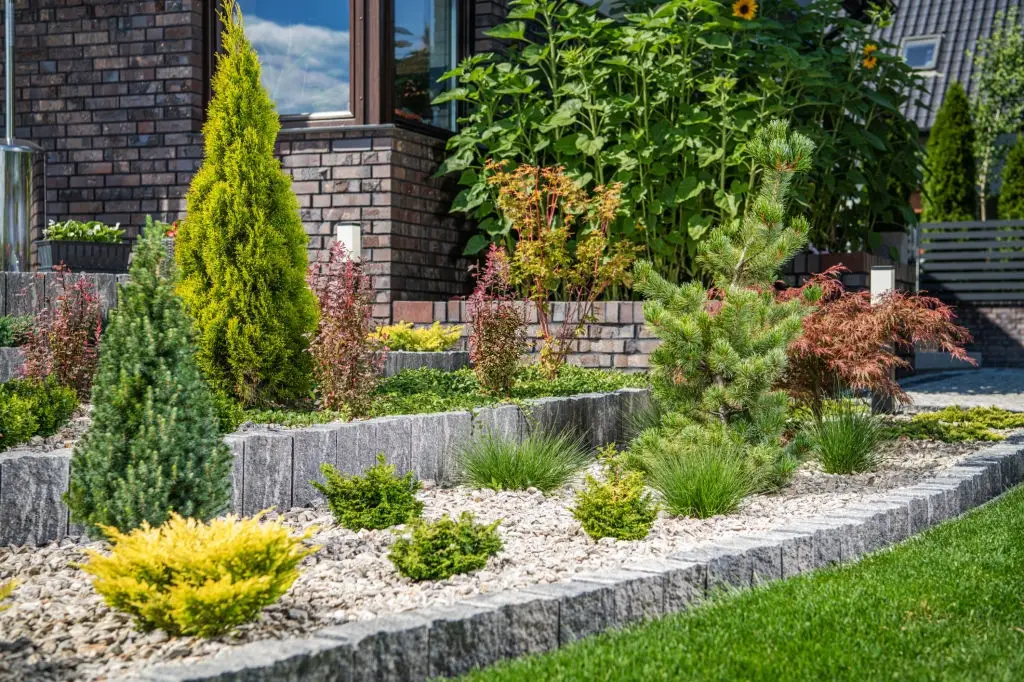
Rock gardens are a great alternative to the traditional American backyard with acres of mown lawn and flower beds. With rock gardens, you have the chance to create something that:
-
Requires minimal effort for upkeep
-
Cuts down on lawn mowing
-
Decreases your water usage making you more eco-friendly
With these advantages, you can keep your green-less thumb and still have a great-looking backyard. Keep reading to find out how to make an amazing rock garden.
How Do You Make Rock Gardens?
Like all things worth having, making an amazing rock garden takes a fair amount of effort upfront to create something that you do not have to spend a lot of time maintaining.
This means you have to have a few things lined up to make a rock garden. You will need to have:
-
Labor and equipment
-
A plan
-
Organized steps that you have to complete one after the other
So before you get down to the steps involved in creating a rock garden, it is important to get a bird’s eye view of how to make a rock garden.
Labor and Equipment
Inherent in the name Rock Garden is the fact that there are rocks. This article will discuss more rocks later, but for now, rocks mean one thing: they are heavy. Do not try to move heavy rocks around by yourself. You will need the appropriate help (namely, strong friends and family) and the appropriate tools.
To make a rock garden, you need strong backs willing to help you move or roll rocks around your yard into their appropriate places. This sounds simple, but it is no easy task, so keep these tips in mind when you are lifting rocks:
-
Keep your back straight and stable
-
Lift with your legs, not your back
-
If there is even a remote possibility that the rock is too heavy, have someone help you.
The best way to make a rock garden is the way that keeps you from damaging your back.
Sometimes rocks are too heavy, even for a couple of people. This means that if you want to make a rock garden, you have to have the right equipment. If you have planned and organized well, you should rent a tractor or small loader on the day you need it. But you will need other equipment, such as:
-
Wheelbarrow
-
Shovels
-
Rakes
-
Trowels
-
Measuring tape
A Plan
The most important thing to get right when learning to make a rock garden is a plan. Making a rock garden requires heavy lifting and several steps, so get it right the first time if you want your rock garden to be amazing. You will not want to move it once it is done. To to do this, you need to:
-
Know exactly where you want your garden to go
-
Know the steps of how you will make the rock garden
-
Draw inspiration from other rock gardens
-
Draw a detailed design with measurements that will incorporate all the elements of how you want your rock garden to look
-
Choose what kind of rocks you want to use
The best way to develop a plan is first to decide where you want your rock garden to go. You can strip bare a whole section of your yard if you are ambitious and go for a grand rock garden conception. But if this is the first time you have done this kind of thing, you might want to start small.
Deciding Where the Rock Garden Should Go
Look at your backyard and think in terms of how much space you actually have. It is one thing to want to be grand in scope, but it is actually to achieve that. If you have decided to go big, find a section of your yard where the rock garden will dominate it. If it is going to be big, it should be centrally located.
However, if you want to start small, then look at your yard in terms of corners. Where are the areas that are out of the way? Where could you create a small feature that will draw people towards it without dominating the yard? A corner where two fences meet may be an ideal location to start planning.
Know the Steps of How You Will Make Your Rock Garden
Later on, this article will go into detail about how to make a rock garden. Once you have those steps in mind, return to this process so that when you look at the area you want to use to create your rock garden, you will have a sense of what you need to do to accomplish that.
You do not want to have a concept for a garden and then find out that the space you have chosen requires more work than you had first thought. Once you have the steps in mind, you will be able to look at different spaces and say to yourself: But wait, if I do it here, I will have to clear the area, whereas over there, that job has already been done.
Be Inspired
Once you have a spot, you want to work with and the steps in mind that you need to do to accomplish the work, you need to figure out what you actually want to do with the space you have.
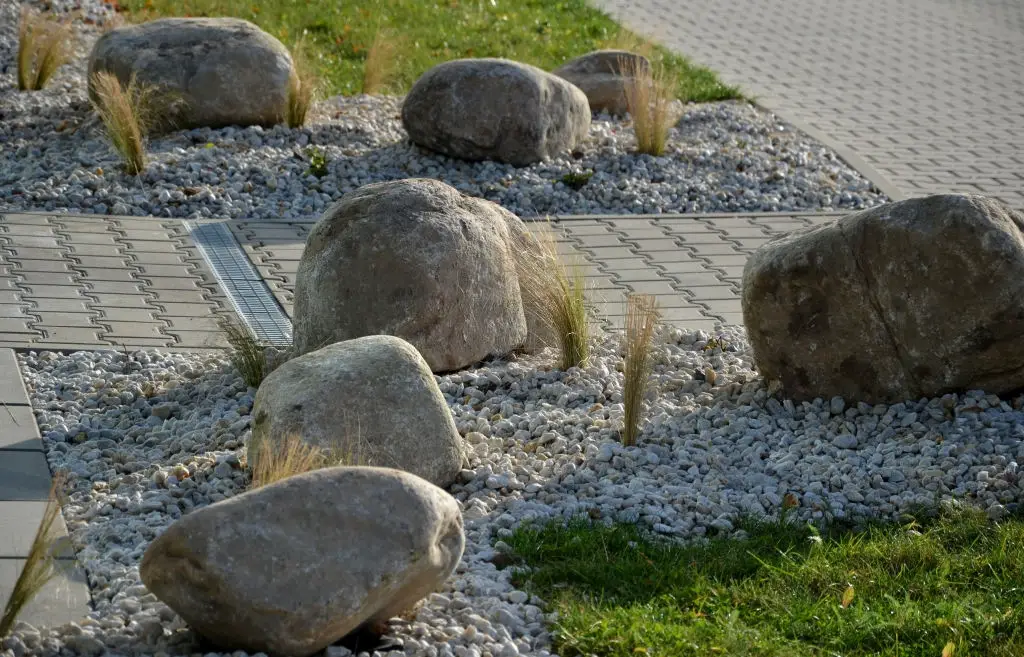
The best way to develop workable ideas for your rock garden is to look at other rock gardens for inspiration. There is no copyright here and no wrong way to apply an idea. In general, though, you find rock gardens looking something like the following:
-
A Japanese or Zen rock garden is supposed to resemble a natural setting to calm an individual, maybe even with the goal of meditation
-
A rock garden surrounding a water feature such as a pond, a small waterfall, or a small stream (you can incorporate water features into almost any kind of rock garden)
-
A rock garden where rocks of a certain hue surround plants that bring both reflective and contrastive hues to the garden
-
A rock garden where a large stone or small group of large stones form a stoic or primal centerpiece
As you look through the different gardens for ideas, keep in mind the materials you will need and the availability of labor you have at hand, not to mention equipment and space. The ideas will always look great, but you need to be sure that they are achievable.
Draw a Detailed Design
Once you have an idea of how you want your rock garden to look, draw the design out on paper with measurements relating to the space you want to put it in. This will take some time, and the keyword with this process is patience.
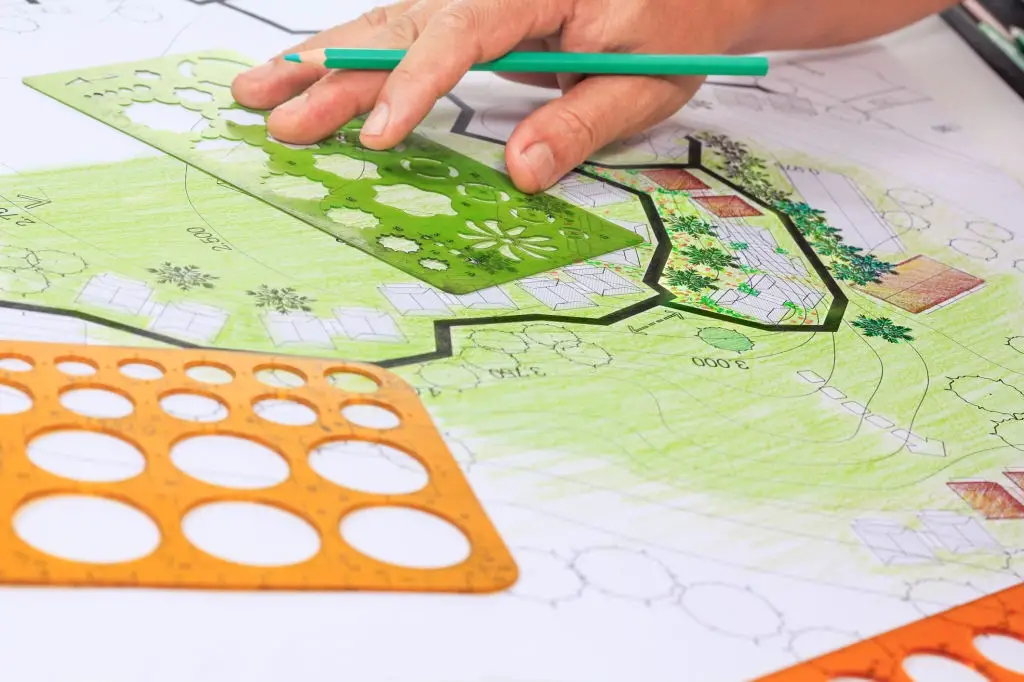
Not everyone is an artist, so not everyone’s design is going to look beautiful. That is ok. But it should communicate with measurements what you want to go where. So get comfy with a sketch pad and start going through design drafts. Do not fret! You will eventually get something that is workable.
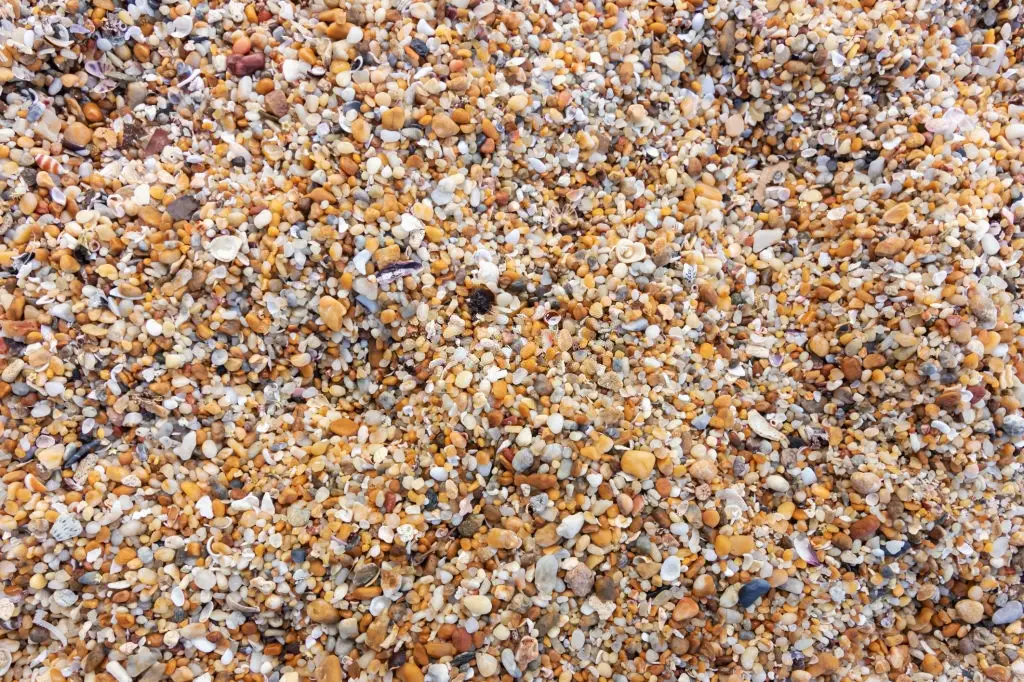
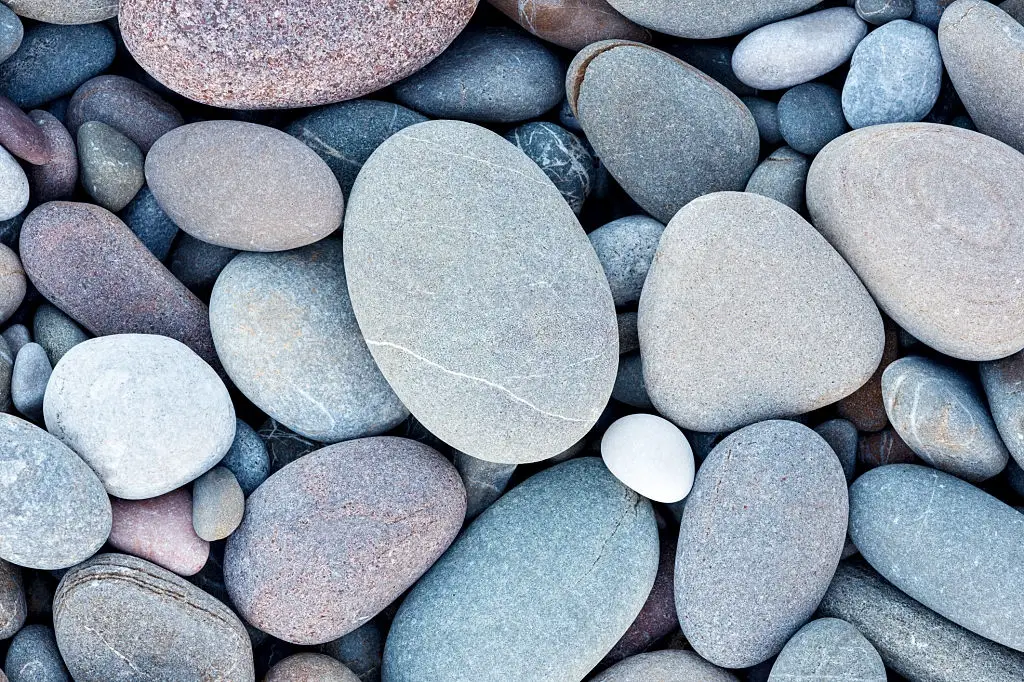
Choose What Kind of Rocks You Want to Use
There are a lot of different kinds of rocks:
-
Lava
-
Granite
-
Sandstone
-
Limestone
-
Crushed gravel
You may want to pick rocks that resemble what has inspired you in a picture, or you may want to with a kind of rock that resembles the ones that find where you live.
You can get rocks and gravel at a lawn and yard store. Sometimes you can dig them up in your yard or find them from your neighbor’s yard (assuming you have permission). But never assume that you can just remove rocks from a natural area. Check with governing authorities first.
Clear The Area You Want to Work With
Some rock gardens are constructed in the middle of a lawn. If this is what you want to do, you will need to clear away the section of lawn that will be under the rock garden.
Do not assume that if you pile a bunch of dirt on it, it will stop growing. You do not want to put all this work into a rock garden to one day find grass growing up through it.
There are a couple of ways of clearing away the lawn that you can consider:
-
Dig up your lawn in the area where you want your rock feature to go
-
Cover your lawn with some form of weed suppressant
-
Use an herbicide
Read on to see what is involved in these options.
Dig Up Your Lawn
Digging up the lawn may be more work, but it might be worth it, considering that the first thing you will need to do when you begin constructing your rock garden is to build a foundation. Having a little depth in the yard will be helpful.
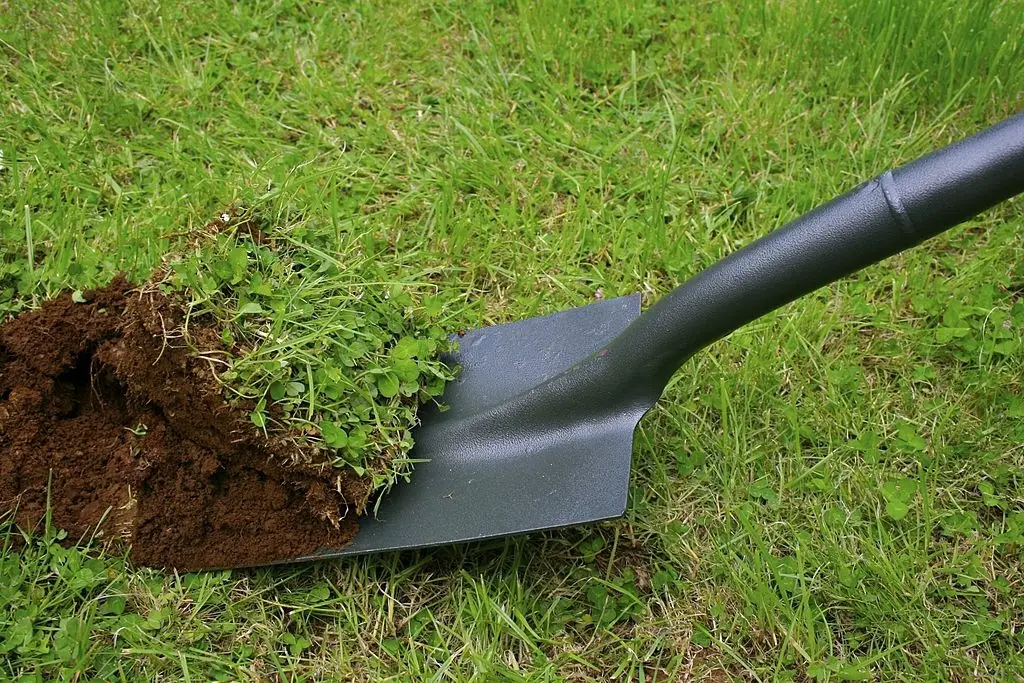
The biggest thing to consider about digging up your lawn is how you are going to do it. The amount of room you will need for your rock garden will be a big determining factor. If you plan on working with a small area, you could simply get your shovel and go to work. It is hard work, but going for a larger piece of equipment may be overkill.
However, if you have decided to work with a large section of your yard, you will want to work with a larger piece of equipment like
-
A rototiller
If you cut the sod out, you have the option of using it somewhere else or composting it. On the other hand, if you use a tiller, you will probably want to lay down a weed-suppressing cloth once you are done since a tiller may dig deeper than a shovel and expose weed seeds.
Cover Your Lawn with a Weed Suppressant Cloth
This brings up the next option to kill your lawn by depriving it of oxygen, sunlight, and water. You can achieve this by laying down a weed suppressant cloth of some kind.
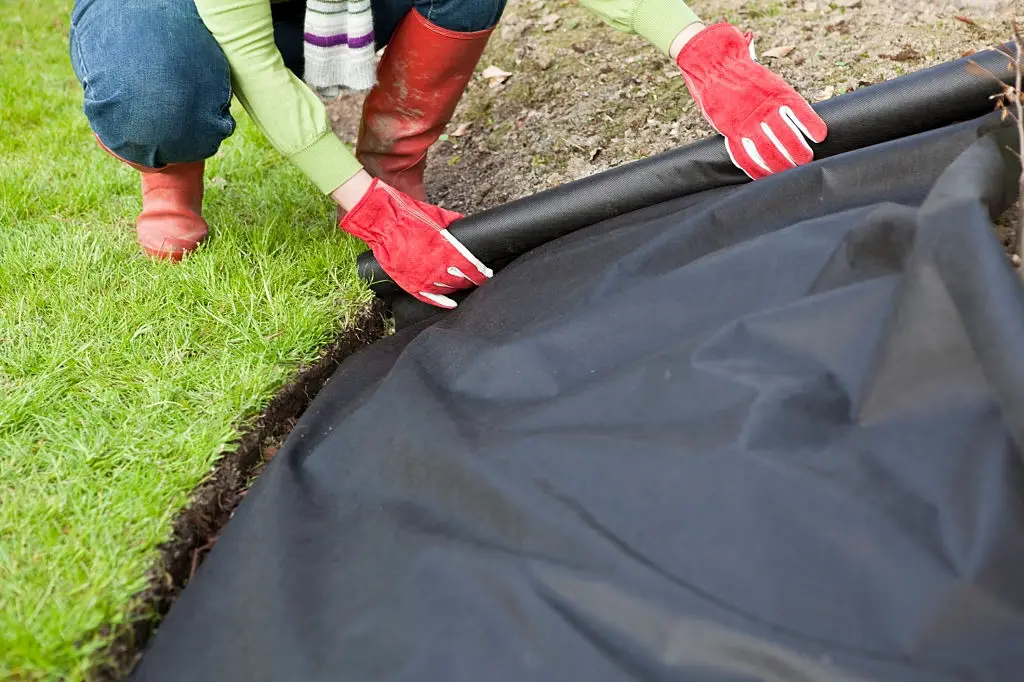
There are a lot of them out there, so when it comes time to purchase a weed barrier for this purpose, consider these features:
-
Weed barriers that are either of a solid polyethylene construction or a very tight weave if they are woven
-
Weed barriers that are known to be durable and tear-resistant in case of rocks poke through
-
Weed barriers that come in shorter lengths (not all do) so you do not end up with a lot leftover if you are working with a small area
If you want to go really cheap and are concerned about biodegradability, you can always go with good old-fashioned newspapers. Lay them down over the area you want to work with and cover them with dirt. That should be enough coverage to kill your lawn, and the newspapers will biodegrade.
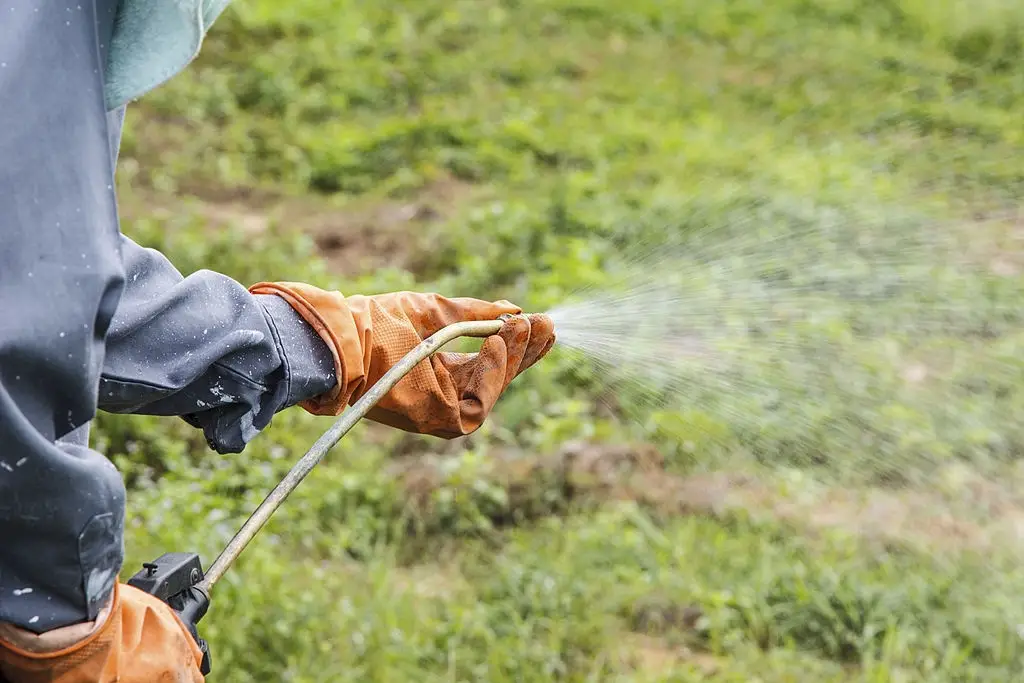
Spray an Herbicide
Finally, if you want to get the job done quickly, you can always take the chemical approach of spraying a mild herbicide on the lawn you intend to replace with a rock garden. Given different opinions about herbicides, this option is not for everyone.
One final thought about clearing the area you are going to work with. This is where having a plan before you start working is very important. You do not want to kill off more lawns than you intend to use. Neither would it be good to kill off too little lawn and find yourself readjusting when the area does not like right.
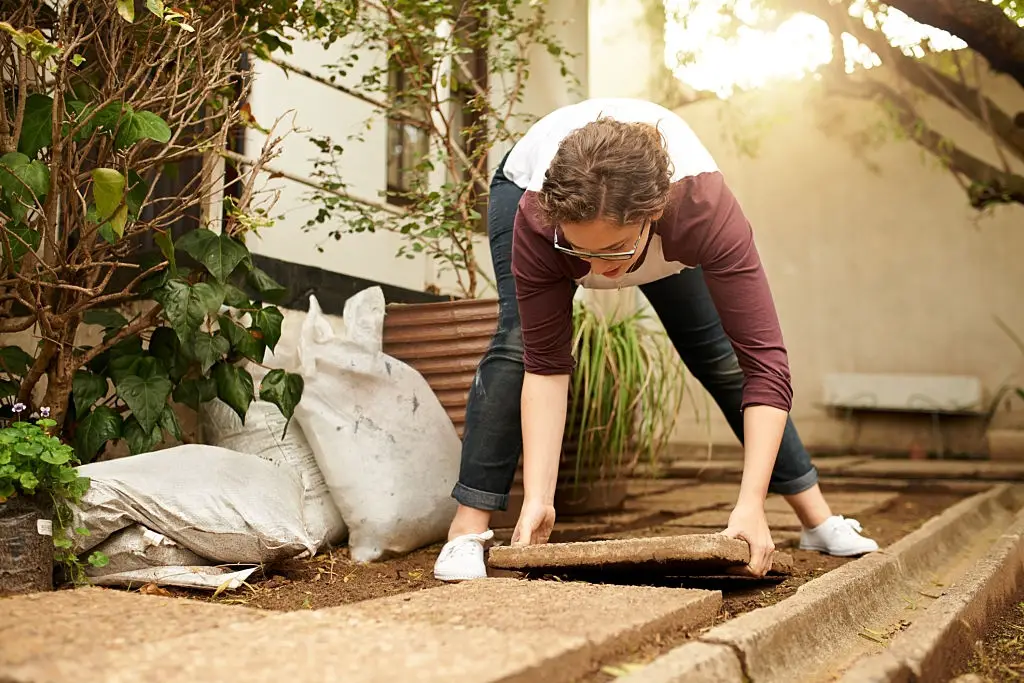
Build the Foundation
If there is a governing philosophy to building a rock garden, it is in creating stable layers. Those layers always start with a foundation. The more stable, solid, and secure your foundation is, the more stable, solid, and secure your rock garden will be. If there is a single most important step, it is building the foundation.
Follow these steps:
-
Dig about a foot down in the area that you want the garden to be in
-
Fill the dugout area with coarse gravel or rubble from broken stones or bricks
-
Use the rubble as the layer that will support the heavier stones.
The rubble and coarse gravel that will layer the area you have dug out are important for drainage. Once you have that foundation level and solid, you can start to add the first layer of your rock garden.
Build the First Layer
Depending on what you want to do with your rock garden, the first layer may look a little different or unique. That is the point. It is your garden, so make it your own. But structurally, you need to consider some things.
-
Create a structure that holds whatever your rock garden becomes
-
Make the structure as artistically as possible so that it looks like the rocks are a part of the natural environment like they are supposed to be there
Once you have these two things in place, you will be set to create the rest of your rock garden.
Creating the Structure for the First Layer
Once you have the foundation, you will need to arrange larger stones in a way that supports or contains whatever it is you want your rock garden to be. At this point, people tend to go one of two ways. They either make their garden an area:
-
To plant flowers or other plants that resonant colorfully with the rocks you have chosen, or
-
To be a support for more rock features
Either way, you will need those larger stones to enclose the area you are working with to support what you put in it. Be sure that the stones are heavy and arrange them close together to contain what you put inside them.
Making the Structure of the First Layer Artistic
As you are arranging the stones, keep a couple of things in mind. Since rock gardens are meant to connect people with a sense of being in a natural spot, you will want to arrange the rock to look like a part of the earth and emerging from it. If they are partially covered, that is ok. If they are a tad uneven, that is ok.
One thing that will help you achieve this and give your garden the drainage it needs is arranging the stones to tilt back a little into the foundation. When you achieve this, you will create adequate drainage for the feature and the right artist effect.
Fill in the First Layer
Once you have the structure of the first layer ready, you need to fill it in with the appropriate material. As another plug for the design stage, you need to have decided what you want to use your rock feature for before you get to this stage.
Knowing what you want to do will determine what you fill it with. If you decide to plant some flowers or plants to go with your rock feature, you will fill it with soil. If you want it to be primarily a rock feature, you will want to fill it in with some kind of rock material. Read on to see some details about the different approaches.
A Rock Garden With Plants
If you want to have plants in your rock garden, you will need to fill it with soil, but not just any soil will do. You will not want to fill your rock garden with soil with a lot of clay.
You will want soil that has peat moss or leaf mold, topsoil, and fine pebbles or gravel in equal measure so that it drains well and supports the plants you are putting in the rock garden.
If you do not know whether or not your soil has clay, there is a simple way to find out. Clay sticks together because of its ability to compact densely. Take a clump of your soil, rub it together, and then squeeze it out between your thumb and forefinger. If the soil stays together as it gets further away from your hand, you have clay soil.
All is not lost. You can either buy the appropriate soil for your rock garden at your local yard and garden store.
A Rock Garden with Rock Features
If you want your rock garden to have rock features and not plants, various ways can fill it. You can use:
-
Fine gravel
-
Pebbles
-
Sand
Any one of these things will make a good layer for what you want to add next. What you add really depends on what you want to do with the garden.
Fine Gravel

This is great to use if you intend to use your rock garden for a sitting area. You can add a dark metal chair or bench to this area.
If you want to keep a more natural look, you can use stone slabs to create a bench or buy a stone bench with a statuary feel. You can also use stone slabs to create a chair. It all depends on how creative you want to be.
Pebbles
Some people like to have a rock garden for a statue feature such as:
-
A stone bird feeder
-
A classical looking statue
-
Tall or impressive looking boulders
-
A Buddha
Pebbles make a nice contrast to the solid color hue because pebbles have all different shades and colors that bring a vibrant context to the statue.
Sand

Sand is often used in a more traditional Japanese or Zen garden. Sand has a neutral and even calming feel when used as a contrastive fill to dark rock features such as:
-
Stone planters
-
Decorative boulders
-
Statues
Once the features are set on the sand layer, you can use a rake to smooth out the sand in even furrows around the different features. This brings a concentric centering focus on the different features in your rock garden.
Other Ways to Fill in the First Layer
The ways mentioned above relate mostly to solid fills for the first layer. This is often done as a base for a second layer. This article will discuss that later. But for now, it is important to consider other ways that you might create the first layer.
Mix Rock and Soil
One way to fill the first layer of your rock garden is to use a combination of rock and soil. You can place large rocks haphazardly or according to a design and allow enough room between them for soil to fill in the cracks.
Once that is done, you have the ability to intersperse plants between the rocks giving your garden an appealing mix of stone and plant colors that resonate with the hues of the stones you have chosen.
Create Divisions in Your Rock Garden
One of the great things about rock gardens is that they allow unique expression color and creating natural settings. You may be limited by the size of the area you are working with, but your imagination does not limit you. To that end, you can create different areas in your rock garden.
If you want a mix of plant life and rock features with a mix of layers, you can do that. Simply use the larger rocks to create sections within the rock garden. Then in each section, you can decide what you want to do with it and how you want it to look.
You can do a solid fill of sand in one area and soil for plants in another. You can even divide the two sections with a path that leads to a bench. Do not let your imagination be cramped by space. There is a lot of variation you can bring to your rock garden.
Adding More Layers
Once you have completed your first layer, you have the option of adding more layers to your rock garden. Suppose you plan for space for another layer that gives you more options of features to add. It also gives you a rock garden with added dimension.
Your imagination can think upward, not just outward. For example, you could:
-
Create two raised areas for rock features with a gravel path that goes between them
-
Create two raised areas for plant features with a path
-
Create a raised area for a water feature such as a waterfall, pond, or a short stream that goes down into a small pool below it.
How to Add a Second Layer
Once you have created the first layer, you have really done the template for adding a second layer. You just repeat the steps:
-
Start with a solid foundation of coarse gravel-like material
-
Add rocks around it to achieve the kind of feature you want to create
-
If you add a water feature, remember that you will need a pump to recycle the water, so your raised second layer will be ideal for disguising the pump.
-
If you add a plant or rock feature, remember to fill the second layer with the appropriate material.